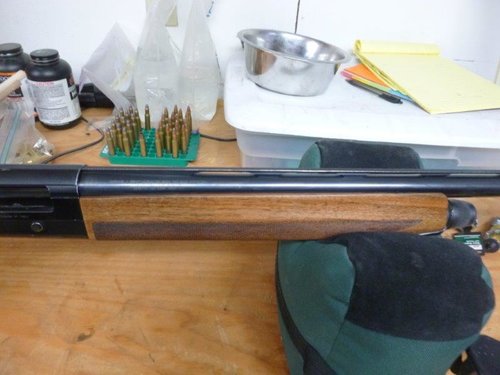
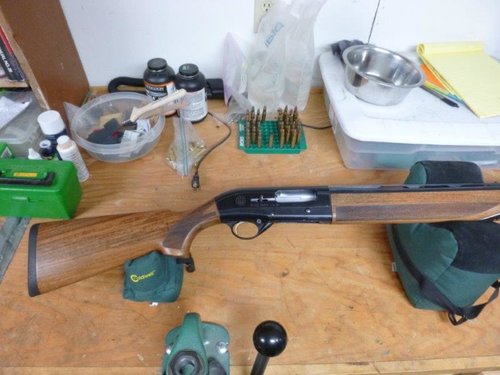
The life of a chukar gun

  • Thread starter Deleted member 20812
  • Start date
D

Deleted member 20812

Guest
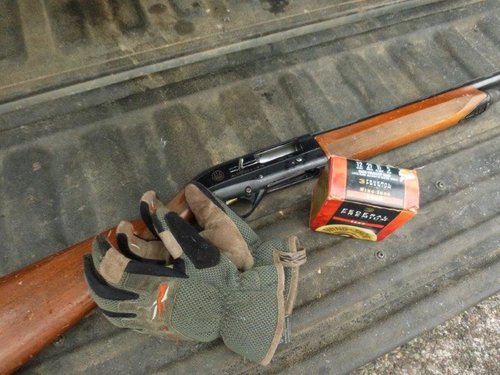
Is not an easy one. My Beretta AL 391 has seen some tough love for sure, from the duck marshes to the basalt cliffs of Hell's Canyon.

I took a few hard tumbles this year and decided that it was time to shed the ugly factory varnish.
012.JPG

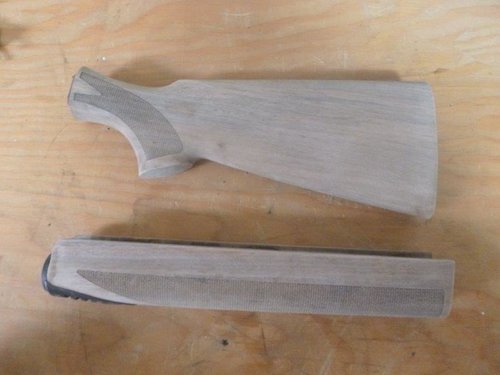
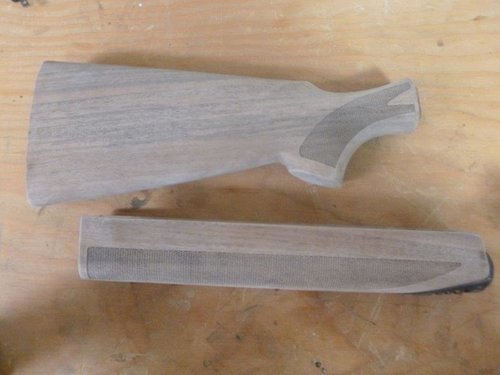
A few coats of Citristrip and we were down to this.
001.JPG

002.JPG

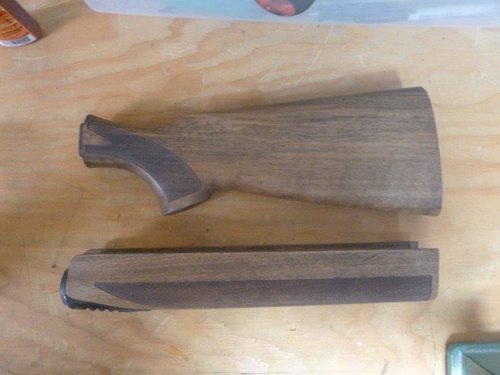
A couple of coats of oil and the checkering has been recut.
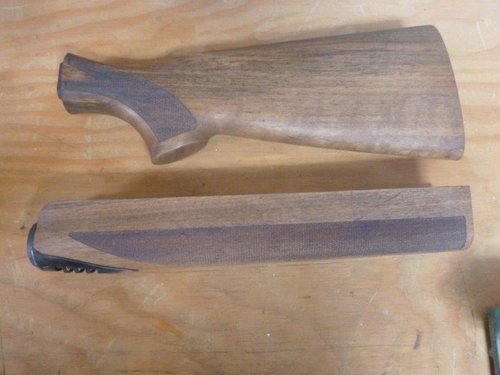
003.JPG

004.JPG

After a few more sandings.

006.JPG

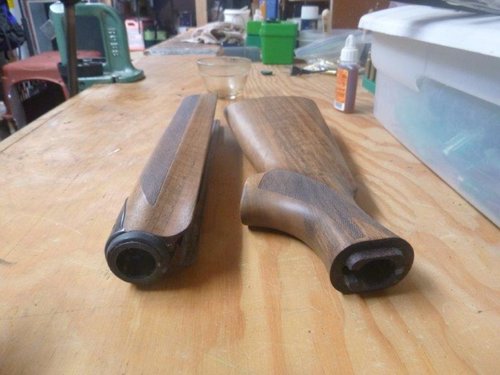
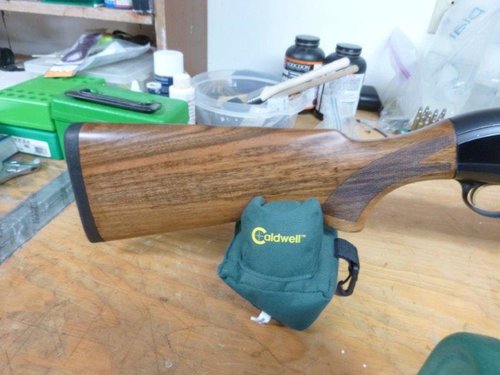
The final product.

010.JPG

011.JPG

013.JPG
 
Last edited by a moderator:
Good looking gun. Your stock looks like new.
I have a Remington 1100 that I bought in 1980 and it wears all the bumps and scratches proudly. It still has a piece of rock imbedded in the stock from an Arizona Strip quail hunt where I took a pretty good tumble.
 
I bet you've told us but I'm too lazy to search your checkering methodology.That sounds like something I could make look like bad graffiti.

...nice job.
 
Factory stock finishes these days are awful. Nice job bringing the life back to it.

What was your process?
 
Very nice! I'd love to buy a nice, light 20ga like that and put that much 'character' on it hunting birds. Well done!
 
I bet you've told us but I'm too lazy to search your checkering methodology.That sounds like something I could make look like bad graffiti.

...nice job.

Ken,

I use a single point checkering tool from Brownell's. The main requirements are:

1). Good light
2) Reading glasses
3) Lots of patience
4) A cold beer helps

I just run all of the lines with the tool. The trick is learning the right amount of pressure. Not enough and you don't really cut out the existing checkering. Too much and the tool gets away from you and gouges things.

It really isn't hard. If you can stay within the lines coloring, you can do this.

Thanks...

I'm out.;)
 
Nice job, guns are supposed to look 'used"

The nice thing about oil finish is that it doesn't take away the character dings. I don't sand out any gouges or dents. You can still see the scratches and dents as they are darker than the wood. Years of reapplying oil over the new character marks that show up will only add to the "used" look of the gun.

Factory stock finishes these days are awful. Nice job bringing the life back to it.

What was your process?

Ben,

Strip down to bare wood (I don't sand at all, just use additional coats of stripper).

Add a liberal coat of oil, reapplying as it soaks in. This is where you really saturate the wood. Let sit 30 minutes and wipe off excess. Dry for two days.

Wet sand with 320 grit and oil. Let slurry sit on wood for 20 minutes, then wipe down with paper towel. Dry for two days.

Cut checkering.

Wet sand with 320 grit and oil, let slurry sit on wood for 20 minutes, then wipe down with paper towel. Dry for two days. Repeat two more times.

Do above step with 400 grit and oil and repeat 3-4 times.

Do above step with 600 grit and oil.

Dry for 3-4 days.

Rub a coat of oil on (not much oil, just wet your fingertips), rub hard enough to generate heat. Let sit for 20 minutes and lightly wipe down with paper towel. Dry for two days. Repeat 3-10 times.

Polish out with 0000 steel wool and/or rottenstone to achieve the desired gloss.

Any unexposed surfaces get coated with varnish prior to reassembly.

I used the John Kay Winchester oil on this gun. I was a little surprised how light it ended up being. It never really reddened up like the Model 70 did.
 
Thanks. I'll have to try the Winchester oil. I've been reading up on other methods as well to get a redder finish. The Boiled Linseed Oil & Tru-oil finish isn't doing much for me these days.

What tool did you get for the checkering?

Nice work!
 
Brownell's s-1 cutting tool. The brand is Dem-Bart. While more time consuming, I like this process much more than True Oil.

As to the redness, I think I was limited more by the wood than anything. There's only so much you can do to mediocre wood. There's a reason you could buy these for 8 bills when I purchased it., and the cost savings was obviously in the quality of wood. Just for fun, I looked up some replacement stocks. While the wood grain was phenomenal, I would have paid more for the stock than I did the gun.
 
Last edited by a moderator:
Brownell's s-1 cutting tool. The brand is Dem-Bart. While more time consuming, I like this process much more than True Oil.

As to the redness, I think I was limited more by the wood than anything. There's only so much you can do to mediocre wood. There's a reason you could buy these for 8 bills when I purchased it., and the cost savings was obviously in the quality of wood. Just for fun, I looked up some replacement stocks. While the wood grain was phenomenal, I would have paid more for the stock than I did the gun.

Awesome. I'll put the cutting tool on my birthday list.

The brits used to use Alkanet to get a redder finish. Might be worth playing with.

A lot of modern stocks are using lesser quality wood. Which is unfortunate. Still, yours turned out nice, if a little blonde. The grain shows up well and the overall finish is excellent. Nice work.
 
Ive redone about 6 wingmasters (the old 870 AP with corncob fore end). I used the Miles Gilbert refinishing kit from midwayusa.

All I can say is finish work is long and drawn out. Patience is definitely tested.

Great job.
 
That looks better than factory. I have a 70's Model 1100 that has at least 500 chukar days on it before I retired it and went to a lighter gun. I might give that a try next winter.
 
Since I hunt in the wet fairly often I use a version of JLS's technique but seal and finish with a 50/50 mix of spar varnish and mineral spirits beginning with at least 3 coats on both the exterior as well as interior surfaces of the wood. When wet sanding I use a pad of hard felt about 3/8" thick under the sandpaper, sand with the grain then lightly wipe the slurry cross grain with a paper towel to fill the pores. Using the same mix I then do 6-7 coats with a fingertip dipped in the mix making sure to allow at least a day to dry. The mineral spirits accelerate penetration and drying time but 2 days drying time between coats won't hurt a thing.

Here's a link to the alkanet root oil if you want to red it up. https://www.google.com/url?sa=t&rct...181309&usg=AFQjCNFd9fcff2SUI9uxmik6aiRy_j34Zg
 
MTNTOUGH - Use promo code RANDY for 30 days free

Forum statistics

Threads
110,805
Messages
1,935,124
Members
34,884
Latest member
Irish-Jay
Back
Top