Ollin Magnetic Digiscoping System

Midwest tower stand build

Stay Sharp

Well-known member
Joined
Dec 12, 2019
Messages
605
Location
Wisconsin
As my Dad gets older (84 years young now), comfort has been more of an issues to extend time on stand due to his declining health (mostly cardiac issues and several surgeries). I have several locations in funnels on farm land that would work well with an enclosed, insulated tower type blind for him.

My father is not a bowhunter but he enjoys crossbowing and firearms hunting so I set about designing a stand for him.

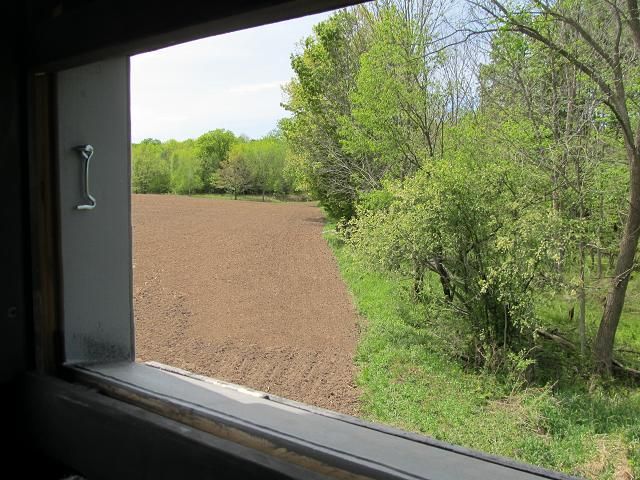
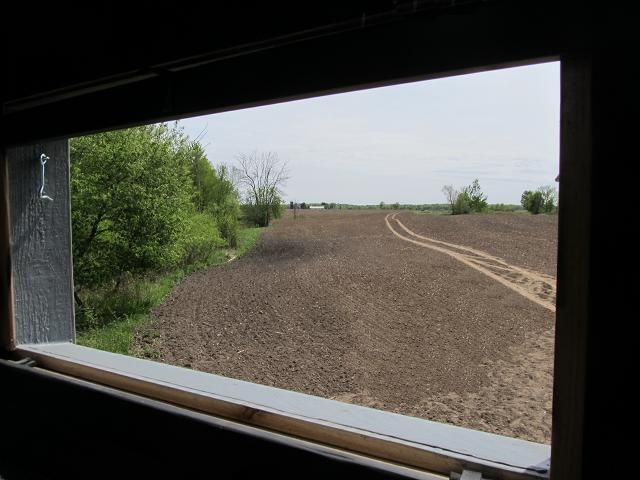
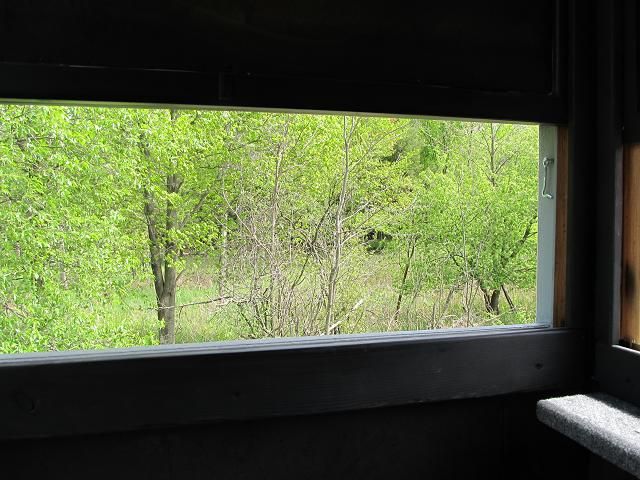
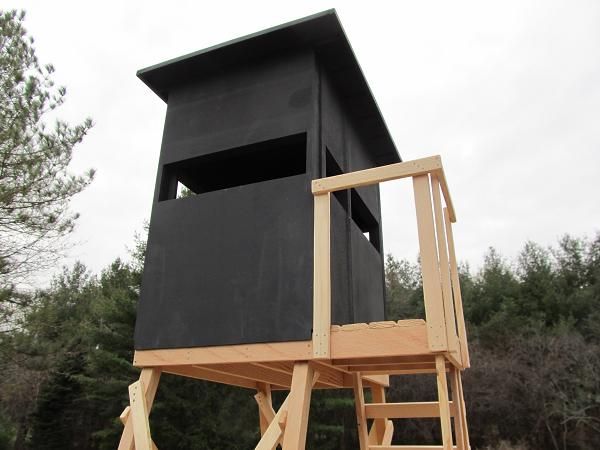
My objectives were to have a stand that can be enclosed for really foul weather during WI winters, that could seat 2 people comfortably, elevated at least 10 feet to the platform meaning a seated person’s eye level would be about 14 feet off the ground, has horizontal windows for gun hunting and crossbowing.

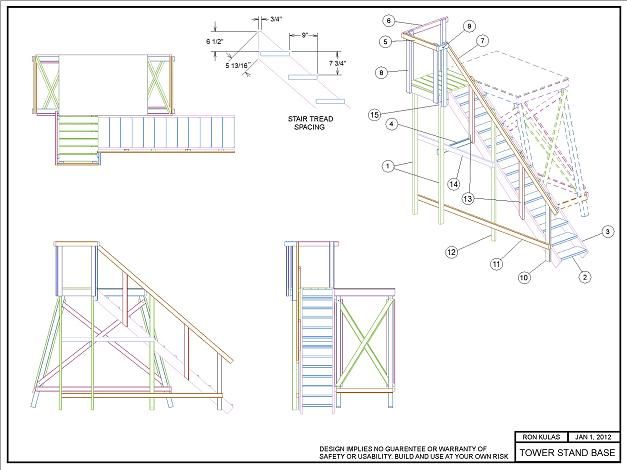
I then used a CAD design software to model the stand. Here is one of the early versions. It did not yet have the roof or door designed but I have since worked out those details.

stand11.jpg


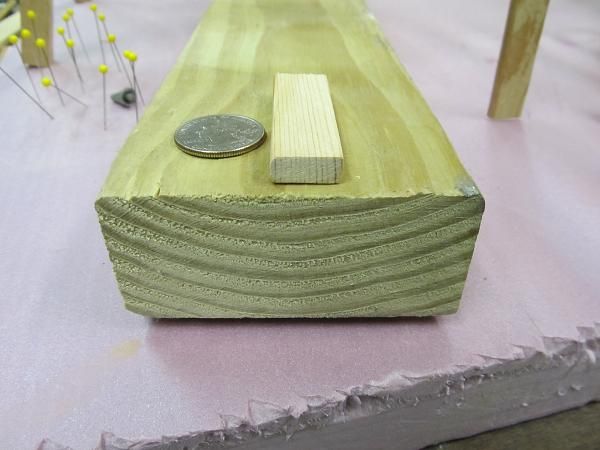
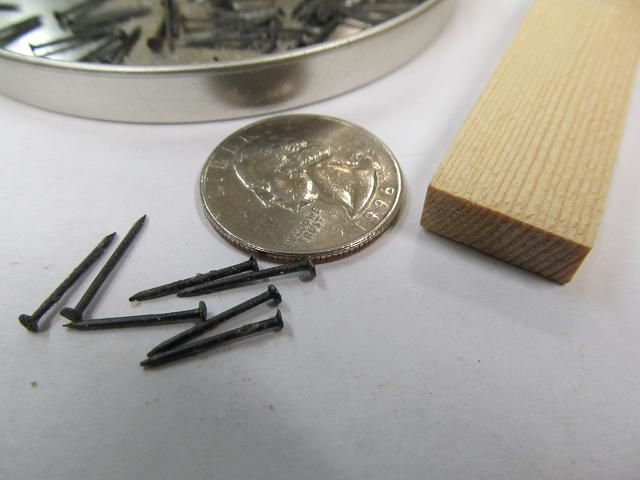
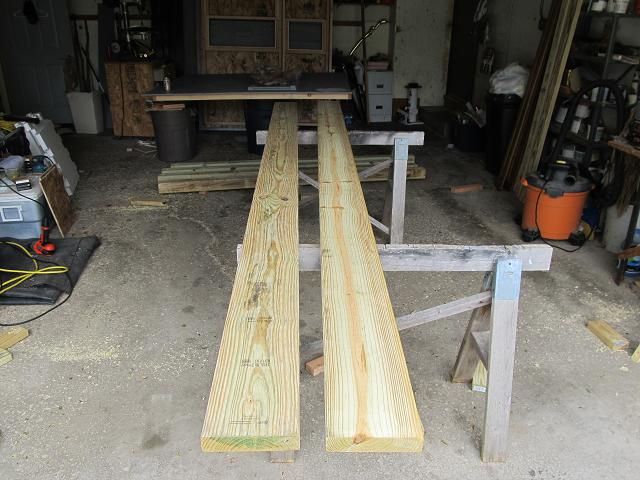
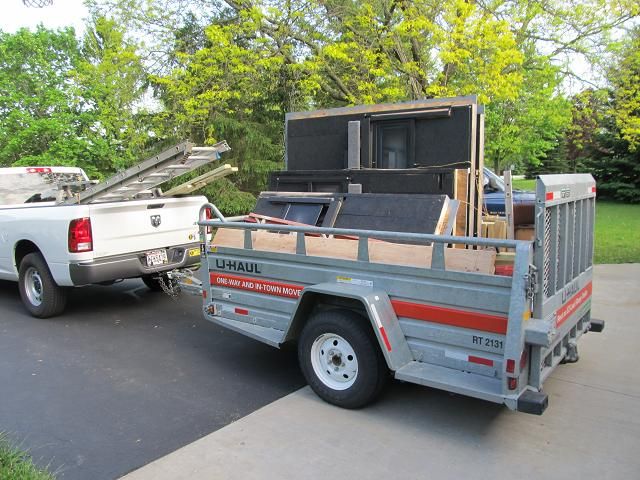
The stand will be built from treated lumber but I wanted to build a prototype out of untreated pine to work out the bugs and make improvements. Here is enough lumber to build the entire stand with the exception of the plywood and window materials.

lumber.jpg


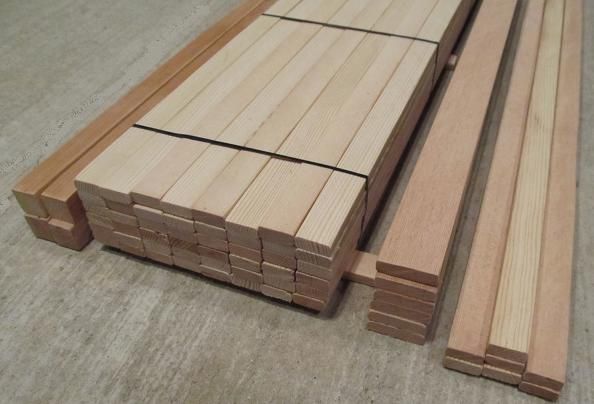
I priced this amount of treated lumber at Home Depot and its around $250 and includes

4) 4 x 4 x 10 long

48) 2 x 4 x 8 long

6) 2 x 6 x 8 long

7) 2 x 4 x 10 long

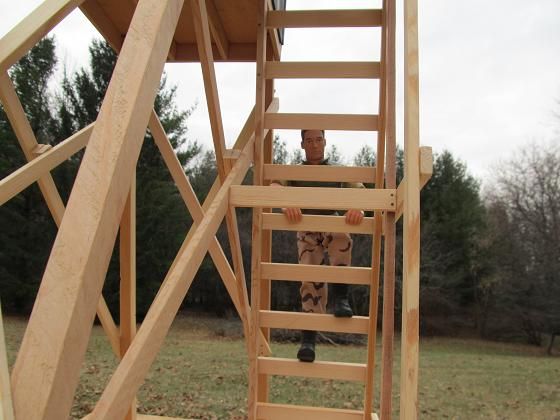
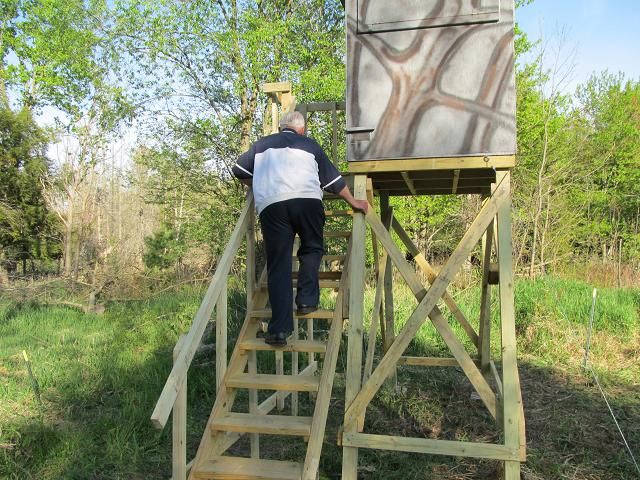
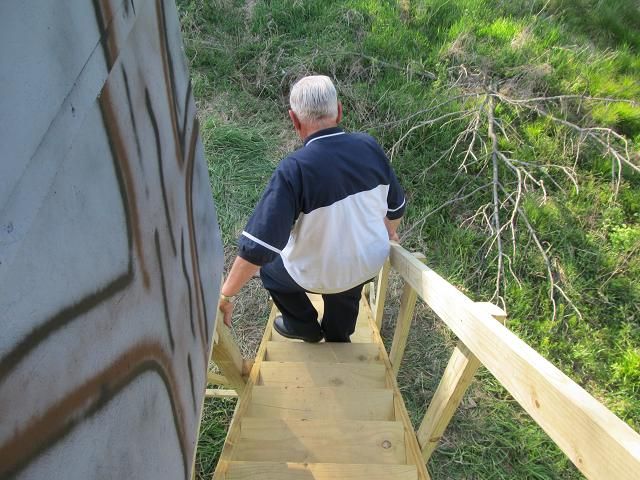
The design has to be 76 year old friendly which is why there are more rungs that are closer together on the ladder than need be for strapping young folks. The internals of the box are 41 by 64 by 75 tall.

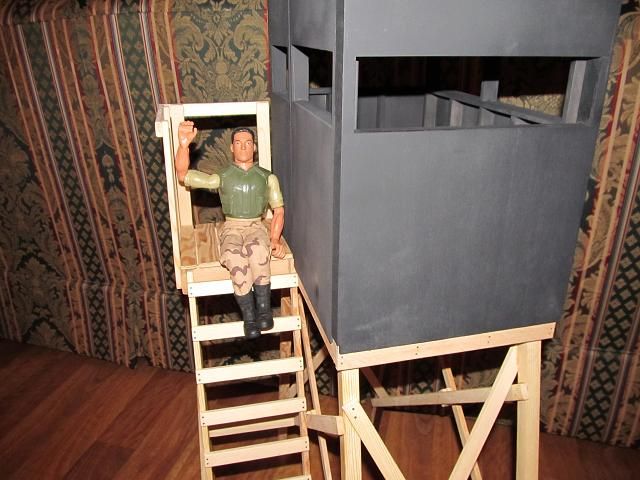
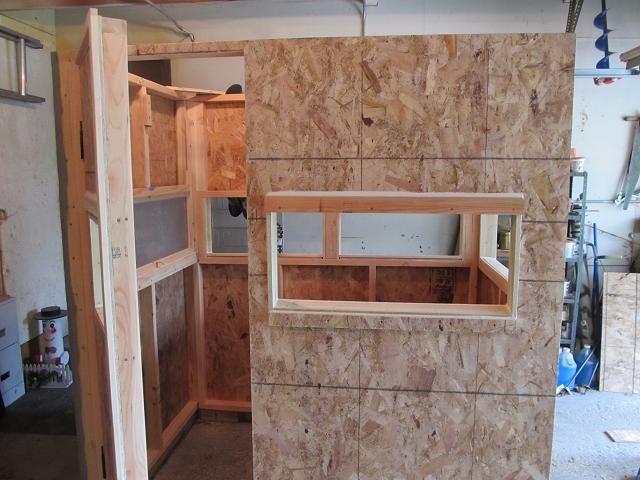
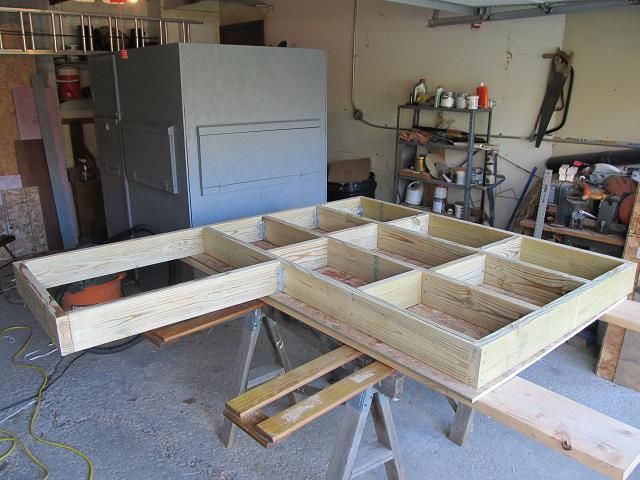
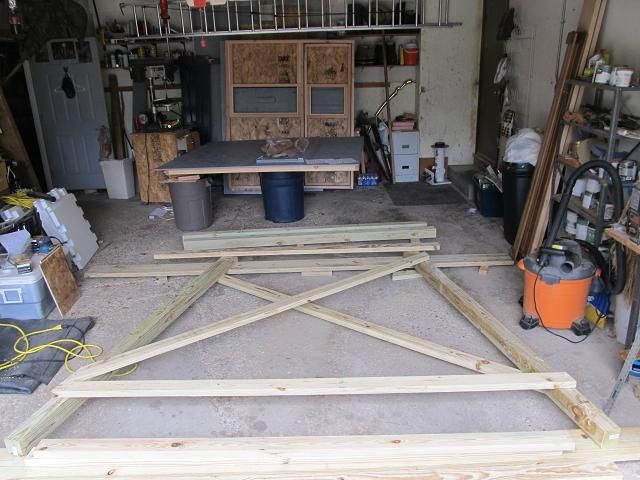
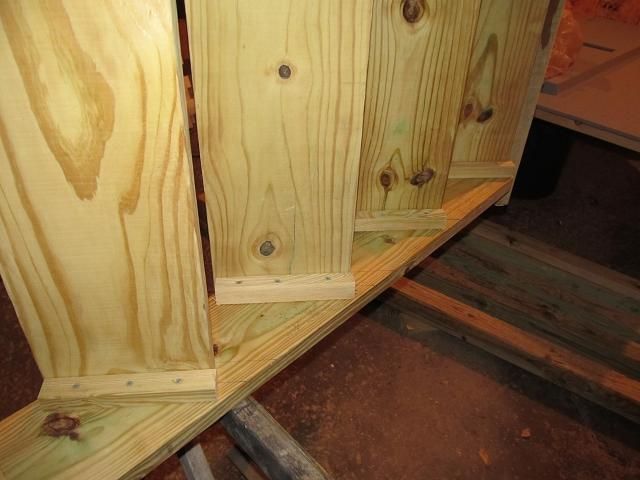
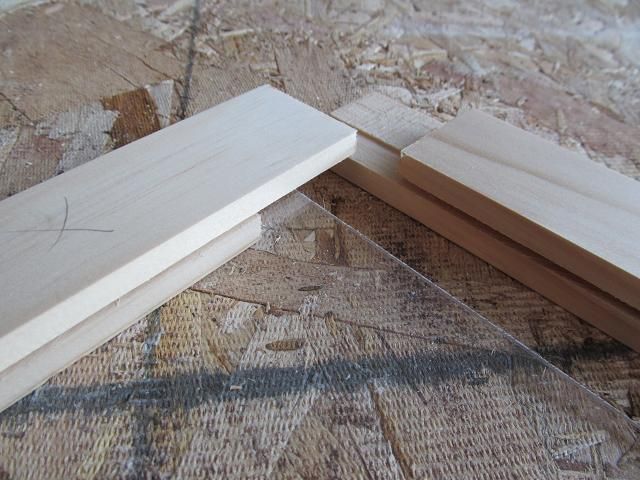
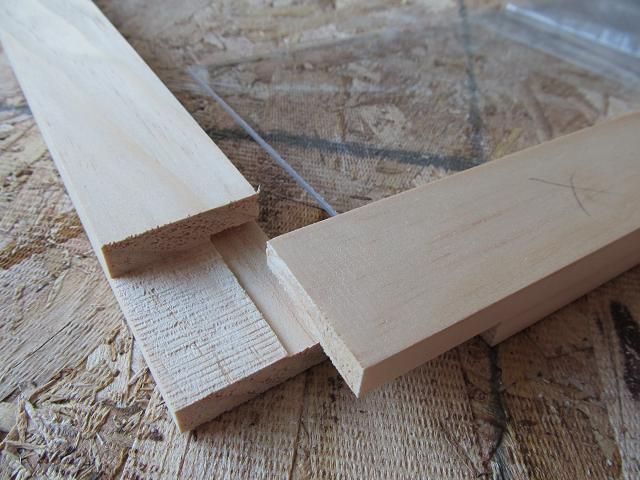
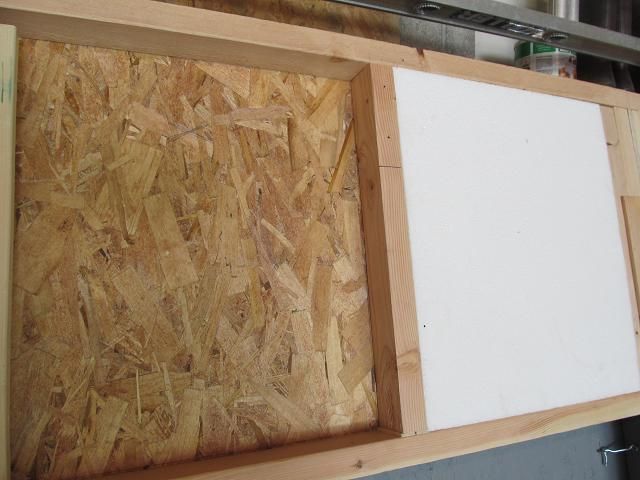
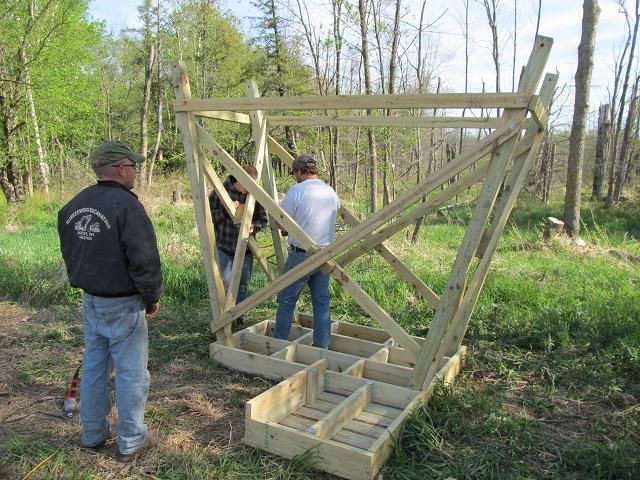
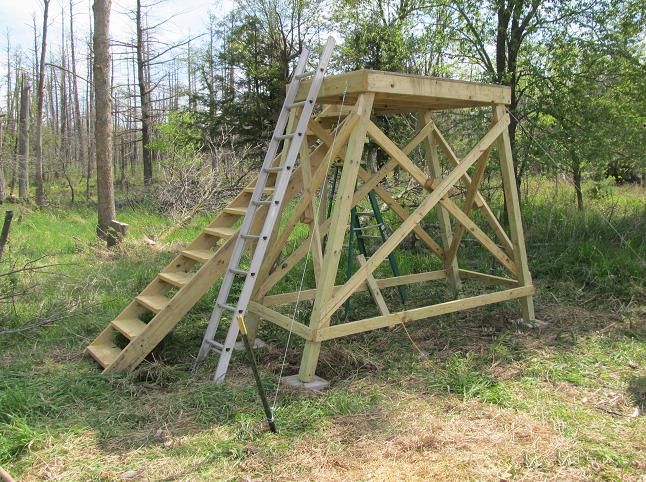
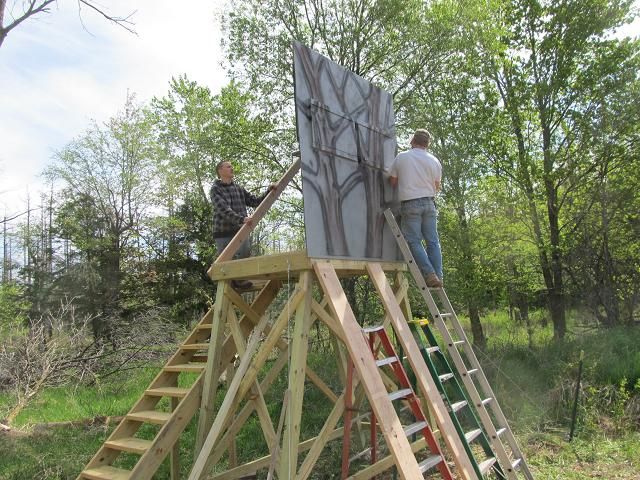
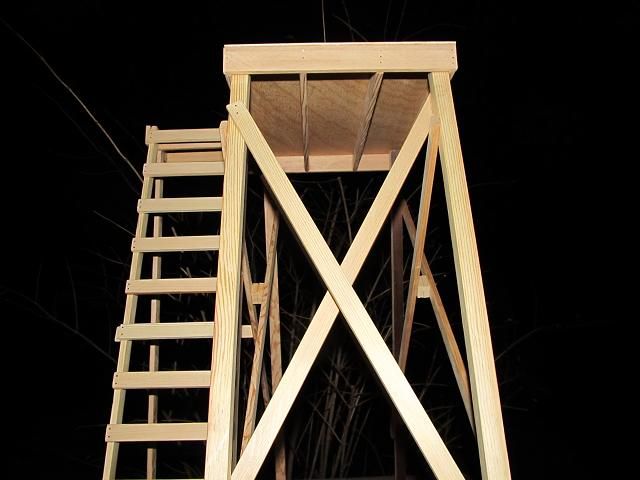
Here are some pictures of the prototype during construction. (I have already begun making changes from the CAD model. )

tower_stand1.jpg


tower_stand2.jpg


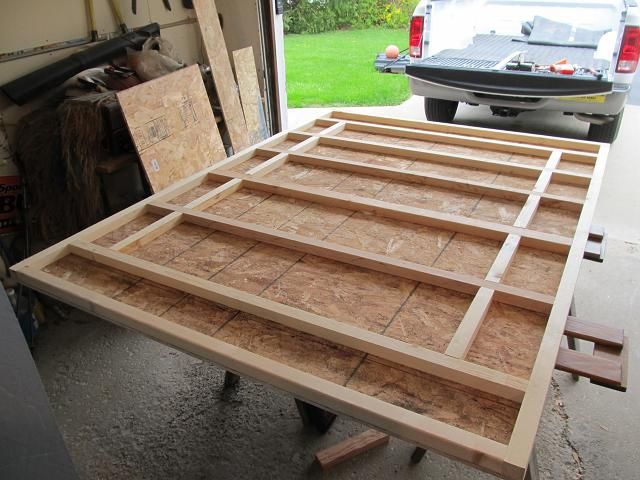
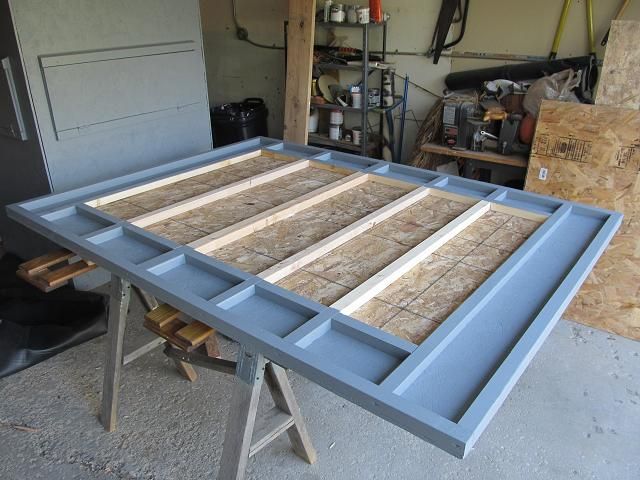
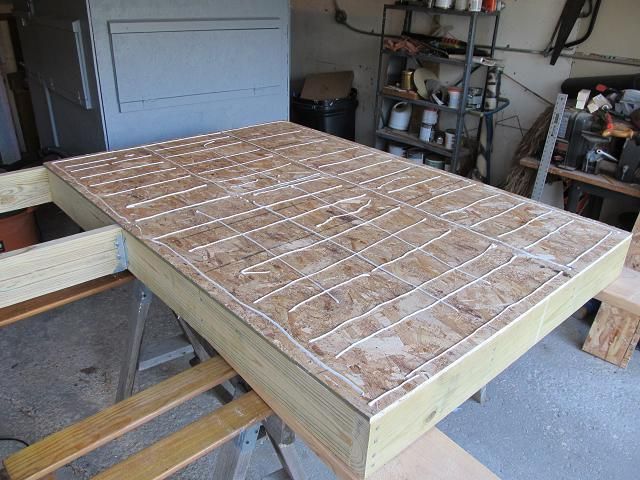
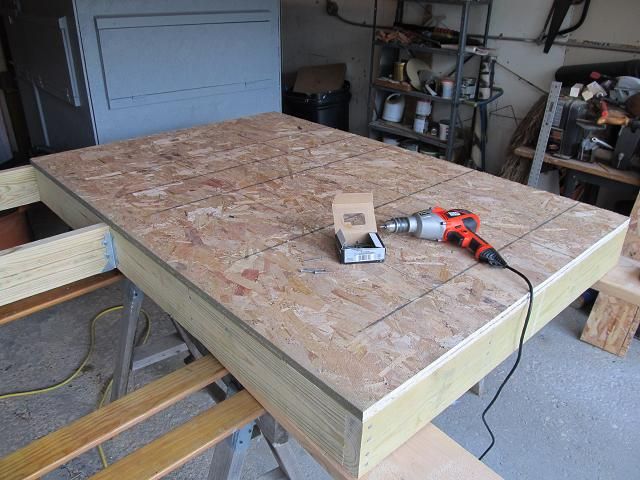
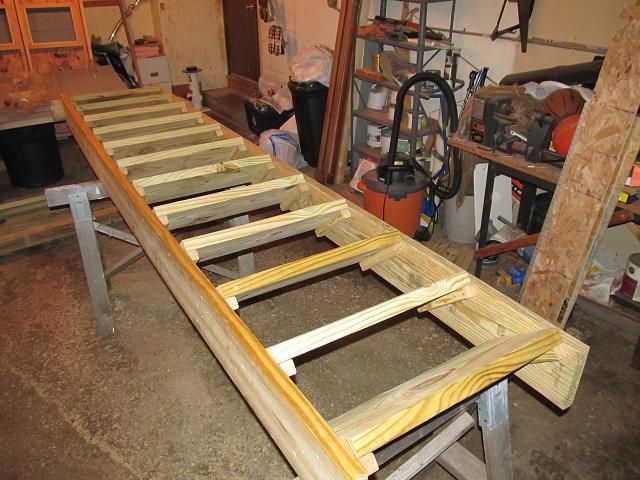
The walls being framed up.

tower_stand3.jpg


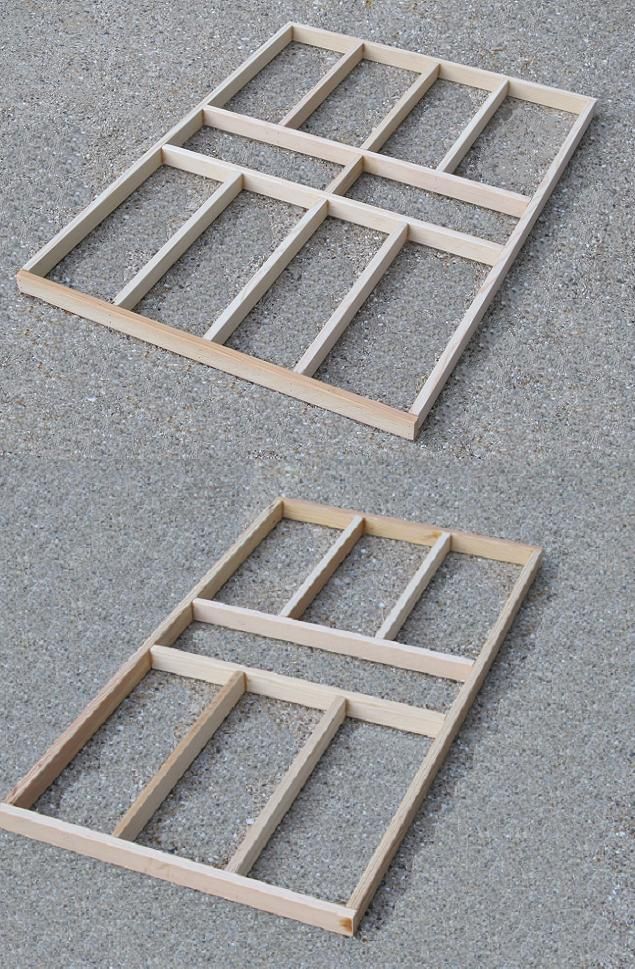
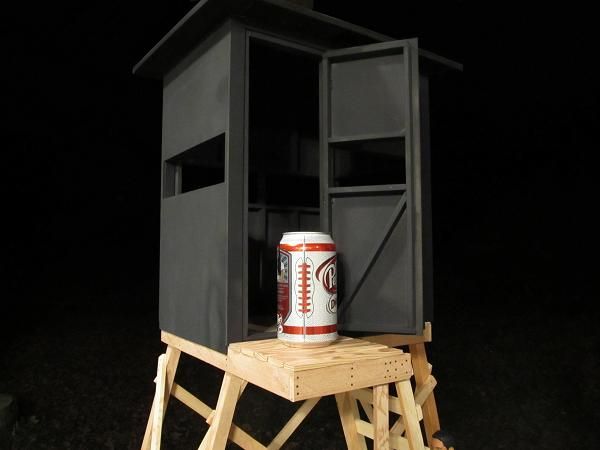
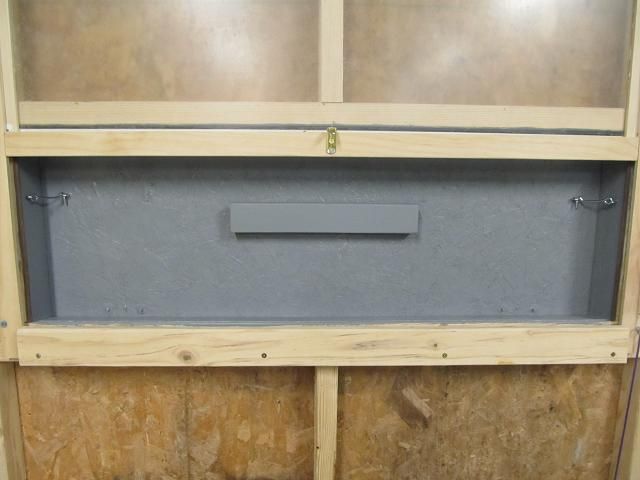
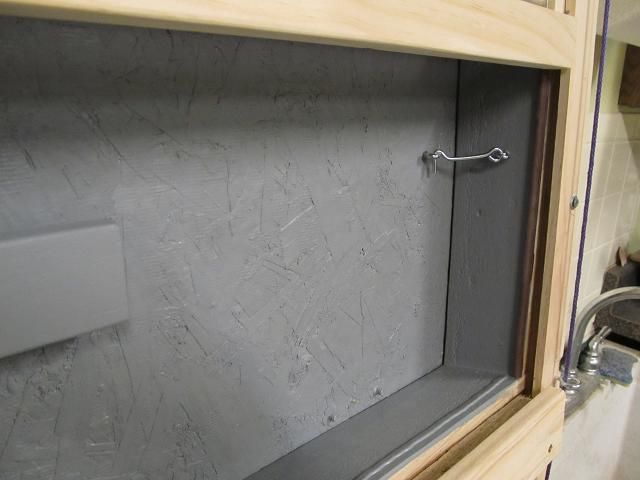
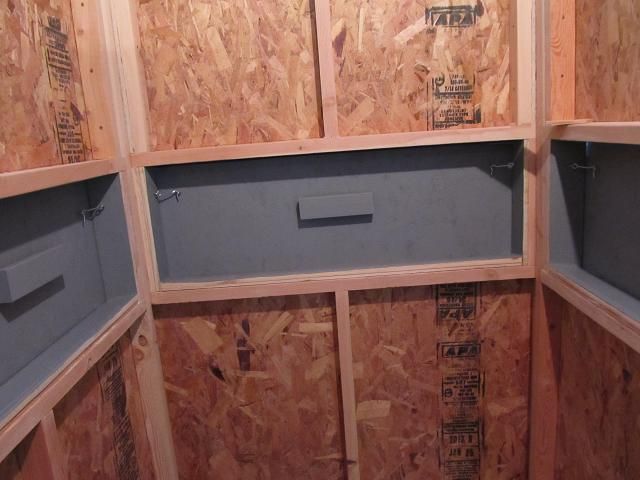
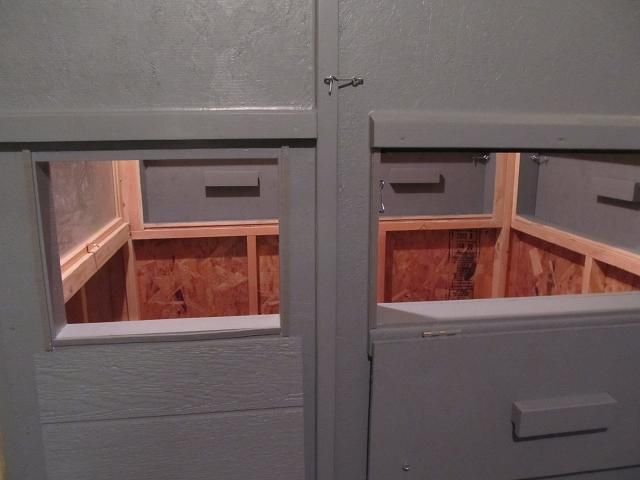
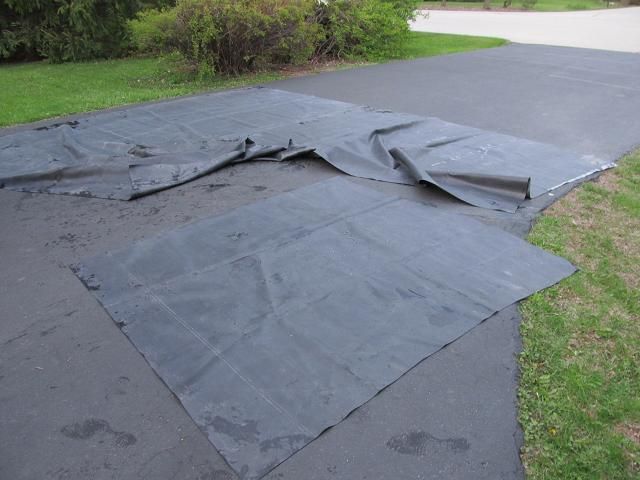
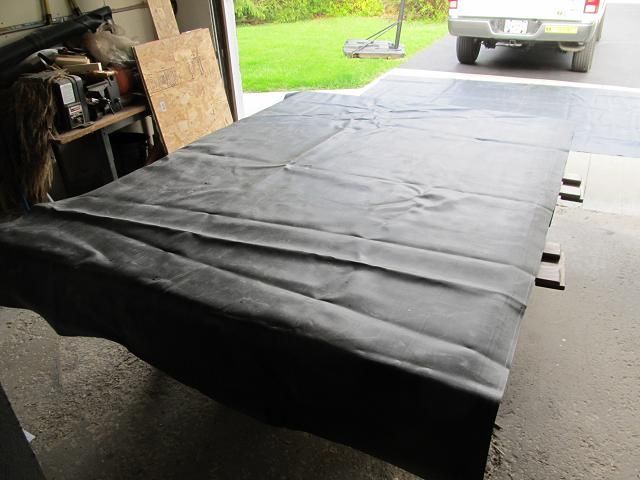
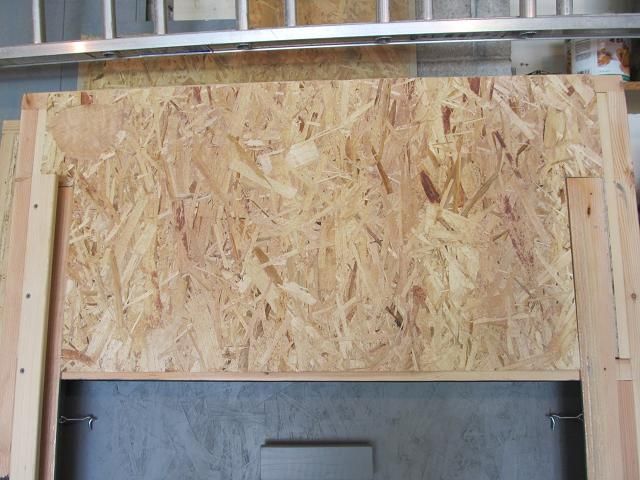
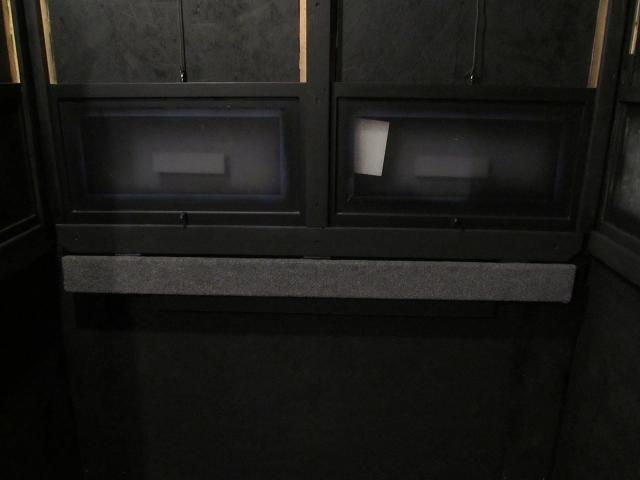
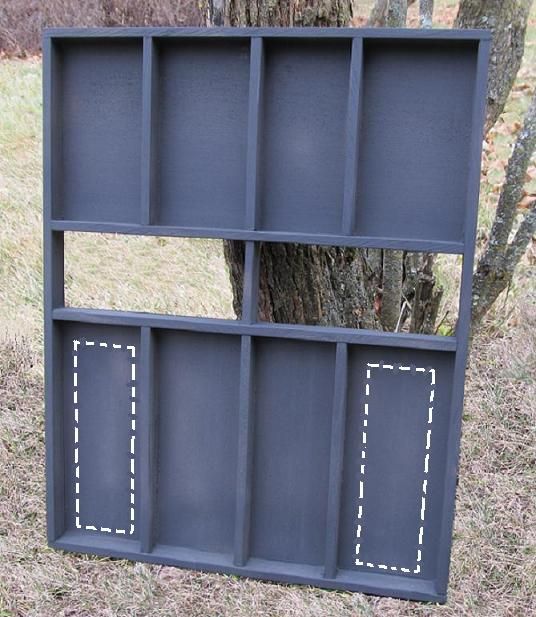
Here is a wall with the sheeting on and painted (I figured the inside of the blind should be dark like most pop-up blinds) The dotted lines indicate a potential location for bowhunting, vertical windows but I am reconsidering their locations at this point.

tower_stand45.jpg


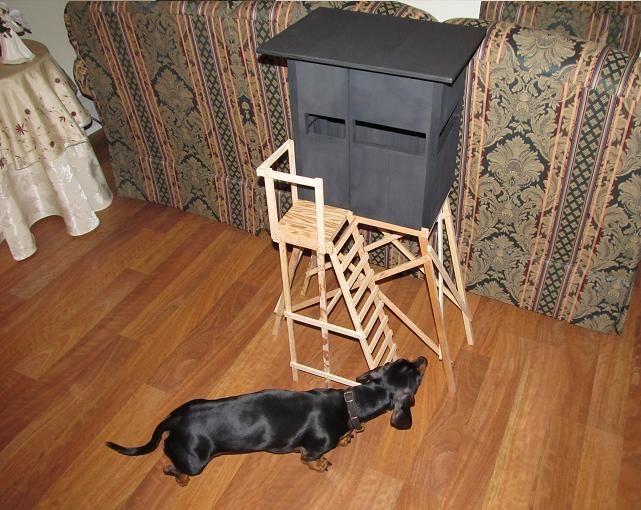
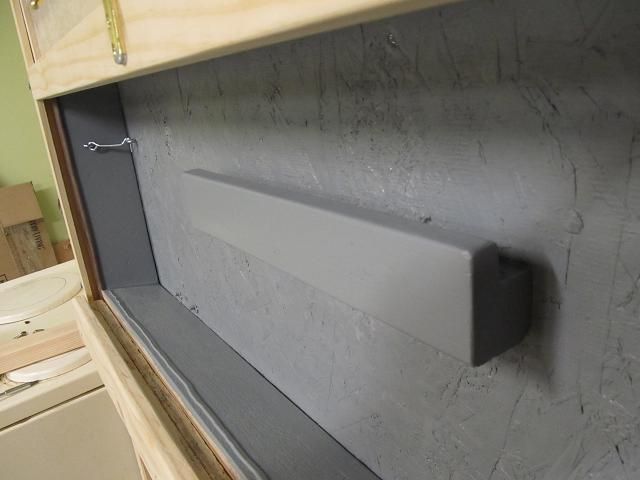
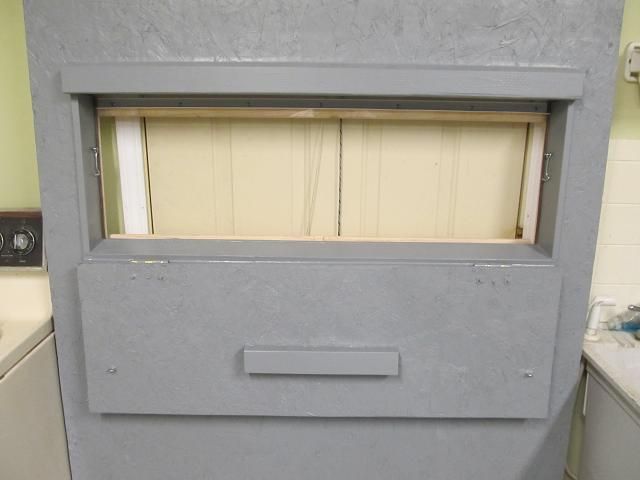
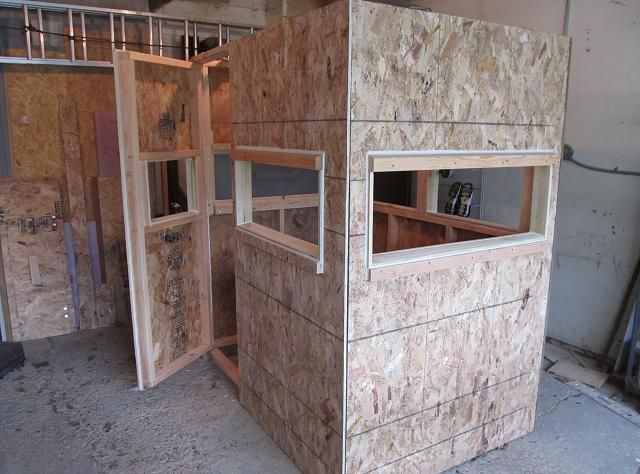
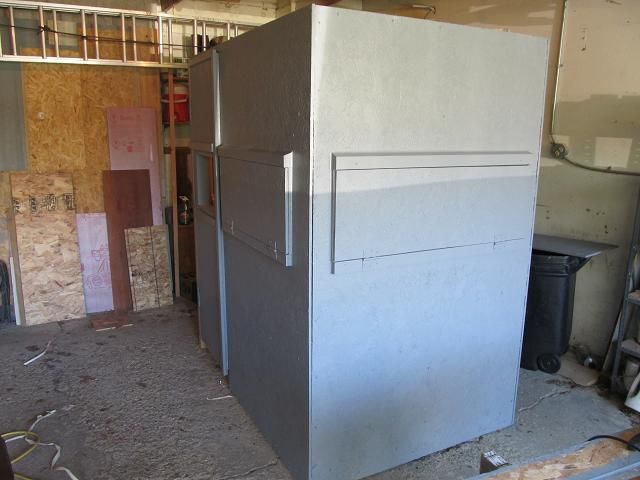
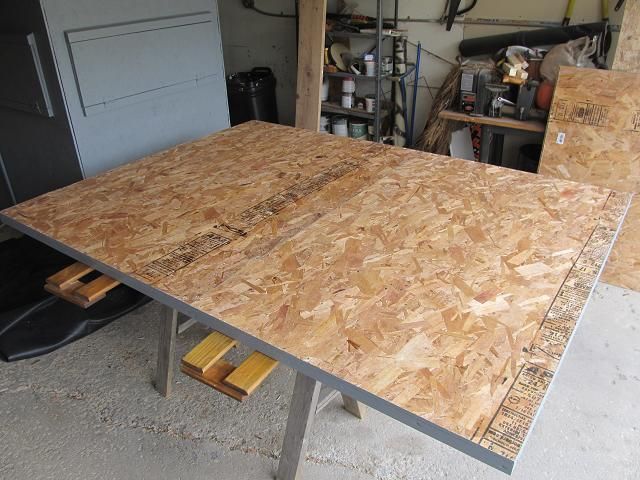
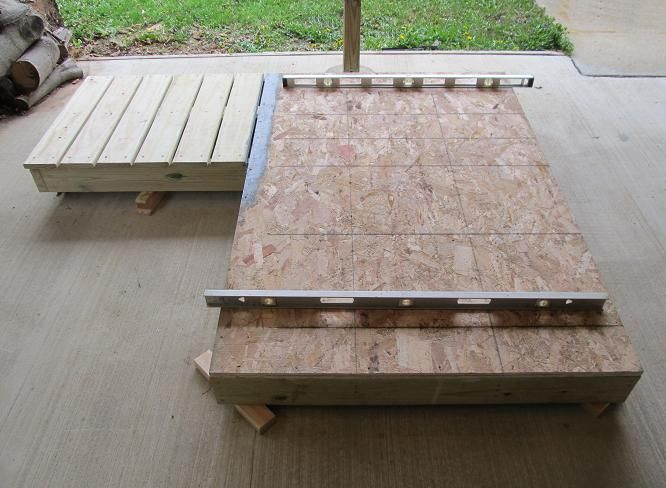
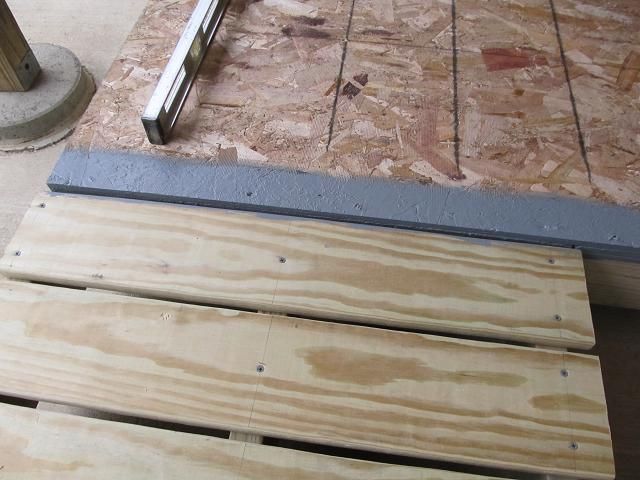
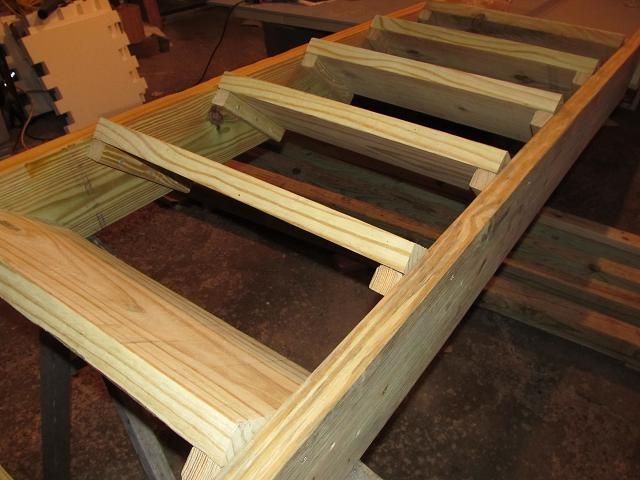
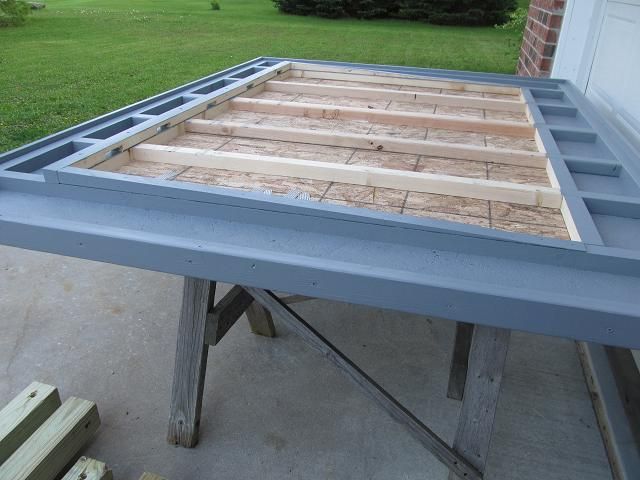
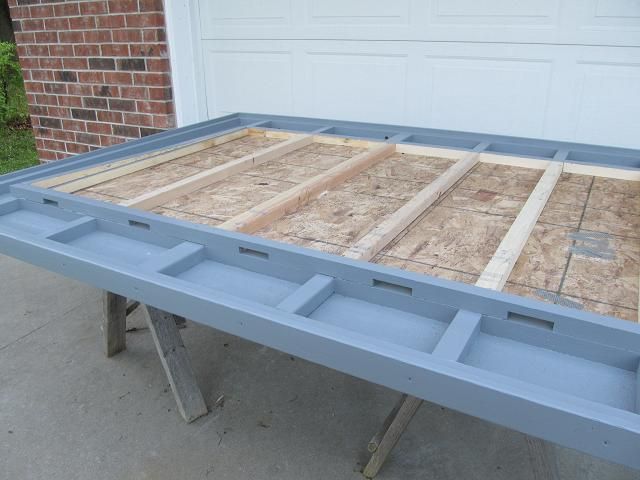
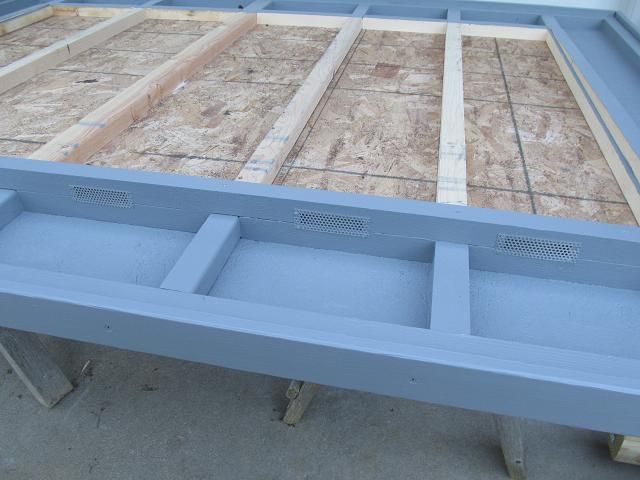
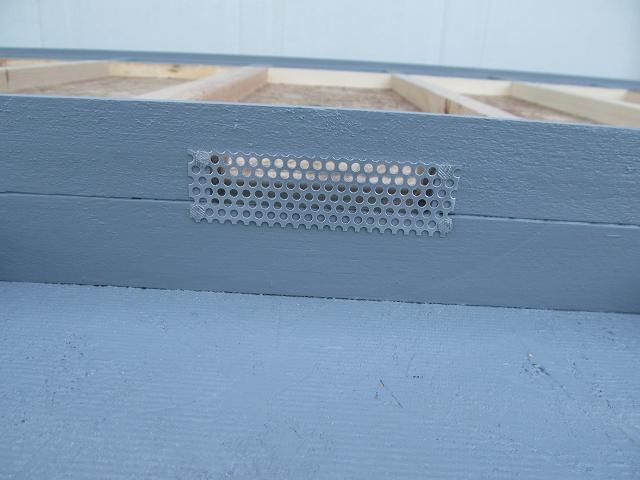
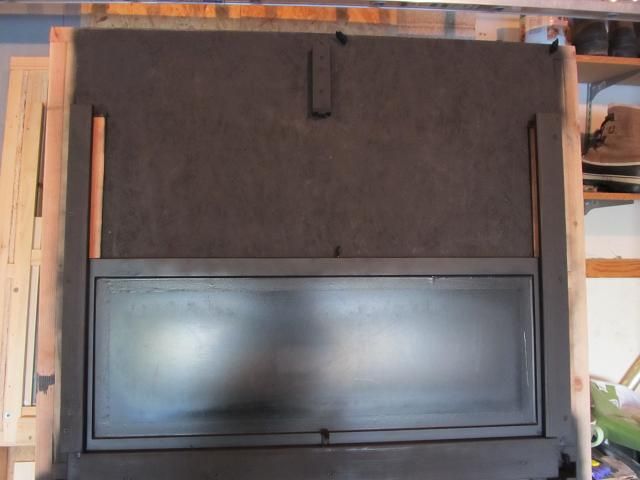
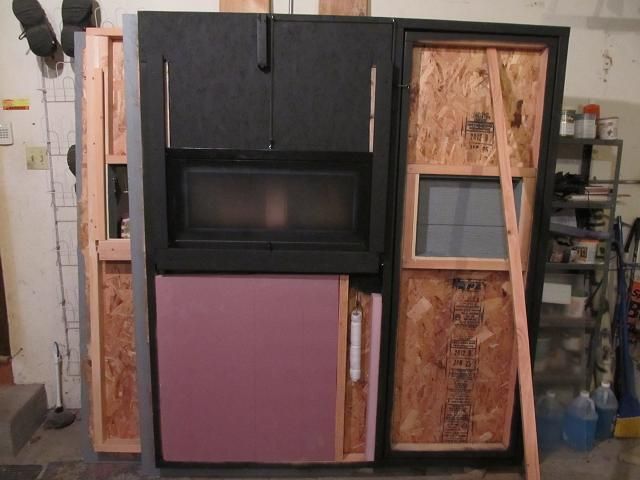
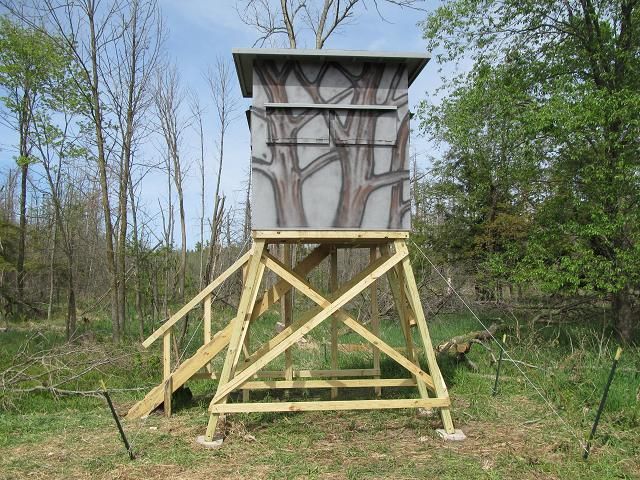
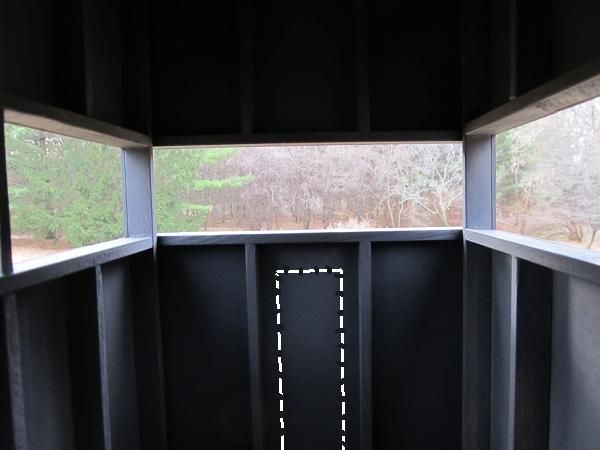
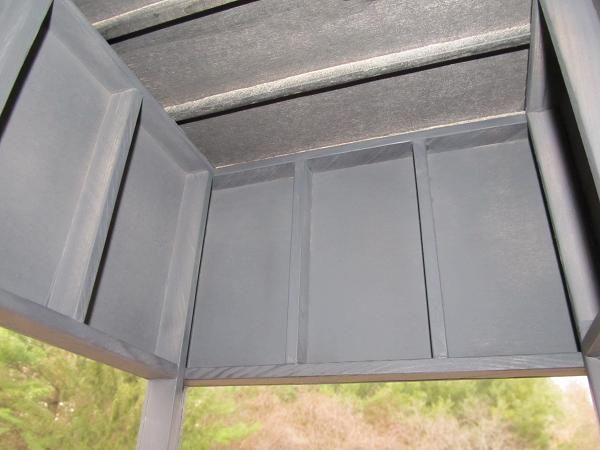
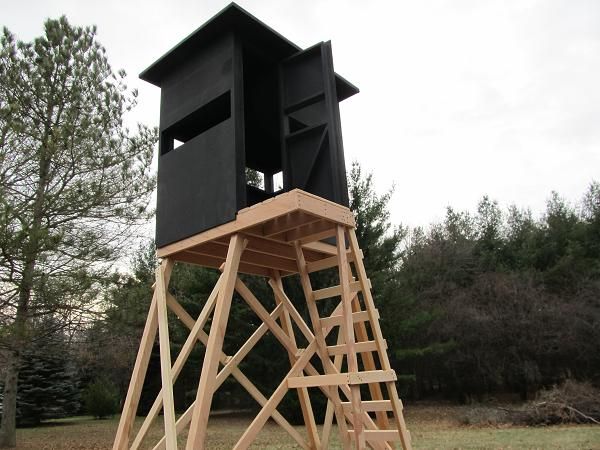
A few views of the framed up box.

tower_stand5.jpg


tower_stand9.jpg


tower_stand6.jpg


tower_stand7.jpg


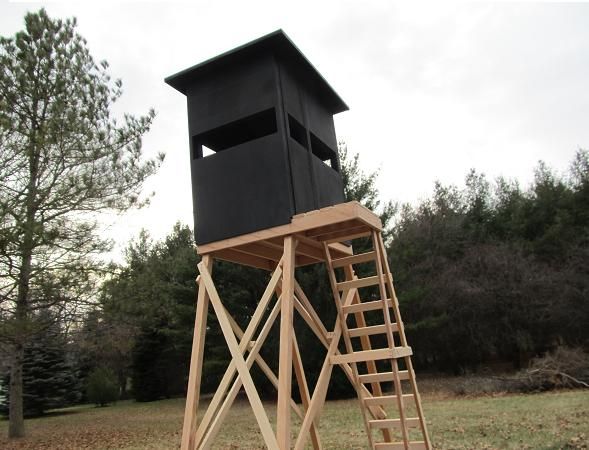
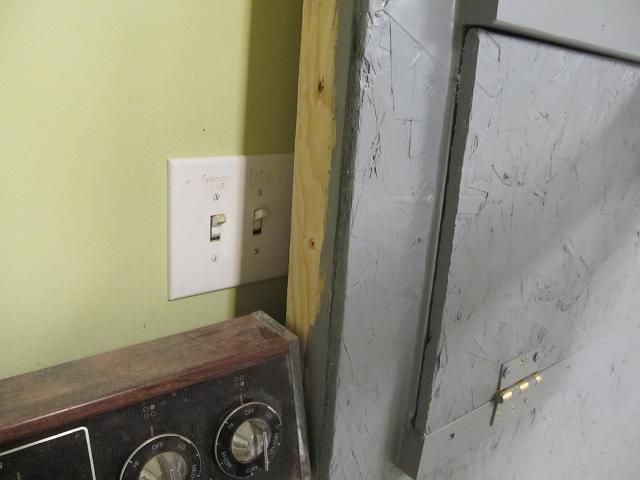
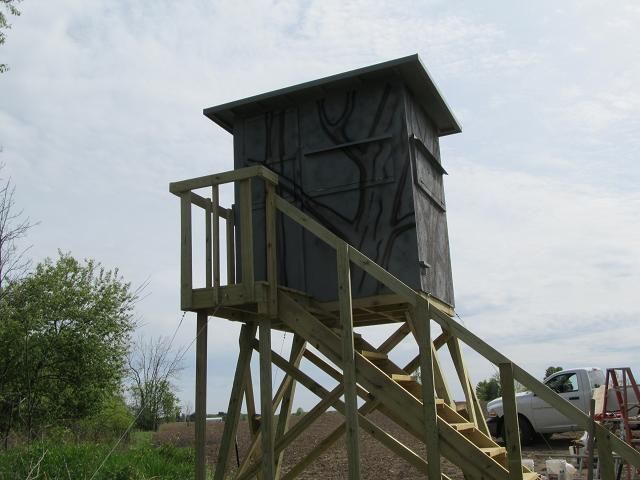
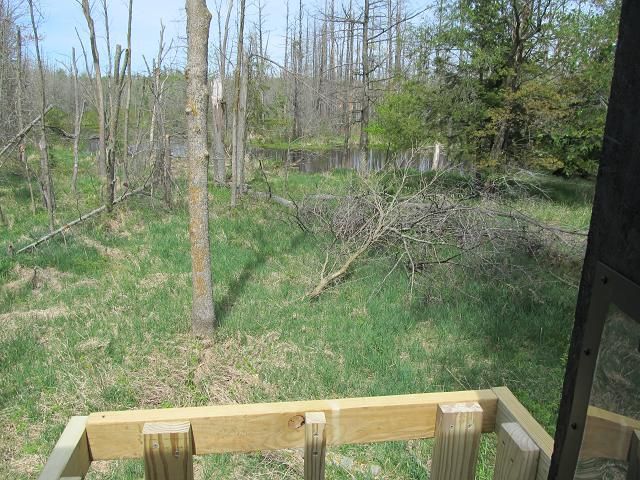
It turned out I needed to make the porch larger and change the swing of the door. The plan was to also install safety rails around the porch.

tower_stand8.jpg


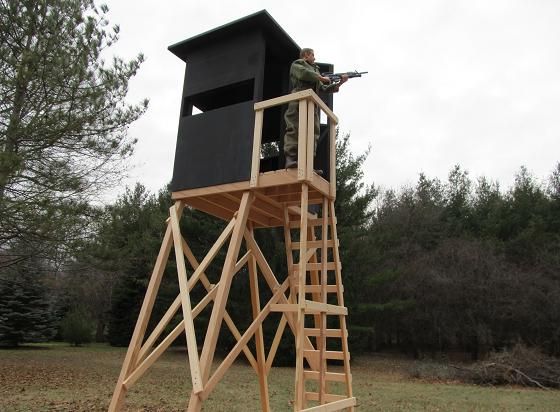
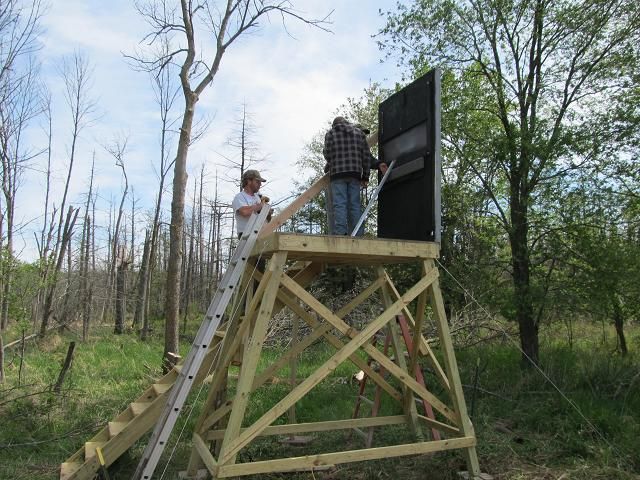
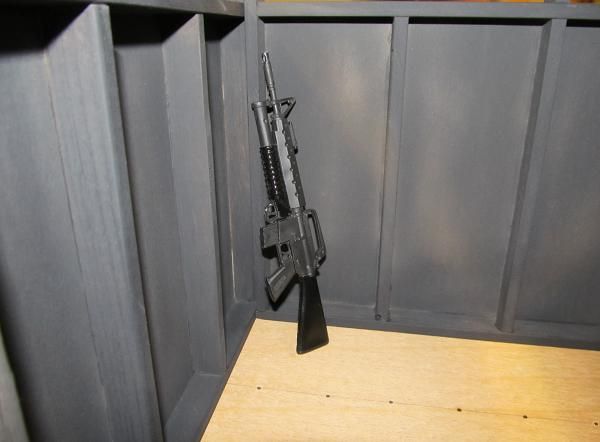
As long as I have a black stand, I will have to (during the firearms season) use a black gun.

tower_stand92.jpg


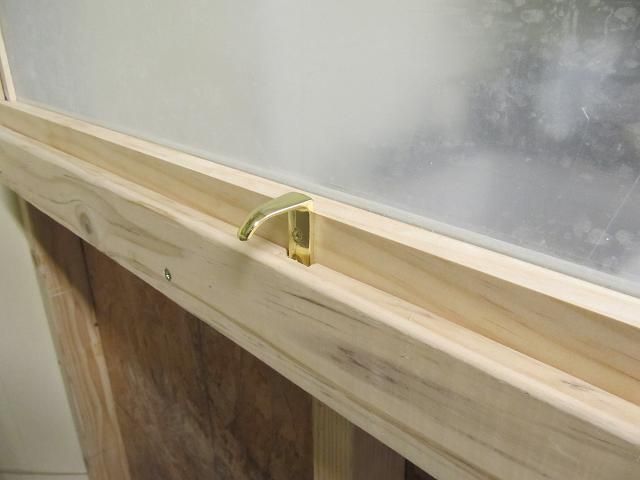
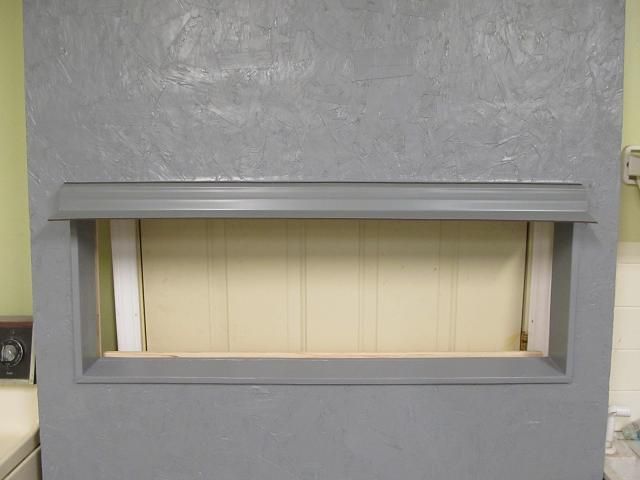
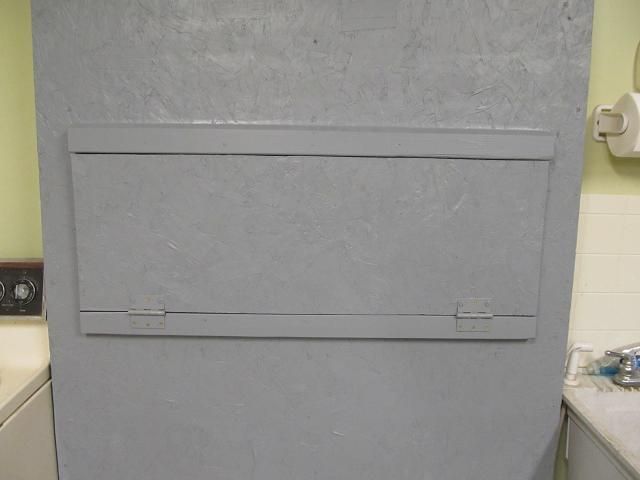
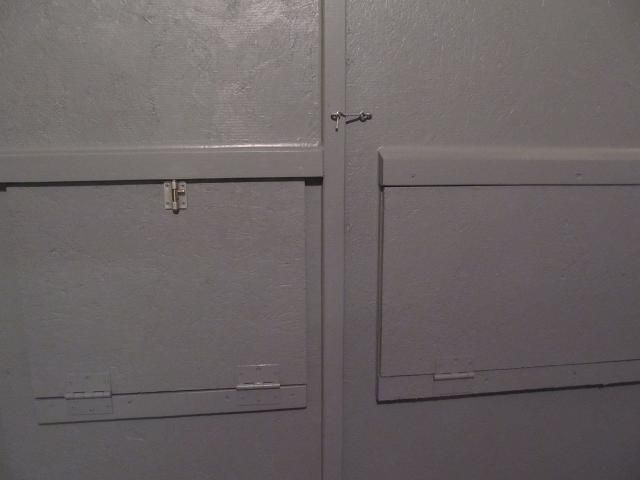
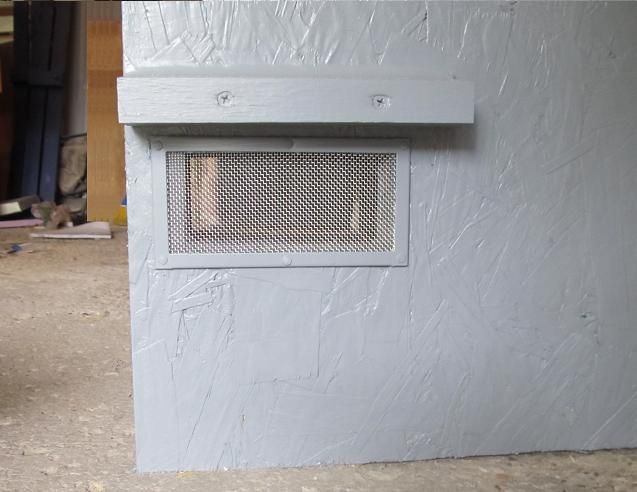
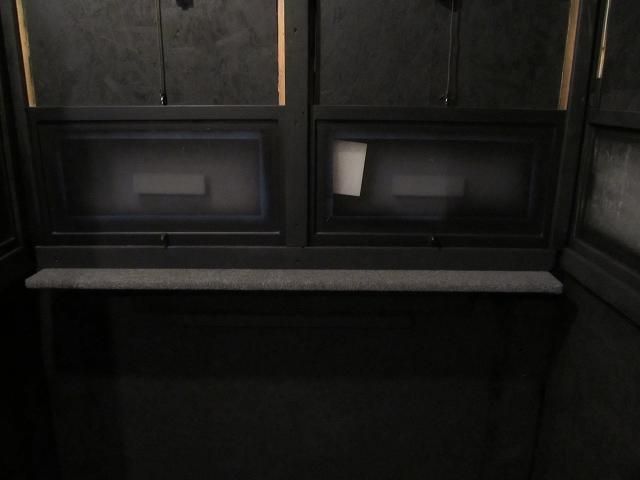
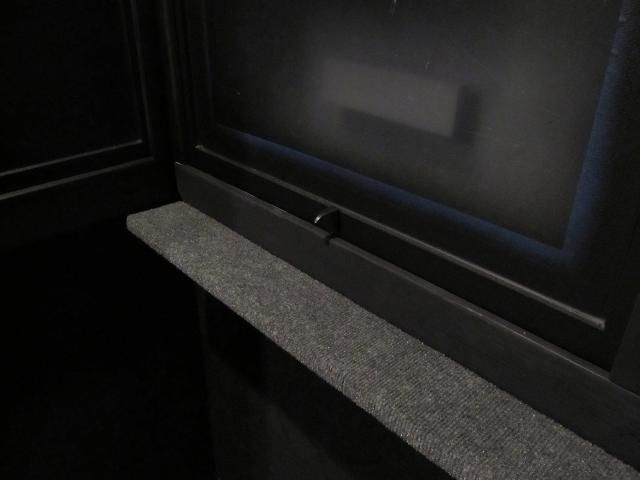
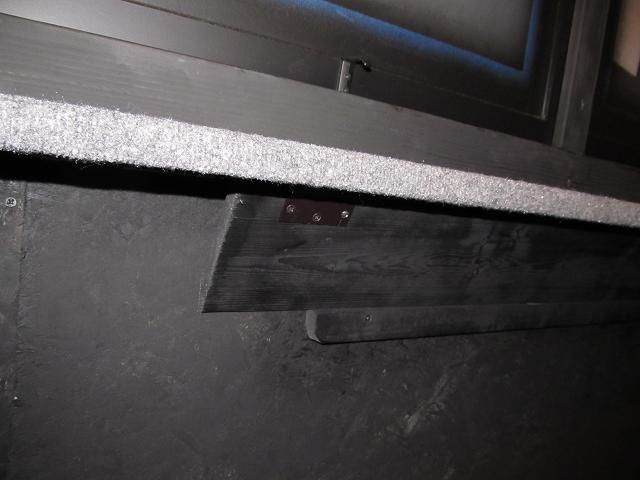
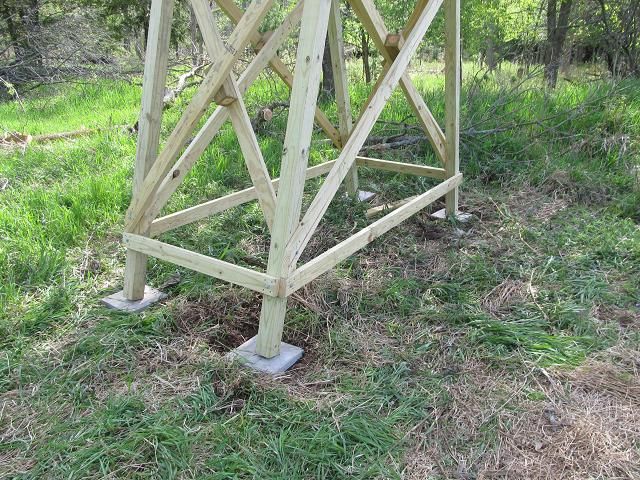
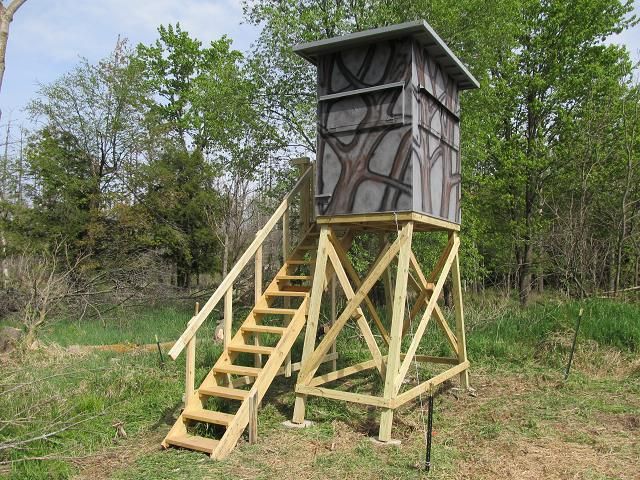
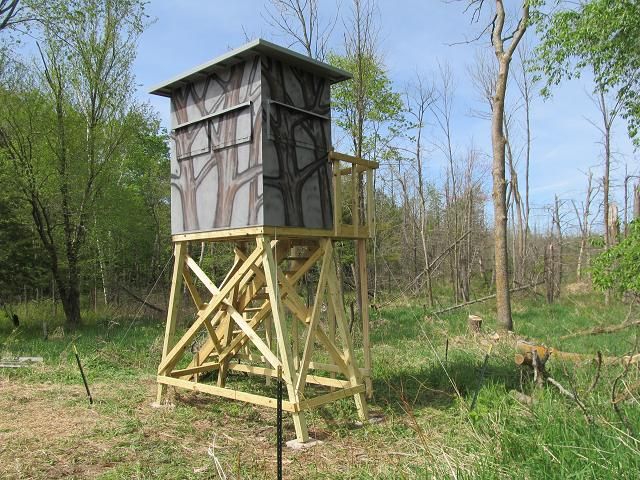
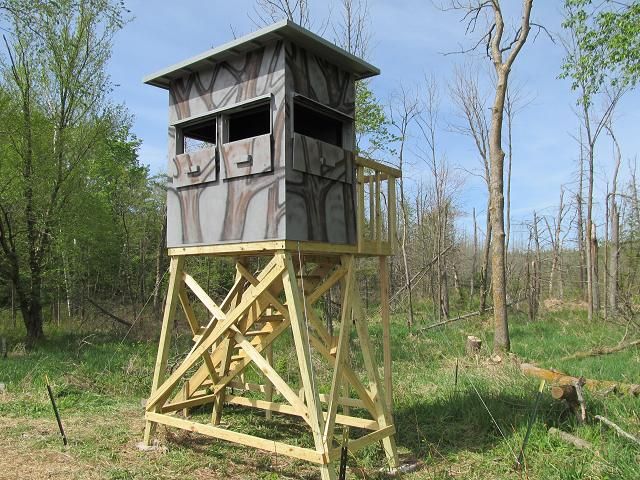
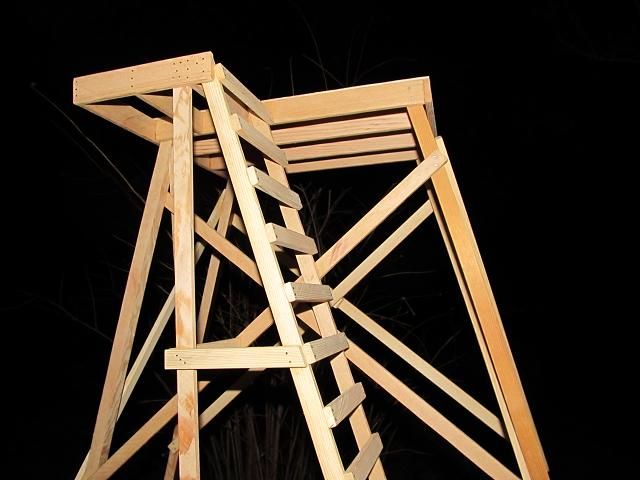
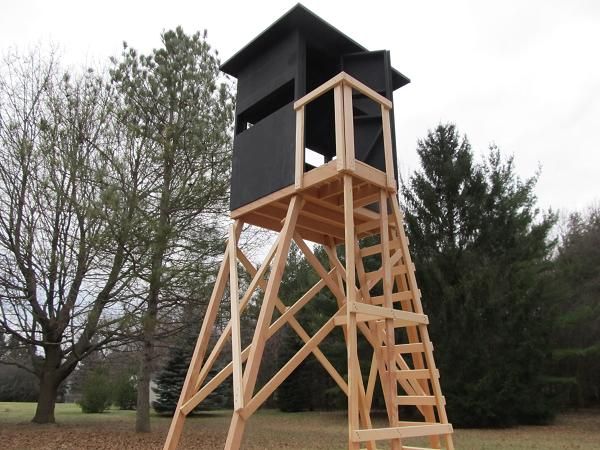
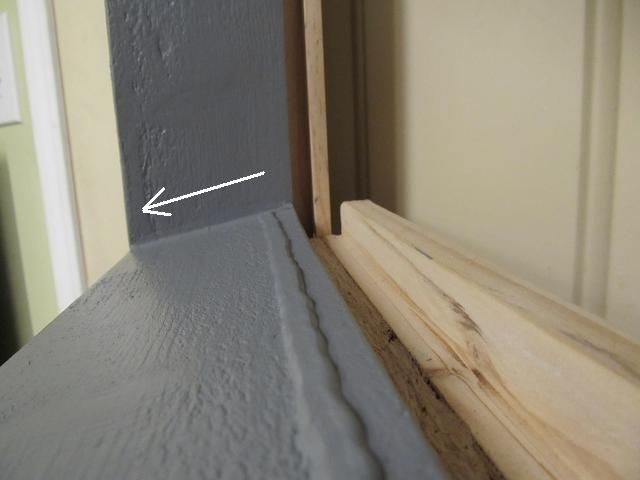
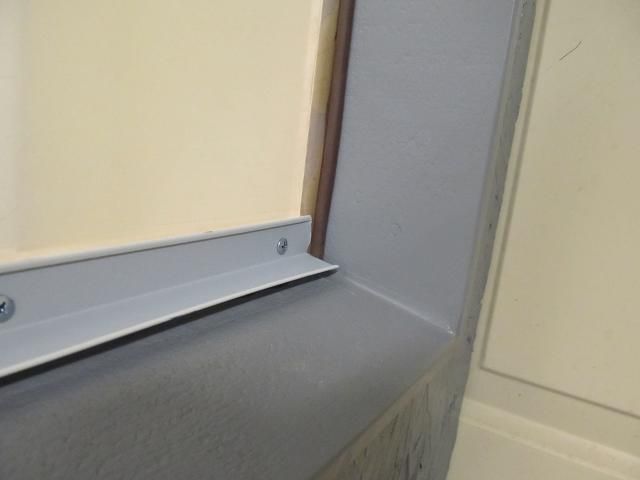
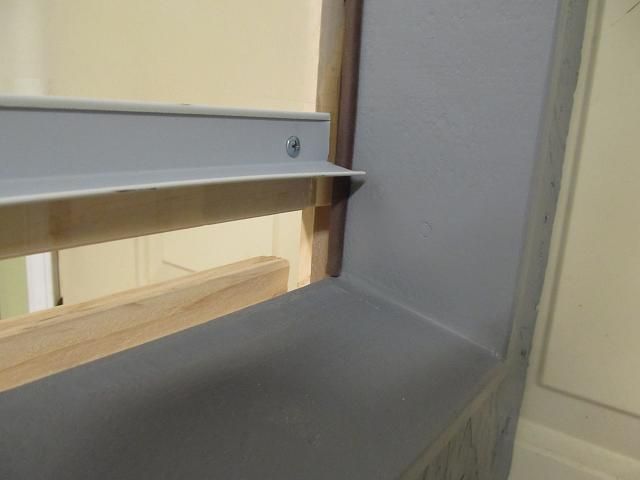
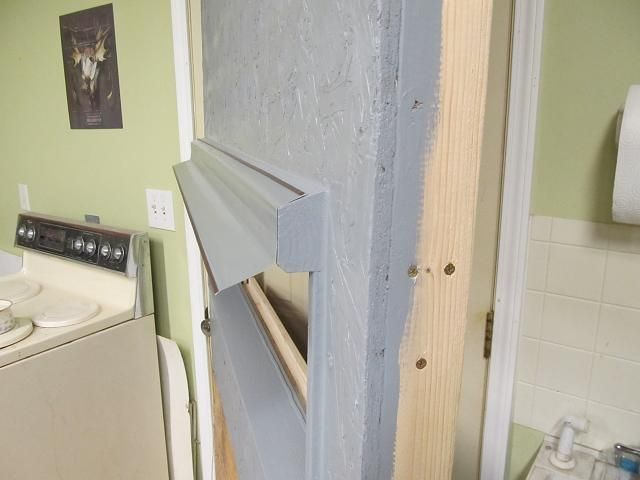
I added a 2nd support under the outer corner of the porch and redid the bracing. I also added a hand rail around the porch. I think I am about finished with the prototype stand as far as improving the design and construction. I need to work out the window details now.

tower_stand98.jpg


tower_stand99.jpg
 
I have had inquires about what I would do with this prototype tower blind and if I would be willing to part with it. The answer was yes but you would have to get past the helpers I had making it. Here is Joe guarding the stand. He wont let anybody near it.

tower_stand991.jpg


He only lets his other friend Joe near the stand. Both are ex-military and have bad attitudes. I thought the photo of the rifle in the blind would have tipped some folks off since it has two triggers (the second one being for the grenade launcher)

tower_stand992.jpg


Plus they have this huge guard dog named Roscoe patrolling the perimeter.

tower_stand9992.jpg


They are all jacked up on Soda in massive quantities.

tower_stand95.jpg


If you haven’t figured it out by now, this is a 3/16 scale prototype model that I built to help me address all the design concerns ahead of time rather than after spending much $$$ on treated wood when I build the real stands. Here is one of my “Scale” 2 by 4’s on a real 2 by 4.

tower_stand96.jpg


Here are the scale sized nails I used.
tower_stand9991.jpg


Here is Joe taking a break after helping test the stand.

tower_stand9993.jpg


The lumber I cut and stacked for that first photo was all cut on my table saw. The banding on that stack of 2 by 4’s is just a thin strip of black electrical tape I cut with a razor.

lumber.jpg
 
OK, enough with the scale model. Time to build the real stand. The one issue I did not address with the scale model was the windows, namely the design and how they would open. At first I thought sliding side by side would be a good option but I forever lose half the window. I didn’t want a hinged design that either swung in or out because of the motion and the issues with keeping them open at a time when a deer approaches so I am messing around with a vertical slider with a counter weight balance system which makes the window very easy to open and keeps it in the open position without having to secure the window.

The Plexiglas and wood frame is 15 inches by 42 inches and weighs about 5 pounds The window rides in tracks on each end and slides up but the weight of the window was a bit much for super easy opening so I used the type of counter weight system so many milk house doors had on the farm.

I have not yet removed the protective film on both sides of the window nor have I installed the felt sliders to quiet the window but I got a chance to play around with the design to see if this is the route I want to go. Here is a view from the inside. The handle to open the window is a coat hook I modified and turned upside down.

tower_stand998.jpg


The sill and sash on the outside are made from treated lumber and painted. I installed the sill at quite an angle to ensure water run-off as I don’t want water to get into the bottom track of the window and then freeze.

tower_stand995.jpg


In the widow itself I installed a weather shield sort of mini awing made of aluminum. It’s the angle piece used for suspended ceilings.

tower_stand996.jpg


With the window open, you can see how it protects the bottom track from rain. On each vertical end, I installed a “P” shaped piece of adhesive backed weather stripping also to keep water out.

tower_stand997.jpg


To further detour rain, I added a wood strip above the entire window and then used a piece of roofing material called a gutter apron only I used it upside down to act as an additional awing to keep rain out.

tower_stand993.jpg


tower_stand994.jpg


Here is a picture of the temporary rope I used to tie the window to the counter weight. After opening the window a few times and hearing the hard stop I installed a block of wood and a piece of sticky backed foam above the window to quiet the stop.

tower_stand999.jpg


Since the sun and its UV rays as well as the grit carried in the wind as well as rain, snow and the risk of birds trying to fly through the blind only to smash into the Plexiglas are all negatives that are likely to occur during the 8 months this blind will sit idle every year, I have decided to install off-season shutters to protect the windows and further weatherproof the blind. The other reason in doing so is that it costs very little to provide this protection since the shutter is made from the scrap created by cutting the window opening. The small latches and hinges came to less than $6.00. In the following pictures, I have removed the aluminum awning made from the gutter apron that will be installed above the window. In prior pictures I held it in place with tape for the photo. The aluminum is too fragile for the rigors of transportation so it will be installed on-site once the blind is erected.

Here is the view from the outside with the shutter raised.


tower_stand9997.jpg


The shutter sits against the lip created by extending the window sash.


tower_stand9993.jpg


I installed a wooden handle to raise and lower the shutter as well as 2 latches to keep the shutter closed.


tower_stand9994.jpg


tower_stand9995.jpg


The handle has a deep finger groove to make it easy to grab and hold on while raising the shutter.


tower_stand9996.jpg


The view from the outside with the shutter lowered.


tower_stand9992.jpg


This seems like a good and low cost way to protect the windows.
 
I got the remaining walls built and positioned them together for a fit-up and so I can start working on the rest of the shutters and sliding windows.

tower_stand9998.jpg


tower_stand9999.jpg


The box now has two coats of Behr Premium exterior paint and the off season shutters are installed. The shutters will protect the stand and especially the Plexiglas windows during the 9 months of the year the stand sits outside unused and exposed to the elements.

tower_stand99993.jpg


The view from inside. I have yet to install the sliding Plexiglas windows on the inside.

tower_stand99992.jpg


The door has a smaller window and the Plexiglas will not open like the windows on the walls. As such, I had to install a dead bolt on the outside to keep it closed in the off season

tower_stand99994.jpg


Here the shutters are down.

tower_stand99995.jpg


There is a self adhesive foam gasket all around the window opening that the shutter touches to make a weather tight seal. Now its time to build the roof.

With the box mostly done, I turned my attention to the roof. I was going to use a spreadable rubberized roof coating but last weekend I was up North cutting firewood and my brother told me about all the rubber roof material he had on hand so I am going that route.

The roof is made from 7/16 OSB and framed with 2x2's (except where the seam where the two sheets meet, there I used a 2 x 3 and caulked the joint before screwing the OSB down).

The roof overhangs the box by 8 inches all around.

tower_stand99998.jpg


Then I gave the exposed underside 2 coats of the same colored paint. The center portion (inside ceiling of the box) will be insulated)

tower_stand999991.jpg


Ready to apply the rolled roofing material.

tower_stand999992.jpg


The Rubber is thick (just over 1/16th inch and very stiff (and heavy)

tower_stand99999.jpg


tower_stand999993.jpg


After spending a few hours in the warm sunshine, the rubber roofing material was easy to smooth and flatten. The wooden strips around the perimeter help hold it in place.


tower_stand999995.jpg


Then I used clear silicone caulk all around the top where the rubber meets the wood. This roof should last a very long time.


tower_stand999994.jpg
 
Then I built the frame for the floor. Its made from treated 2 x 6 with joists on 16 inch centers. Then because I had lots of scrap ends, I filled in the joist spaces with additional blocking. Is it overkill?? You bet. I don’t want a floor that creeks and groans. I’m building it once so I want it too be strong rather than wish I would have when its too late to do anything about it.

tower_stand999996.jpg


The first layer of ½” OSB was screwed down after laying beads of construction adhesive on all the joists. Then I laid down more construction adhesive and another layer of ½ OSB

tower_stand999997.jpg


Now I have a floor that an inch thick that is both glued and screwed. Is it over kill?? You bet it is.

tower_stand999998.jpg


I’ve moved the stand deck out to the back patio because I need the room to build the larger parts of the stand. I leveled it up because when I poured the back patio I used a lot of slope for good drainage. Eventually I will bring all the walls out here as well and give them a test run before shipping the stand to its permanent home. I would rather discover surprises in the shop than out in the woods.

tower_stand999999.jpg


I painted the exposed edges even though the door threshold will cover this area and the OSB on the door will protect it. I just figured it was better safe than sorry with melting snow.

tower_stand9999991.jpg


Then I framed up both of the sides of the base and marked the pieces and disassembled them.

tower_stand9999992.jpg


If you go all the way back to the beginning of this project you will see I had intended to use a ladder to get into the stand. Since this stand will be used by hunters in their 80’s as well as little kids. I went back to the drawing board (literally) and designed a very easy to climb set of stairs. The cost and time went up a bit but will make for a better and safer climb. While the plan does not show it I will be adding more vert railing on both the hand rail and the deck rail.

towerdelete.jpg


I don’t know what it is about treated lumber but finding 2, 12 foot long 2 x 8’s meant sorting through a lot of warped and twisted junk to get two that were usable.

tower_stand9999993.jpg


Its going to take more than a couple guys to raise and position this staircase. Its pretty heavy.

tower_stand9999994.jpg


tower_stand9999995.jpg


tower_stand9999996.jpg
 
Window construction Is under way. Waiting for coats of paint to dry is taking too much time in the chilly weather.

tower_stand9999998.jpg


tower_stand9999999.jpg


In the meantime, I decided to add a little pitch to the roof to make sure the rain and snow are pitched away from the side with the stairs and the door. I ripped a couple wedges that fade from 1 ½ thick to zero thick. Then I cut some ports in between the bays to act as air vents. Then I covered them with aluminum mesh sheet to keep bats and wasps out. I will put a inlet air vent in the bottom of one of the walls. This way, when the stand is sealed up over the summer and its 100+ degrees outside, the stand will be able to breath a bit.

tower_stand99999991.jpg


tower_stand99999992.jpg


tower_stand99999993.jpg


tower_stand99999994.jpg


While waiting for the windows to dry I am making the tracks that they will run in.

All the windows are made and painted and the tracks installed. Time to start insulating and covering the inside walls with 1/4 inch OSB. I think I will paint the entire inside flat black. I also need to make the window counterweight system so no matter what position I want to lift the windows, they will stay up.

tower_stand99999995.jpg
 
I started insulating the walls with ridged foam that 1.5 thick. I have some leftovers from the last meat smoker project so I didn’t need to purchase much additional foam.

tower_stand99999996.jpg


After the insulation, I covered the wall with ¼ inch OSB.

tower_stand99999997.jpg


Then gave the interior a spray coat of flat black.

tower_stand99999998.jpg


For the bottom sections, I did the same except I had to create a smaller and uninsulated area for the window counter balance weights.

tower_stand99999999.jpg


The ¼ thick OSB panel that covers the counter weight has to be removable should I need to service the weight. The other portions that never need to be removed are nailed in place.

tower_stand999999991.jpg


Because I have air vents at the top of the stand to vent off the hot air when the stand is sealed up during the off season, I needed an air inlet. I added a stainless steel mesh screen wrapped in an aluminum frame and then put a little rain guard above it. I placed it as close to the floor as I could. I think I have all the venting I need and hopefully the stand will have enough air flow to avoid getting moldy inside.

tower_stand999999992.jpg


With the walls done I added a flip up shelf on the long wall and covered it with the same indoor/outdoor carpet I plan to use on the floor of the stand. Its hinged and can be lowered to lay flat against the wall when its not needed.

tower_stand999999993.jpg


tower_stand999999994.jpg


Lifting it and swinging the angle support down lowers the shelf.

tower_stand999999995.jpg


tower_stand999999996.jpg
 
After some dry weather and a forecast for a nice weekend I reserved a U-Haul trailer to get the stand up north to where it will be erected. Friday afternoon I was loaded and ready to go.

tower_stand999999998.jpg


I enlisted the help of 2 of my brothers and a nephew. Was started at 8:00 on Sat morning. Building the stand didn’t leave a lot of time of picture taking but I did my best.

tower_stand999999999.jpg


We flipped the stand over and set it on cement pads and leveled it.

tower_stand9999999991.jpg


tower_stand9999999992.jpg


Than anchored it in 4 locations with 3/16 cable and steel posts driven deep into the ground.

tower_stand9999999993.jpg


tower_stand9999999994.jpg


The pre-made stair case was the next addition.

tower_stand9999999995.jpg


Then it was time to attach the walls.

tower_stand9999999996.jpg


tower_stand9999999997.jpg


Putting up the last wall and the roof was a chore and I forgot to stop for pictures. It wasn’t until I finished the stair railing that I remembered to take more pictures. Here is the finished stand.

tower_stand9999999999.jpg


tower_stand99999999991.jpg


tower_stand99999999992.jpg


tower_stand99999999993.jpg
 
Here it is with the windows open and shutters down.

tower_stand99999999994.jpg


Here is the view looking North from the porch. There is a river that became a pond a few years ago when beavers dammed it up. You can see all the trees that died from being under water. The beaver problem is gone but the damage remains.

tower_stand99999999995.jpg


The view looking West. you can see 440 yards.

tower_stand99999999996.jpg


Looking North you can 1,000 yards to the farm.

tower_stand99999999997.jpg


Looking East to the river. I need to cut some shooting lanes.

tower_stand99999999998.jpg


I came back with my father to show him the completed stand. He liked it and it was easy to climb the staircase with his old and replaced old knees.

tower_stand99999999999.jpg


tower_stand999999999991.jpg
 
Looks great! It makes the older generation so greatful to have a stand like that. My grandpa has 2 and without them, he wouldn't spend nearly as much time hunting. He's able to stay warm and comfortable! It's a priceless thing to do for your father!
 
Looks great! It makes the older generation so greatful to have a stand like that. My grandpa has 2 and without them, he wouldn't spend nearly as much time hunting. He's able to stay warm and comfortable! It's a priceless thing to do for your father!

I bought him 9 popup blinds, a crossbows and made him a cocking device since couldn't @#)(# it with one hand. I doubt he would hunt if I didn't spend the fall at the farm and make it convenient for him. The 5 stints in the heart and two carotid artery surgeries has him on blood thinners. He cant tolerate the cold any more so this insulated blinds lets him stay out longer.
 
cost and since I had a lot of extra food quality exterior house paint, I painted the heck out of it.
 
I bought him 9 popup blinds, a crossbows and made him a cocking device since couldn't @#)(# it with one hand. I doubt he would hunt if I didn't spend the fall at the farm and make it convenient for him. The 5 stints in the heart and two carotid artery surgeries has him on blood thinners. He cant tolerate the cold any more so this insulated blinds lets him stay out longer.
That's a very selfless thing to do. Like my grandpa I'm sure he's so greatful to be able to extend he's years hunting! My grandpas cross bow has one of the cranks to draw it, it's simple and he can do it as many times as he wants lol
 
Well thought out design but a u haul?.....figured you'd've built your own. ; )
 
Ive since bought a trailer that size and then did a modify so I no longer have to rent a u haul. That is another thread I will post at some time.
 
Back
Top