


Navigation
Install the app
How to install the app on iOS
Follow along with the video below to see how to install our site as a web app on your home screen.
Note: This feature may not be available in some browsers.
More options

You are using an out of date browser. It may not display this or other websites correctly.
You should upgrade or use an alternative browser.
You should upgrade or use an alternative browser.
Container Cabin Build
- Thread starter npaden
- Start date

HowaHunter
Active member
This is awesome! Thanks for sharing.

npaden
Well-known member
Last bit was getting some site prep work done. The place where these will be going it is very sandy. I got some quotes on materials and turn key options on putting in a 40x60 pad to place both of the containers on. One guy that is local quoted $500 per semi for some millings and dirt mixed that he said would work perfect for a foundation for these plus some parking in front. He said 4 loads would be plenty to build it up 6" and for $1,500 he would smooth it out and pack it down. Ended up with a surprise of an extra $400 to water it down as they spread and packed it in lifts but still don't think that was terrible. I could have done the spreading and packing but not sure he would have given me the same price of the material delivered if he didn't smooth and pack it and I doubt they would have waited a couple hours between loads for me to get it smoothed and packed. So $3,900 for the site preparation.
They had some truck trouble so I ended up leaving before they started delivering the gravel/millings/dirt mix but my trail camera got some pictures of it. The trail camera got overloaded with pictures so I didn't get the last load being delivered and watered in but they told me it was 4 loads and I believe them. Still haven't been able to go up there and see the finished product yet. This weekend is going to be a true labor day for me and have at least one trip up there planned so will get some pictures of it although it might already have both containers parked on it by then.
Anyway here's some pictures of the site prep.
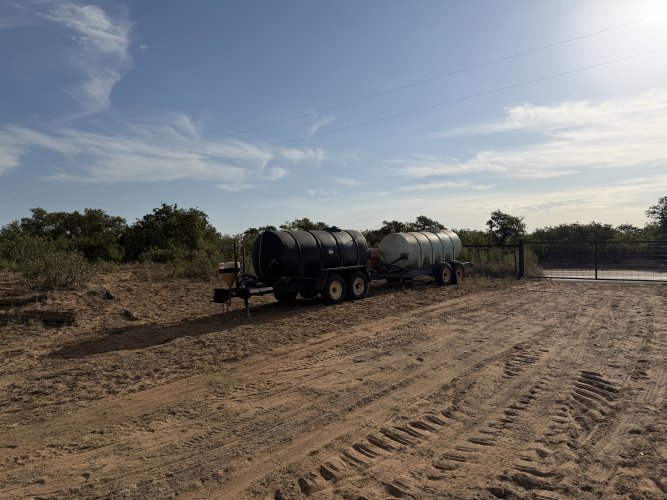
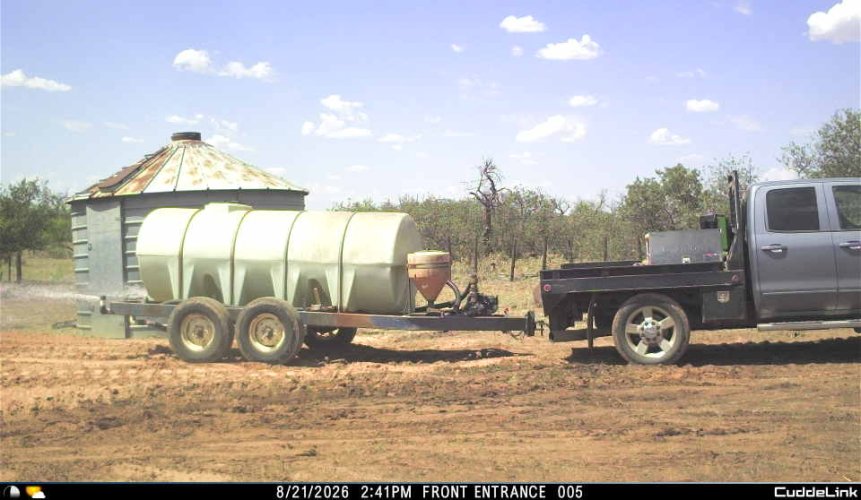
2,000 gallons of water to help pack it down. They used every drop.
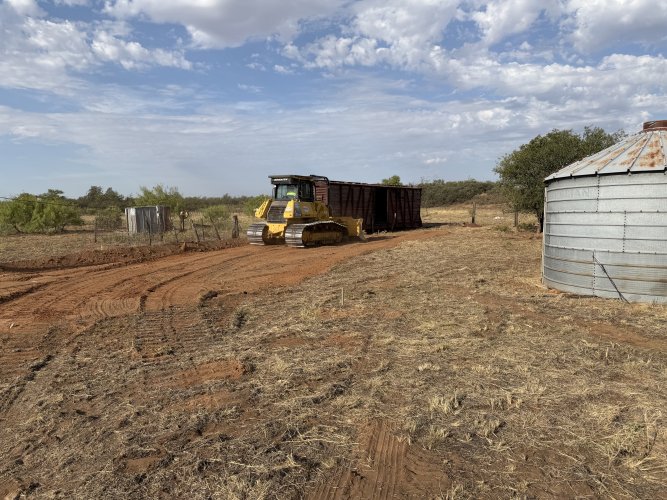
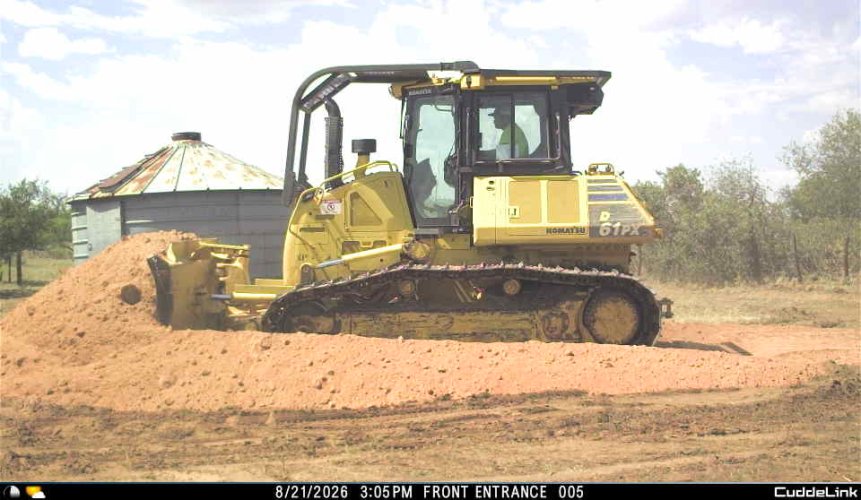
Maybe a little overkill on the size of the dozer. There was a little confusion that they were going to take some trees down so very glad that I was up there to show them exactly where I wanted it.
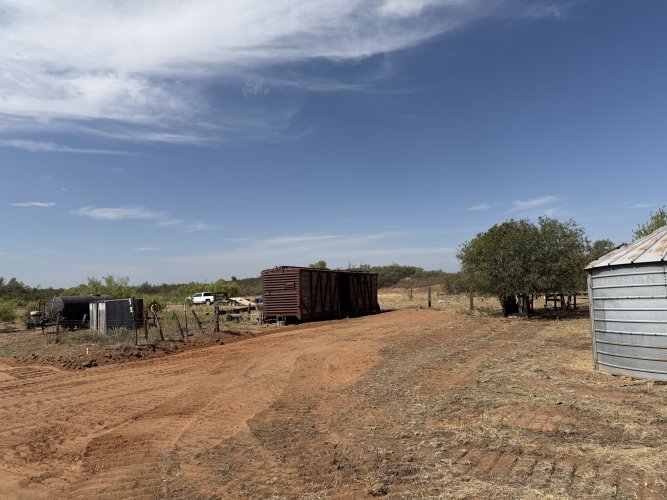
Just getting it leveled out a bit before the material comes in. That's my truck and trailer in the background, I hauled my tractor up there for some other chores.
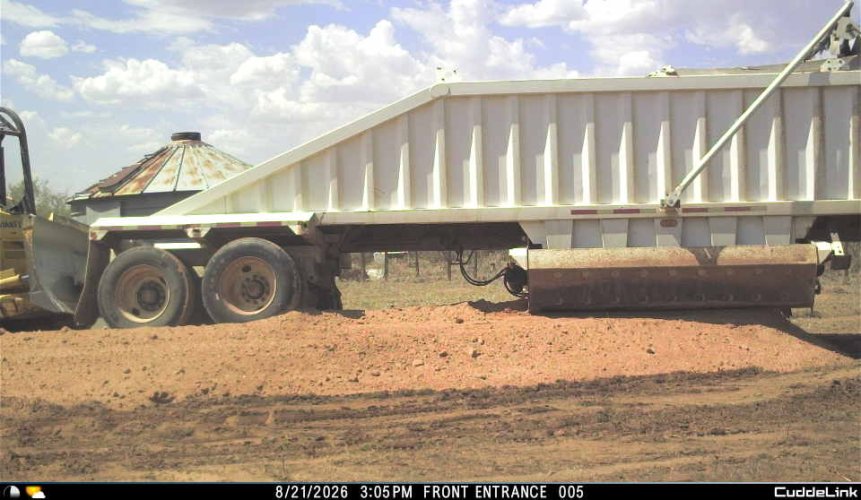
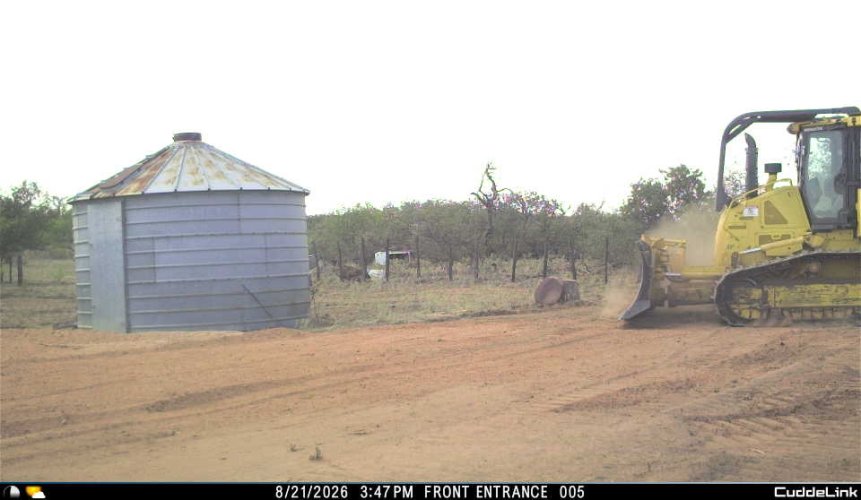
Was interesting seeing them getting the semis in and out of there. They sure can get them in and out of some tight spots. Here is one of the trucks dumping after it went around the grain silo. I wasn't there so not sure if the truck got stuck and the dozer had to help it out or what.
Smoothing out the dirt.
Watering it down.
Last picture I got before the camera got overloaded with pictures. They had one more load after this.
Not sure what "millings" were in there - I thought that would be asphalt but obviously this wasn't asphalt. He said that it would set up very firm and for sure it it was better than the loose sand that was there.
Last big decision on this part of it is how far apart to set the containers. Right now I'm leaning toward 23'4" so if I wanted to down the road I could set some 24' rafters between the containers for shade and a parking area.
They had some truck trouble so I ended up leaving before they started delivering the gravel/millings/dirt mix but my trail camera got some pictures of it. The trail camera got overloaded with pictures so I didn't get the last load being delivered and watered in but they told me it was 4 loads and I believe them. Still haven't been able to go up there and see the finished product yet. This weekend is going to be a true labor day for me and have at least one trip up there planned so will get some pictures of it although it might already have both containers parked on it by then.
Anyway here's some pictures of the site prep.
2,000 gallons of water to help pack it down. They used every drop.
Maybe a little overkill on the size of the dozer. There was a little confusion that they were going to take some trees down so very glad that I was up there to show them exactly where I wanted it.
Just getting it leveled out a bit before the material comes in. That's my truck and trailer in the background, I hauled my tractor up there for some other chores.
Was interesting seeing them getting the semis in and out of there. They sure can get them in and out of some tight spots. Here is one of the trucks dumping after it went around the grain silo. I wasn't there so not sure if the truck got stuck and the dozer had to help it out or what.
Smoothing out the dirt.
Watering it down.
Last picture I got before the camera got overloaded with pictures. They had one more load after this.
Not sure what "millings" were in there - I thought that would be asphalt but obviously this wasn't asphalt. He said that it would set up very firm and for sure it it was better than the loose sand that was there.
Last big decision on this part of it is how far apart to set the containers. Right now I'm leaning toward 23'4" so if I wanted to down the road I could set some 24' rafters between the containers for shade and a parking area.

Jack Ryan
Well-known member
Screw a long thin board on the line where the bottom of the top cabinets will be. Just a screw at each end is enough. That is easier to get straight and all level on the same line.Really getting close to caught up now. These are all from this weekend.
Got the paneling all put up for the walls, got the cabinets screwed to the wall and shimmed. That gap at the top of the last piece of shiplap is giant but I double checked and my 1x2 trim will JUST cover it. I wanted to match the shiplap lines up and that was about the only way to do it only using 2 sheets.
View attachment 415865
Got the countertop down and the backsplash on. The cinder blocks are holding the backsplash tight against the wall as the only thing holding it on is silicone. Got the wall cabinet hung.View attachment 415866
View attachment 415867
Big mistake this weekend was putting the backsplash on BEFORE cutting the hole out for the sink. Because I put it on there first, my jigsaw couldn't get close enough to the back of the counter to get the hole cut. I tried moving the template forward far enough to get my jigsaw back there but then it was too far forward and didn't stay on the inside of the cabinet. Cutting the rest of the counter out took like 3 or 4 minutes. Cutting the back 33" out took me almost an hour with the oscillating saw. Cutting through a 1 1/2" laminate countertop with an oscillating saw isn't fun.
View attachment 415889
But I got it done. Got the paneling up in the bathroom also and the 1x2 trim around most of the ceiling. Bathroom vanity isn't installed, just checking how it is going to look.
View attachment 415868
T
Then put up one cabinet at a time setting on the "helper" stick. With minimum screws. Then screw the cabinets together and put the rest of the screws in the wall.

Forkyfinder
Well-known member
- Joined
- Dec 13, 2023
- Messages
- 6,270
Cool. I wouldnt change a thing - looks great.

npaden
Well-known member
One last post and then I'll go back and answer questions.
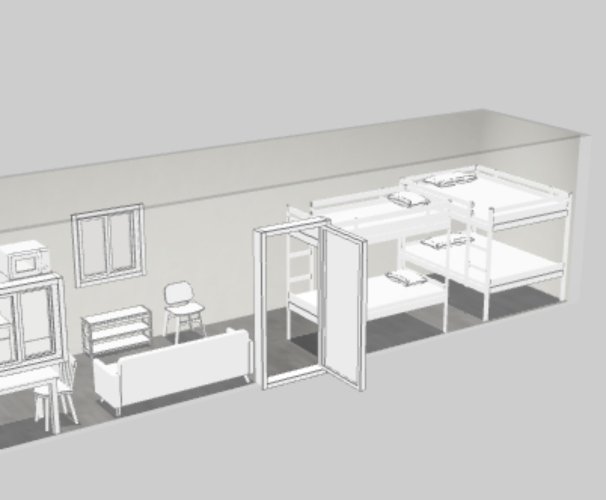
Here's the latest 3D renderings of the it with pretty much the current planned layout.
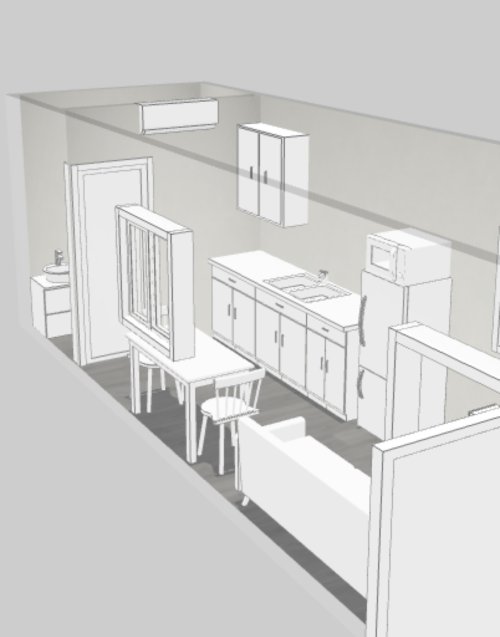
This is correct for the sleeping part except the middle twin bunkbed is going to be a loft with a futon under it.
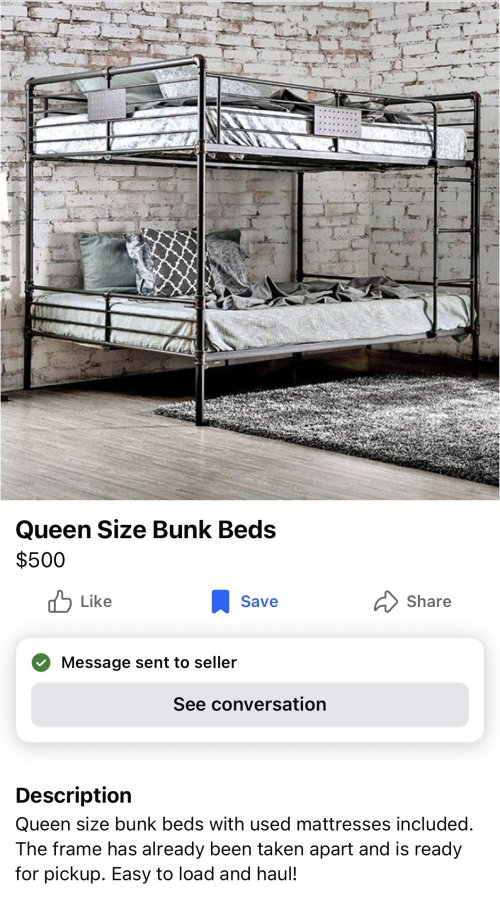
Actually picked up this queen bunk bed setup with mattresses that was practically brand new for $400 off Facebook Marketplace.
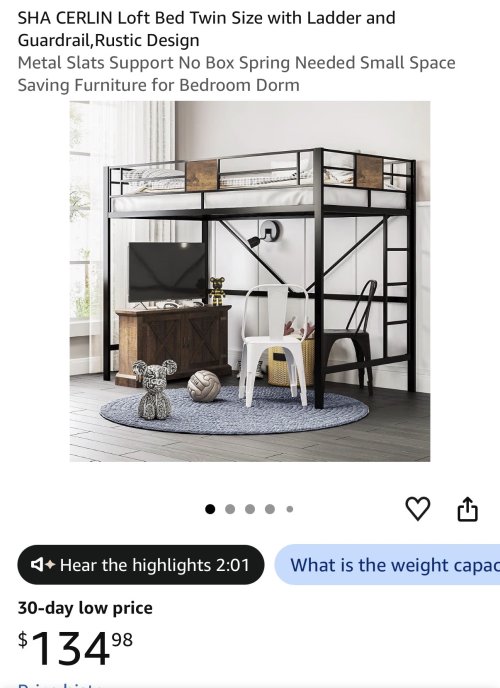
And here is the loft bed I got. Found it on Marketplace for $50.
For the dining table I bought another 52" long laminate butcher block countertop that I'm going to put some legs on and use for a table. Keeping it narrow is for sure the requirement there. I looked into making it a drop down table but just didn't think it would be sturdy enough.
Got a propane outdoor instant water heater that I spent too much on but seems like most of those are junk reading the reviews so figured it would be worth it to go with good one right off the bat instead of messing around with the crappy ones.
Have a 12,000 btu 230v mini split that will go on that accent wall at the end of the kitchen. Did the precharged but still have to pull a vacuum type one.
Have about talked myself into putting in my own septic. That's legal in Texas and I have the excavator so might as well put it to use. With the sandy soil the perc is very good but still probably going to overkill it a little with a 1,000g tank and 60' of chambers. Have to trench about 100' further than I would have thought to clear an old abandoned well just to be safe.
Might try to put the floor down tonight. Might not.
Oh yeah, on my other container I ended up springing the big bucks for a people door on it too.
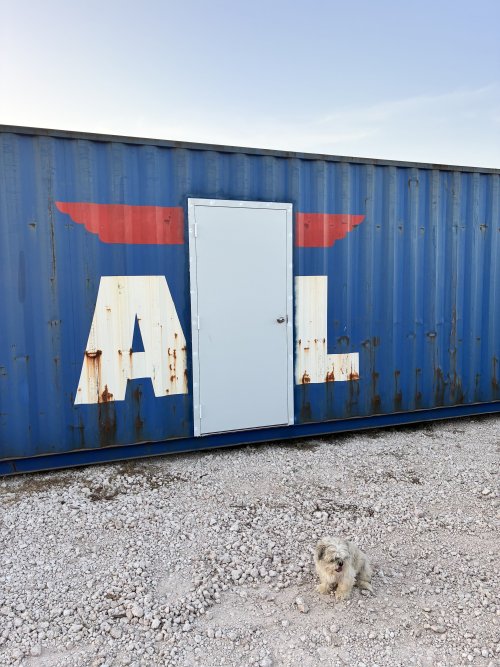
Kind of patriotic looking!
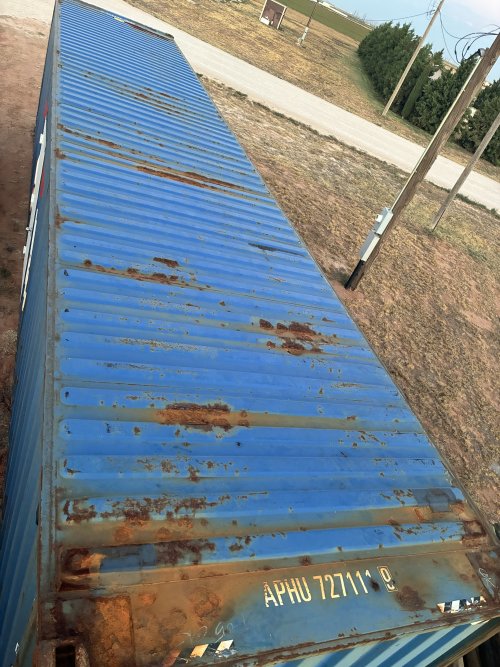
Also decided to try some of the white elastomeric roof coating on the non cabin one to keep the temperature down in it. Guy with the containers quoted me $500 to put it on for me. Roof has some rust spots so having him put some rust converter on it first before the roof coating.
Think that's it. Have a bunch I need to get done today but was nice to get sidetracked for a bit posting this.
Here's the latest 3D renderings of the it with pretty much the current planned layout.
This is correct for the sleeping part except the middle twin bunkbed is going to be a loft with a futon under it.
Actually picked up this queen bunk bed setup with mattresses that was practically brand new for $400 off Facebook Marketplace.
And here is the loft bed I got. Found it on Marketplace for $50.
For the dining table I bought another 52" long laminate butcher block countertop that I'm going to put some legs on and use for a table. Keeping it narrow is for sure the requirement there. I looked into making it a drop down table but just didn't think it would be sturdy enough.
Got a propane outdoor instant water heater that I spent too much on but seems like most of those are junk reading the reviews so figured it would be worth it to go with good one right off the bat instead of messing around with the crappy ones.
Have a 12,000 btu 230v mini split that will go on that accent wall at the end of the kitchen. Did the precharged but still have to pull a vacuum type one.
Have about talked myself into putting in my own septic. That's legal in Texas and I have the excavator so might as well put it to use. With the sandy soil the perc is very good but still probably going to overkill it a little with a 1,000g tank and 60' of chambers. Have to trench about 100' further than I would have thought to clear an old abandoned well just to be safe.
Might try to put the floor down tonight. Might not.
Oh yeah, on my other container I ended up springing the big bucks for a people door on it too.
Kind of patriotic looking!
Also decided to try some of the white elastomeric roof coating on the non cabin one to keep the temperature down in it. Guy with the containers quoted me $500 to put it on for me. Roof has some rust spots so having him put some rust converter on it first before the roof coating.
Think that's it. Have a bunch I need to get done today but was nice to get sidetracked for a bit posting this.
Last edited:
npaden
Well-known member
I love these show as you go threads.
Would you ever consider a cover over your house to add summer time shade?
I'm looking forward to considerations given to awnings, porch, exterior lighting and electrical as well.
Thanks. I'm trying to plan for some type of cover between the 2 containers. Not sure I will do it right away but don't want to have to try to move them around down the road if I do. Right now planning on them being 23'4" apart so that I could put a 24' roof on them if that's what I decide to do. Was originally planning on 20' between them but decided that might not be quite wide enough.
I have never seen 2x4's like that before. Looks like a great start to a cabin. Between work and age I am getting into the era where I don't mind paying to have stuff done also especially if it will save me some time
I think they are called engineered 2x4's. I don't think they are quite as good but I think they are pretty close. For this project they really aren't doing anything other than providing something to screw OSB into and hide electrical wire and plumbing so I think they will be more than adequate. I also find that paying to get it done sometimes is the way to go.
I might be a little aggressive there but have also been looking at it in 3D. The toughest part to visualize is going to be that little sitting/congregating area to the left of where you come in the door. I may have to play around with some actual furniture pieces there to figure out what works. Having a small shelf or something there will give you something to set stuff on when you come in so it doesn't immediately go on a couch or chair.Looks great. Looks like price wise it beats about any option to have a cabin short of cutting logs on site.
I do think you sold yourself a bit short on the interior drawing. Likely a little bit less furniture will fit than your drawing shows.
I know the container houses can come out well. A lot of job sites here have ones they buy commercially made. Very common for onsite offices but bunk units also are common in construction.
I think when it is all said and done with the excellent pricing the container guy has given me on the labor I'm going to come in at about 1/2 the price I've seen the commercial versions selling for and it has features that I like better.
I kind of thought it would be nice to have it darker back there but I went back and forth. At the time I was making my decision on the windows my drawing looked like this:Looks cool! Any reason you didn’t put a window in the sleeping area? Seems that would be a good idea both for full compartment ventilation and airflow, as well as fire safety.
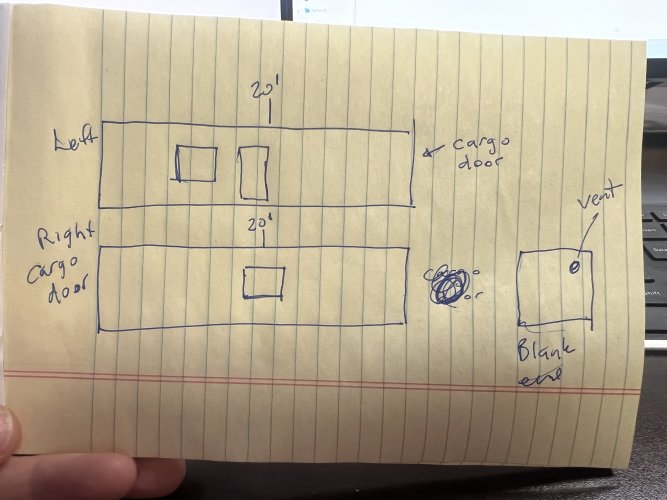 Looking at it now I probably should have added one on the other side of the electrical box. Hopefully with the door right in the middle no one should have to go through a window to get out. From ventilation perspective I doubt the windows are open very often but they could be in the fall.
It will be a little cramped. Not planning on living there full time. Seems kind of luxurious compared to a tent or even a travel trailer. I'll have another one for storage. I did look briefly at tying 2 of these together but by that time you might as well build a barndominium.Very nice, I love the container stuff that people do now....I only see one issue, I think you should have used 2 of them and not just one, but that is the great thing, you can add on another one later if you like. It just seems a little cramped.
I went back and edited it, I had a brain fart there. I do plan on having the channel for the pocket door to close into. Just running them as high as the door though.Why can you not hide that cut under a piece of base as well? If it were me, I would run 2 pieces of trim vertically as door stops, creating a channel for the pocket door to close into. You could run them floor to ceiling and then butt your base into them. Pocket doors don't seal up very well anyway, so that would help immensely with privacy in the bathroom.
I would love it if they made some "wide body" containers, even an extra 6" would be very nice. The main reason for the container is that they are rodent proof. Seems like mice are always a problem for rural cabins or trailers and trying to avoid that with the container. I'm thinking in the ballpark of $35k for everything including the 2nd container for storage. Probably going to end up closer to $40k though.Neat project but not fond of the narrow floor plan.
I'd be curious to see the all in price of the project once you have it in place, hooked up to water, sewer, electric, etc.
Hope it works out for you.
That's one other reason that I'm doing the container. I just bought this land by Paducah and am not 100% it is my forever land. If I find something somewhere else it really won't be that big of a chore to get it picked up and move it.I love these build threads! In the end you are going to have something so much better than the typical RV that gets parked somewhere.
Last edited:
Wyoming270
Well-known member
- Joined
- Jul 9, 2026
- Messages
- 328
I think your beating out the commercial units for sure. And you could start simple for a roof, some joints and sheet steel or tarps. you put a sturdy roof between them, then do a couple simple sides at the end, that might enough for parking your 4 wheeler on its own. make a great workshop or covered sitting area for sure.

Lmartin5
Well-known member
- Joined
- Dec 23, 2025
- Messages
- 603
I like it!
npaden
Well-known member
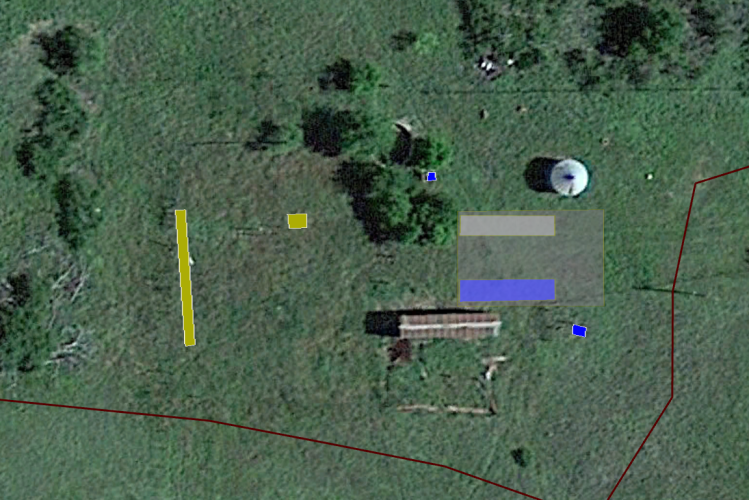
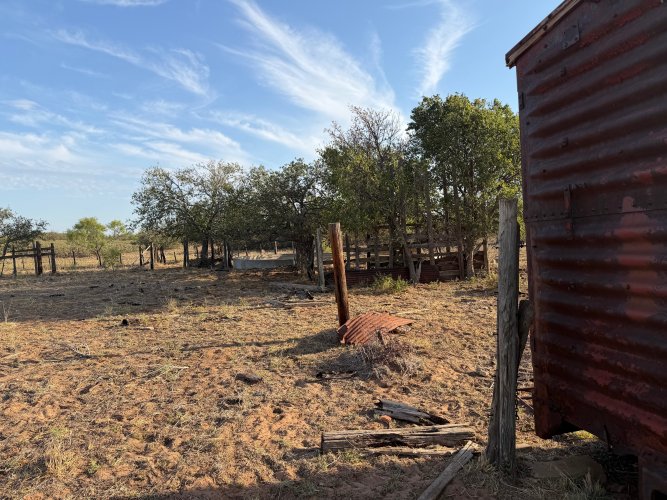
Okay - here's a mark up on google earth where the containers and gravel pad are going to be. I can't decide on that old railroad box car. It's floor is pretty much gone but it kind of looks cool. From a sheer practical perspective I should probably tear it down. The storage container is going to end up about 6' from it. Probably need to move it to 8' so i could get a tractor through there and mow. But then things start to get tight on the other side with the grain silo. Kind of the same thing with it, it kind of looks pretty cool but that's about it. I could probably figure something to do with it but right now there is just a bunch of very old cotton seed in it that is going to be a pain to clean out. Don't think it has a cement floor or anything.
The 2 dark blue squares are wells. The one to the north behind the containers is abandoned, that's the one that is causing me to have to move the septic and drain field way back. The tank has to be 50' from any existing or abandoned well and the leach field has to be 100'. The little yellow square is where the tank is going and the long skinny yellow rectangle is where the leach field is going to be. There's about 14" drop needed to get to the tank at the right slope so going to have to have some risers to get it closer to the ground in case I ever have to do any maintenance or anything on it. Might move the tank further south so the drain from the cabin doesn't have to deal with those trees.
Plan is to trench with my 24" bucket from the well to the electric pole then over to the grey container for both water and electricity. Both will be in conduit and I'll put the water line in first then push a little dirt in and then put the electric on the other side of the trench. AI said I should buy some warning tape and put it in the trench about 12" above the lines and that sounds like a good idea to me.
Going to go with aluminum wire from the pole to the container about 90' to save on money but from the pole to the well will be copper. It's only about 50'. Going to just use 1" PVC for the 160-170' of water line. At the flow rates I'm looking at it should be fine.
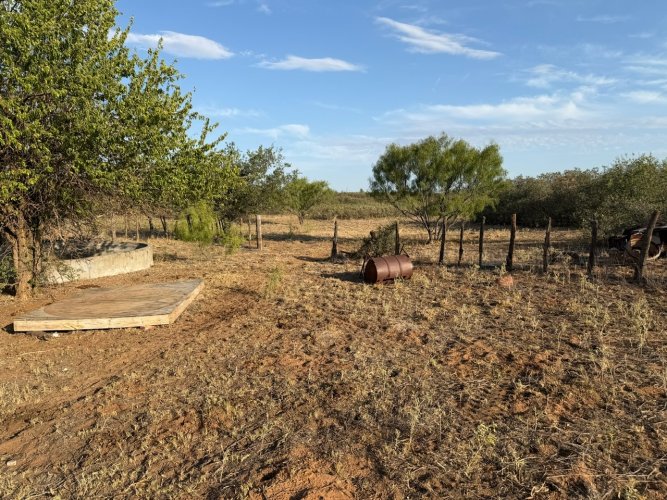
Going to take my little dump trailer up there at some point and clean up around the area. Lots of old junk laying around.
The 2 dark blue squares are wells. The one to the north behind the containers is abandoned, that's the one that is causing me to have to move the septic and drain field way back. The tank has to be 50' from any existing or abandoned well and the leach field has to be 100'. The little yellow square is where the tank is going and the long skinny yellow rectangle is where the leach field is going to be. There's about 14" drop needed to get to the tank at the right slope so going to have to have some risers to get it closer to the ground in case I ever have to do any maintenance or anything on it. Might move the tank further south so the drain from the cabin doesn't have to deal with those trees.
Plan is to trench with my 24" bucket from the well to the electric pole then over to the grey container for both water and electricity. Both will be in conduit and I'll put the water line in first then push a little dirt in and then put the electric on the other side of the trench. AI said I should buy some warning tape and put it in the trench about 12" above the lines and that sounds like a good idea to me.
Going to go with aluminum wire from the pole to the container about 90' to save on money but from the pole to the well will be copper. It's only about 50'. Going to just use 1" PVC for the 160-170' of water line. At the flow rates I'm looking at it should be fine.
Going to take my little dump trailer up there at some point and clean up around the area. Lots of old junk laying around.

Wildabeest
Well-known member
I’d probably move it out by your septic if you decide to keep it. Maybe turn it 90 degrees and put the north corner between the septic tank and that little group of trees. Making somewhat of a disconnected U shape with your new containers. Just a thought.I can't decide on that old railroad box car.
Last edited:

Thanks for such an interesting thread, despite being filled with terms I don’t understand and guys doing things I have no idea how to do, but just utterly fascinating.
How hot does it get inside when it’s 100’ outdoors? And I haven’t seen any mention of HVAC (unless my super-not-handy self just missed it)?
How hot does it get inside when it’s 100’ outdoors? And I haven’t seen any mention of HVAC (unless my super-not-handy self just missed it)?
Comment regarding the bunk beds. I put bunk beds in my cabin and nobody over the age of about 40 will use the top bunks. They prefer to sleep on the couch or a cot rather than crawling up into a top bunk.
No problem for kids, but not so great for older adults.
No problem for kids, but not so great for older adults.

noharleyyet
Well-known member
Cool thread Nathan, fond memories from Cottle county whitetail hunting.
npaden
Well-known member
Kind of the idea for the whole thing. Last year once I bought the place I quickly realized that I needed to be shooting a LOT of does. Like 5 or 6 a year just to stay even. So I asked around and had a couple dads who were excited to take their younger kids out to shoot some does.Comment regarding the bunk beds. I put bunk beds in my cabin and nobody over the age of about 40 will use the top bunks. They prefer to sleep on the couch or a cot rather than crawling up into a top bunk.
No problem for kids, but not so great for older adults.
I wasn't up there for them to use my 5th wheel so one of them tent camped on the place and the other drove up there in the very wee hours of the morning and hunted until dark. Both of them got 2 does so that part was good, but I just felt a bit odd having them camped out up there. And the bathroom facilities (zero) were less than ideal so that involved driving into town and using a gas station. All things that I've done many times, but one of them has a girl who has some interest in hunting and thought that might not be ideal for her and another friend has asked to take his daughter turkey hunting this spring and it became apparent that unlike my old place that was 95% of the time just me or me and my son, this new place had opportunities for others to enjoy it as well without really affecting the 1 or 2 bucks a year that I would want to target.
So I'm spending time and money to essentially create a place for others to enjoy. I'll still get to enjoy it and I've felt pretty good building it that I still have a few skills from my teenage years but a lot of the design and layout is centered around people taking their kids up there to shoot does. If I make it a nice and fun place for them to have a good experience I think I will feel a lot better about it.
Spending some $ putting in a couple nicer blinds too. Didn't think I would ever be doing that. I've always built them out of 2x4's and plywood. Putting in an All Seasons Big Chingon and Little Chingon with the 2" insulation in the walls. Want the kids to be cozy right?
I'm the only one I can think of over the age of 40 that will be using it so hopefully the bunk beds will work out.
Last edited:
npaden
Well-known member
I feel like a rookie builder, I was messing with the click-lock flooring last night and spent the entire time figuring out how to cut it and click it together. Kind of tricky that the cut ends 100% have to go against a wall because the middle has to be a factory right side and factory left side to click into place. The ones I used as spacers setting my baseboard height got mashed a bit so they don't click anymore so I may end up having to buy another box with the extra waste from the way they have to go together and from losing a few planks to test fitting. I ended up drawing out a template of how I'm going to cut each plank and where the other side will go and still going to end up with more waste than I would like.Thanks for such an interesting thread, despite being filled with terms I don’t understand and guys doing things I have no idea how to do, but just utterly fascinating.
How hot does it get inside when it’s 100’ outdoors? And I haven’t seen any mention of HVAC (unless my super-not-handy self just missed it)?
100% for sure it is going to have a nice mini-split blowing the length of the container from that accent wall at the end of the kitchen. Just not going to install it until it is up there so I've been sweltering in the container. With the insulation it is probably 10 degrees warmer than outside without any airflow but if I can get the big doors open and a breeze going through it's not bad. But the last 2 Saturdays working in there I lost 5lbs one day and 3.5lbs the next. Too bad it all comes right back once I get rehydrated.
npaden
Well-known member
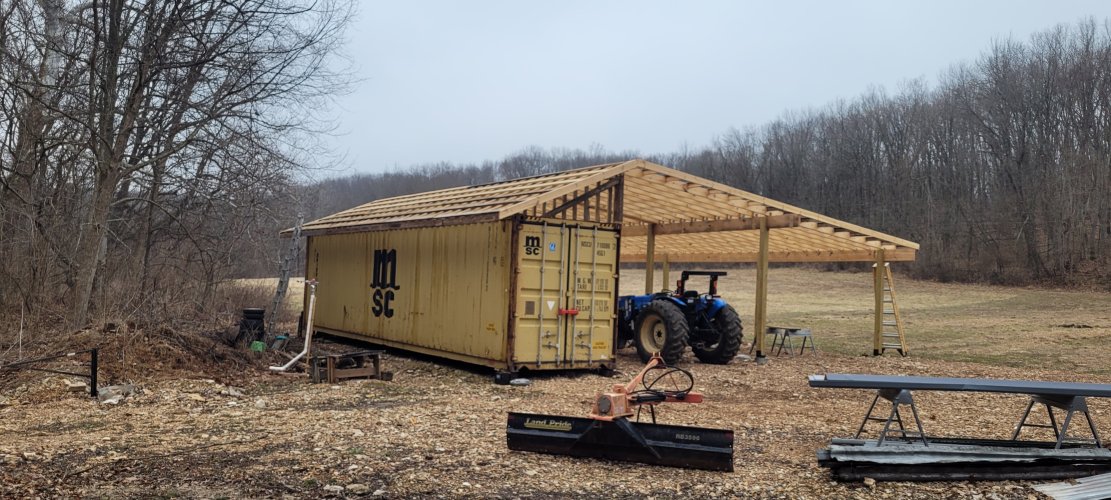
I've gone back and forth and back and forth on the cement pads. Would have been cheaper than bringing the gravel/millings in by far, but I think it is going to be really nice having that area packed in and not so sandy. The sand there is fine if you drive over it one time every now and then but if you continue to drive over it you start to sink pretty quick. Neighbor told me that it isn't a matter of "if" I'm going to get stuck out there, it is a matter of "when". So far I've been cautious and kept my momentum going anywhere it is really soft, but if you just park and come back and start to go I've had to put it in 4 wheel drive a couple times on flat ground to get moving again without digging in.I highly recommend pouring footing for the 4 corners of the container. I hung a lean to off mine to keep my farm equipment under shelter. Still need to sheet it with tin
View attachment 415927
I looked at a few different types of blocks and pavers to just put in the corners but they really don't make any big enough to do much good. I figure once it is set if I get any settling problems down the road I can just pick it up with the excavator or hydraulic jacks and pour some cement under it.