Yeti GOBOX Collection

Brain tanned bison hide

MT Bound

Well-known member
Joined
Nov 20, 2014
Messages
551
Location
MT
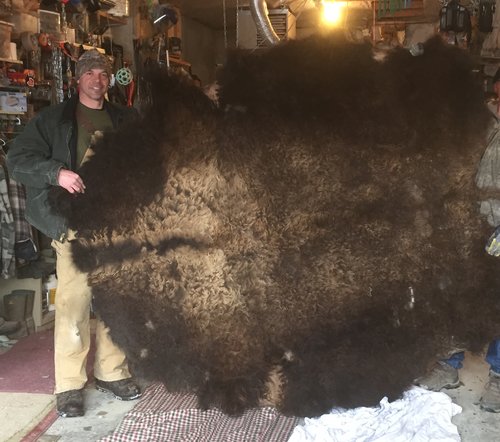
For those that may be interested, I attempted my first brain tan this winter. The bison hide was given to me, so I figured what the heck might as well try it.
Here’s the basic steps
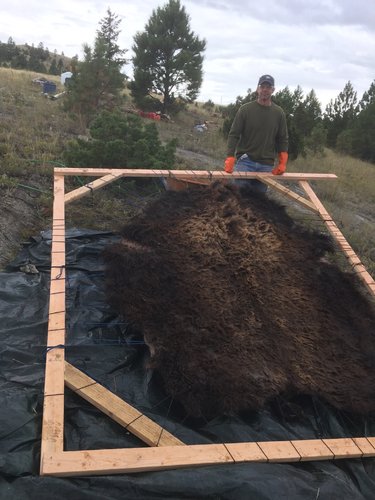
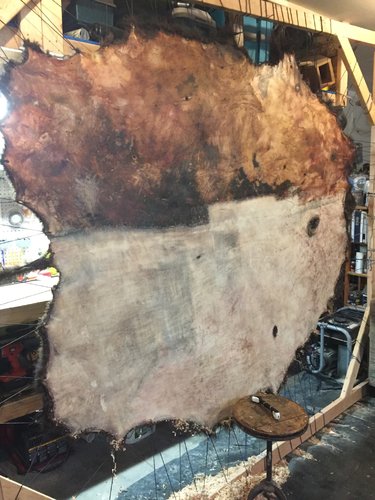
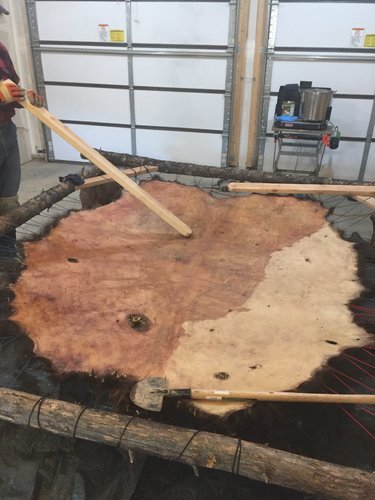
1. Stretching and fleshing, took us a few hours (half a day) to get all the extra stuff off the skin
 

Attachments

  • 3B8A34F6-FB7F-43D5-B1A4-4FF4CB7425B2.jpeg
    3B8A34F6-FB7F-43D5-B1A4-4FF4CB7425B2.jpeg
    831.9 KB · Views: 34
2. Let the skin dry and start the long process of dry scraping. I would do an hour or 2 a night, probably had at least 20 hrs in on this step.
I also forgot the salting step prior to step 1, salted it down good and rinsed it prior to fleshing
 

Attachments

  • 3CE45D0C-3AE4-4AD5-A2C4-0A20B63F84C7.jpeg
    3CE45D0C-3AE4-4AD5-A2C4-0A20B63F84C7.jpeg
    829.7 KB · Views: 25
4. Apply brain tan solution, glad I saved some from the elk this year might not had enough. As it dried I would break the hide as it turned to leather, it took days not hours like I thought it would and as reference material says. If I had more time to work it the leather would’ve been more soft
 

Attachments

  • 066708EB-E0BF-4A37-A04C-8B29CA1DD743.jpeg
    066708EB-E0BF-4A37-A04C-8B29CA1DD743.jpeg
    963.8 KB · Views: 28
Final product. Lessons learned, should’ve sewed up the holes right off after fleshing, and more time working hide after tan, but overall for the effort I put into it I’m glad it worked out. My worst fear was that’s it would be a big flop after all those hours
Far from a professional product but it’s preserved, so I guess that’s a success
 

Attachments

  • AAAB4011-7B56-4B30-ADD8-4768290925C2.jpeg
    AAAB4011-7B56-4B30-ADD8-4768290925C2.jpeg
    1,010.6 KB · Views: 45
Last edited:
Cool! Was it worth using the brain, or would you do a commercial tanning solution in the future?
Yes I think so. I've used chemical tanning sol'n on 3 whitetail hides and some fox & mink in the past. I think the brain worked just as well. Biggest thing w/the bison is the hide is so dang thick, takes alot to thin it down and break it
 
4. Apply brain tan solution, glad I saved some from the elk this year might not had enough. As it dried I would break the hide as it turned to leather, it took days not hours like I thought it would and as reference material says. If I had more time to work it the leather would’ve been more soft

Super interesting, was wondering about the softness/pliability
 
Did you do anything to clean the Hairside? Fleas, ticks, lice, debris?
 
Did you do anything to clean the Hairside? Fleas, ticks, lice, debris?
No not really. I got the hide in May and threw it straight in the freezer until August when we fleshed it. I think the deep freeze killed any critters. There was alot of dirt in the hide that got beat out of it throughout the process, it could probably use some more cleaning but I'm gonna leave it as is and probably use it as a throw rug in the bonus room.
 
Yes I think so. I've used chemical tanning sol'n on 3 whitetail hides and some fox & mink in the past. I think the brain worked just as well. Biggest thing w/the bison is the hide is so dang thick, takes alot to thin it down and break it
That old crippled up guy Tom on that show "Mountain Men" makes it look easy.....yeah, right. Good Job on the Hide, looks great.
 
how much space do you have between the holes where you put the cords to stretch it on the frame? how far back from the edge did you put them?
 
you can flesh it before you string it up on a regular fleshing beam like trappers use. A good fleshing knife will make it a lot easier.

Look for fleshing knives with brand name of:

Post

or

Caribou


Those two are about as good as it gets.
others include


Necker

or

Sheffield


After you get it fleshed and laced up, let it dry good and hard. Then you can clean it up and even out the thicker areas with a palm sander and coarse grit sand paper.


Save the rawhide sandings and such. you can boil them to make hide glue.
 
Very cool. Forgive the ignorance but what is the purpose of the smoking process? You planning on making a rug out of it or something else?
 
how much space do you have between the holes where you put the cords to stretch it on the frame? how far back from the edge did you put them?
oh maybe about 4-6" between holes, and we poked the holes about an inch or so from the edge. Not very exact or scientific, just kinda winged it! I could trim that entire edge off but for now I'm going to just leave it.
 

Forum statistics

Threads
111,045
Messages
1,944,813
Members
34,986
Latest member
tinhunter
Back
Top