Hunt Talk Radio - Look for it on your favorite Podcast platform

Sous Vide Deer European Mounts

jt13

Well-known member
Joined
Jul 13, 2017
Messages
1,549
Location
PA
Hey guys, I'm working on my first attempt at a doing my own Euro mounts. After being quoted $400 to do a cow elk skull and a mule deer skull I figured it was time to learn. I saw a few threads posted in regards to this kind of thing but figured I'd get my own going so folks can follow along if they're interested.

Step 1: Removed hide, bulk of head meat, and lower jaw.
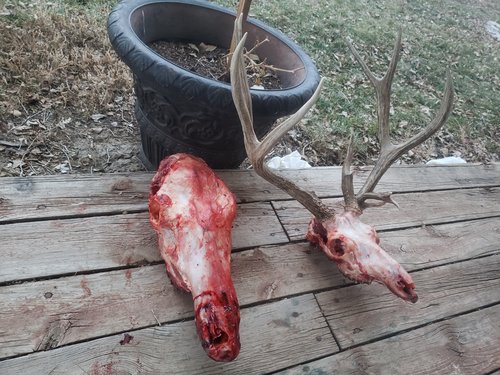
20191112_163043.jpg

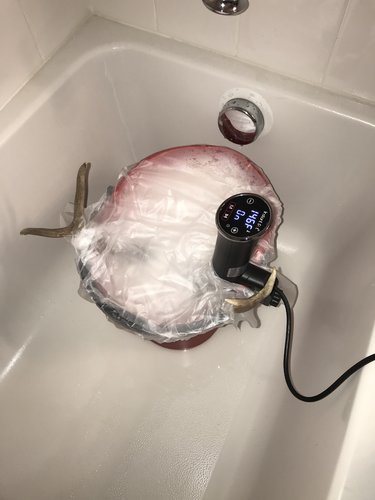
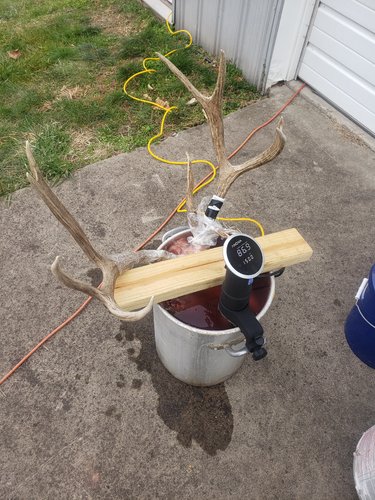
Step 2: Both heads in pot at 150 degrees. Antler bases wrapped in plastic. Dawn dish soap added to water.
20191118_142844.jpg

Step 3: Wait.......

Will see how they look tomorrow at about 24 hours in the pot!
 
Sous vide, huh, never thought of that.
Subscribed!
P.s. Very cool muley you are going to show pics of the extras right!?
 
I have done a few this way and have a few in garage from the last couple weeks that need done now. I believe I did 145* for like 12 hours, then power washed the meat and brains off the best I could then did another 8 or so hours. I used powdered OXI Clean soap and did mine in an old plastic igloo cooler. Please post any tips that helped and I will do the same as I get going on mine soon. A very small flat blade screw driver worked about as well as anything for picking the meat out of all the tiny crevices. When done and dried for a few days I then used a beauty salon bleach cream to whiten them.
 
Cool idea, that should guarantee you don't end up with accidental bleaching of the bases. Can't wait to see the results.
 
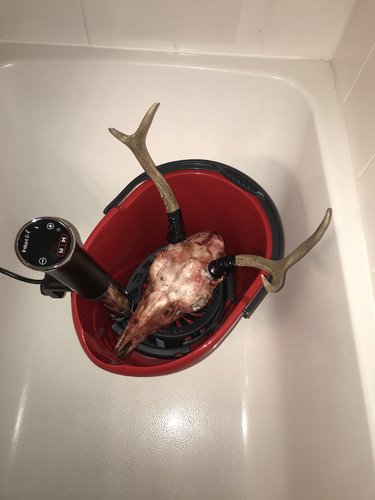
sous vide my little dinker buck last week. something like 145 degrees for 24, ended up being about 36 hours total, last portion at 130. i was generally following what @wllm1313 has been doing.

such a young buck the nose bones came loose, i'll be gluing them back on.

yeah, nose bones and teeth can come loose and fall out when working euro's, but that's my one tip so far - with young animals maybe don't do the marathon soaks in the sous vide. maybe i put in too much oxiclean? if i end up with another young buck next year i might do hotter and shorter, but will that really be different than cooler and longer?

I also tested out doing the 50v peroxide paste 1:1 ratio in water at 130 degrees for 10 hours or so. worked pretty well. there is some yellow around the skull plate where the bones fuse together I can't get rid of. i even did another paper mache wrap for 3 days that didn't get rid of it. maybe a day in the sun will.

next year, or if my late cow hunt this year is successful i'll keep her head and test out a 40v clear liquid peroxide at max sous vide temp for a rather short period, less than an hour.

doing all of this in the guest restroom bathtub of a rented condo is a pain, had to buy a new spaghetti strainer...

the mop bucket with the little plastic piece on the bottom to keep sort of let dirt settle out the mop and keep it from picking up dirt again was perfect for this little buck

open to suggestions here, people may find this helpful but this was a trial run for me. had this buck been bigger i'd be shelling out the money to not risk screwing it up

i haven't taken any after pictures yet. but can post some after i'm done.

IMG-5526.jpgIMG-5519.jpg
 
Last edited:
sous vide my little dinker buck last week. something like 145 degrees for 24, ended up being about 36 hours total, last portion at 130. i was generally following what @wllm1313 has been doing.

such a young buck the nose bones came loose, i'll be gluing them back on.

yeah, nose bones and teeth can come loose and fall out when working euro's, but that's my one tip so far - with young animals maybe don't do the marathon soaks in the sous vide. maybe i put in too much oxiclean? if i end up with another young buck next year i might do hotter and shorter, but will that really be different than cooler and longer?

I also tested out doing the 50v peroxide paste 1:1 ratio in water at 130 degrees for 10 hours or so. worked pretty well. there is some yellow around the skull plate where the bones fuse together I can't get rid of. i even did another paper mache wrap for 3 days that didn't get rid of it. maybe a day in the sun will.

next year, or if my late cow hunt this year is successful i'll keep her head and test out a 40v clear liquid peroxide at max sous vide temp for a rather short period, less than an hour.

doing all of this in the guest restroom bathtub of a rented condo is a pain, had to buy a new spaghetti strainer...

the mop bucket with the little plastic piece on the bottom to keep sort of let dirt settle out the mop and keep it from picking up dirt again was perfect for this little buck

open to suggestions here, people may find this helpful but this was a trial run for me. had this buck been bigger i'd be shelling out the money to not risk screwing it up

i haven't taken any after pictures yet. but can post some after i'm done.

It's definitely a trial and error process, I've found that you definitely have to alter time and temp depending on the critter. Also you can start hot and then lower the temp as you go.

In my experience there are basically dealing with fat, cartilage, and meat. You want to get it hot enough to cook off the meat, liquefy the fat, but preserve the cartilage. If you over do it the cartilage breaks down and the bones fall apart.

Everything is time and temp dependent.

In my experience >160 is the danger zone for over 3hrs, I haven't experimented a ton above this temp.

155 -> 24 hours max for an elk, then subtract time for smaller animals... maybe 2-3 hours for a small whitetail (also depends on how much meat you leave on

130- 145-> In this range you have to cook longer to get the same result as 155

125-> Minimum temperature to get the fat to liquefy.

120-> Good temp to break down the stubborn little bits in the nasal cavity that can't be reached. I did a bear skull at this temp for 10 days straight, in a bucket of ammonia on my deck.

I've tried a bunch of stuff, and Oxiclean powder is by far the best.


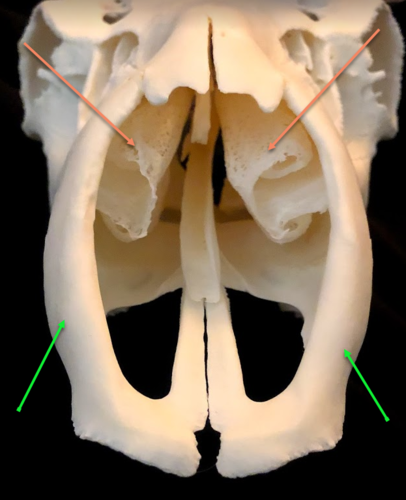
Did you lose the nose bones like the tubes (pink lines) or the nasal bone (green). The nasal bones come out all the time but they are really easy to glue back in the tubes... you're screwed.
1574264666529.png

As far as the yellowing that because your dealing with cartilage versus bone. I've noticed that it often turns white after you let it dry out completely (2 weeks). I also have found that for touch ups you can boil a small amount of v50 and paint it on a spot and it will quickly lighten it up over night.

Another thing to know is that lots of taxidermists will "cheat" and paint skulls with something like Elmer's glue to get a uniform color.
 
i lost the nasal bones, not the tubes. i had no fantasy about keeping the tubes intact nor knew I was not going to be patient enough to try.

i had considered but didn't put enough time in to thinking about how much differently i should treat a small skull over an elk skull. i did consider it though, 155 for 24 hours scared me a little bit so i backed off that idea.

following whitebone creations methods i'm also going to put on some mop glo at the end of it all. also provincial minwax to blend in the portions of the antler that lost color.

i don't necessarily mind an imperfect white if that's what ends up happening. it's a process of learning how to get it right and im simply just going to be proud of a little buck on the wall that i did myself. some off colors are just part of what gives it character in that context, to me at least.

your posts are always helpful wllm, thank you
 
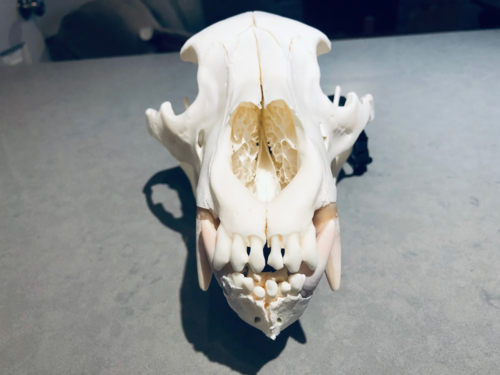
I always just pull the "tubes" and all of the nasal cavity out. Just cleaner to me. Sucks about the actual nasal bones, I've been interested in trying the sous vide method
 
@TOGIEGOAT Whitebone has some great videos, I think he and I have a bit different aesthetic tastes, i.e. I think having the nasal bones looks away better... especially on a bear, but overall he has tons of great info and produces amazing content.

I just love how that looks, the crazy patters of those bones, it's like looking at perfect snowflake or something.
1574267294414.png

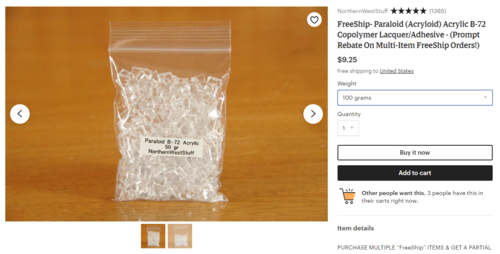
Per whitebone I have been using mop glow as well (especially good on pronghorns), but this year I have been playing around with paraloid B-72. Essentially it's a thermoplastic resin that's used by museums for fossils and bones (if you have a skull on your desk, or one that your kids are going to handle, maybe take to show and tell like a beaver or bobcat this is 100% what you want to use). Essentially you are putting a plastic coat around the bone, meaning that it won't collect dust as bad and you can wipe it down with a wet rag to clean. Also unlike other sealers it doesn't yellow over time.

Easiest place to get it is etsy, 100 grams will be enough to do a bunch of mounts (easiest if you do a bunch at the same time).

Basically you dissolve crystals in acetone (over night, 1-1.5 table spoon per cup acetone) and then either paint on (elk/deer/moose) or dip (bear/bobcat). I painted my elk from this year, stuff dries within 20-30 seconds, I went with a low concentration that has a matte finish to it.
1574267936309.png
 
I tried my sous vide on a pronghorn this year for the first time. 145 for about 36 hours. Kind of worked, as in my sous vide shut off on me. Turned it back on and it gave me some sort or error code. I took it apart and cleaned it up a little and it seems to be working alright. I think i will attach some wire mesh around the probe to help keep it clean next time. It was the cheapest one i could find so i am not too surprised. I am sold on the powerwashing vs picking though! Carwash worked great! Lost a couple teeth and blew out the nasal bones but does a good job of defleshing. Definitely wear clothes you don't care about! Can't wait to try the sous vide again.
 
i do agree, nasal bones look awesome. maybe more confidence in processes down the road will have me really aiming to keep them in there.

you pressure washed your elk though, i can't imagine how you can keep them intact that way. and if you don't put the pressure washer down the nose you manage to clean out that nasal cavity keeping them in tact

i had told myself if it seems doable i'll try and leave them in tact, but i looked down that nasal cavity and was like, no way in hell am i doing whatever it takes to clean that and keep them intact. i am an ignorant beginner at this though

When washing I just rise the nasal cavity (trigger not depressed) and then blast the exterior + brain cavity. Some times the long skinny piece of cartilage between the tubes will be really stubborn. I had a bad one this year and I called in the big guns and had my wife do a "nasal ectomy".
 
20191120_072727.jpg

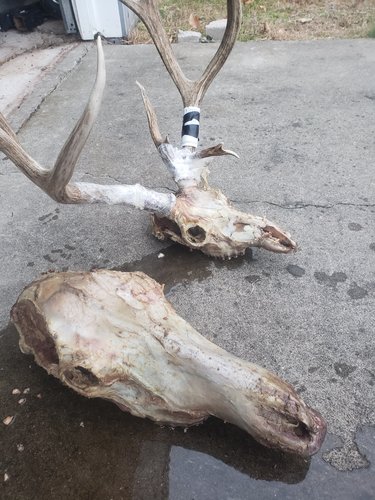
Here they are after about 24 hours at 150 degrees. Most of the meat and soft tissue just pulled right off. Cartilage and some of the fattier tissue is still pretty stuck on there. Going to buy a cheap harbor freight pressure washer and try blasting it all off. The nose bone and the nasal bones are all still intact for the moment. The mule deer seems to have taken to the cooking more than the elk probably just due to size
 
Everything came off pretty good after a pressure washing except the nooks and crannies and that long shiny piece of nose cartilage. Mule deer is pretty much good to go but going to try a quick boil at a hotter temp for the tough stuff still on the elk
 
Looks good. Sounds like a few hoops to jump through but there are many ways to skin the cat for sure. Once those are whitened up they will look really nice. Good work.
 
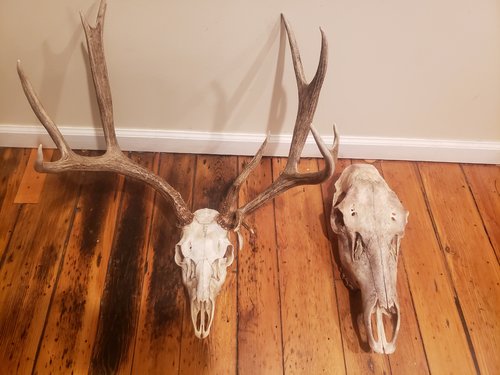
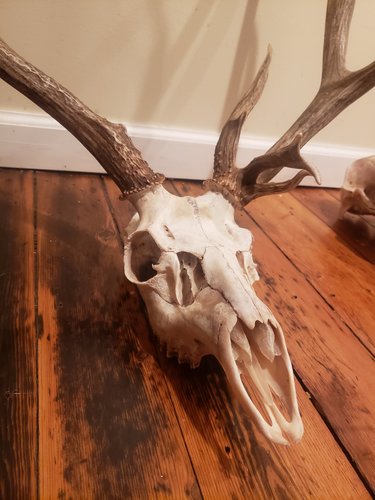
Next time I'm trying oxyclean or another more abrasive cleaner than dawn dish soap but overall happy with the outcome.

Bleaching will be next after a few days of drying
 
Back
Top