Addicting
Well-known member
I will make you a deal on mine if you want one done.


Follow along with the video below to see how to install our site as a web app on your home screen.
Note: This feature may not be available in some browsers.

A roof vent and single wall source vent (window or otherwise) should work well. Cross venting of some sort. Check out the Nu-Way ice house propane stoves. Great little design (really small), are vented and require no fan. It does require as with any stove to use a flu pipe and to cut into your roof for install (this could be a downside for some). One of my friends currently has one (12k BTU) and it is tiny (about the size of a Football), heats his 6x12 without issue even in below zero temps. No issues whatsoever with moisture or Carbon poisoning. Very economical as well. They can also be easily converted to burn wood or pellets in an apocalypse/bug out situation which is a plus.I don’t have a lot to add, but I started the process last year to do the same. I have a 6x12 enclosed trailer I use for goose decoys and ice fishing mainly. Last year I decided to start doing the same as you. We had a guy spray foam insulate the whole thing basically, including the underside. I have a lot of work to do, but it worked great. My wife and I used it to stay in for the MT elk opener last year. It was windy and got down to -10 at one point. We stayed warm with a generator and electric heater. Need to figure out a vent system though. Lol
Pretty cool setup.Get rid of the axle altogether and put a Timbren axle less suspension on it. You can get it to lift the trailer up 4”.
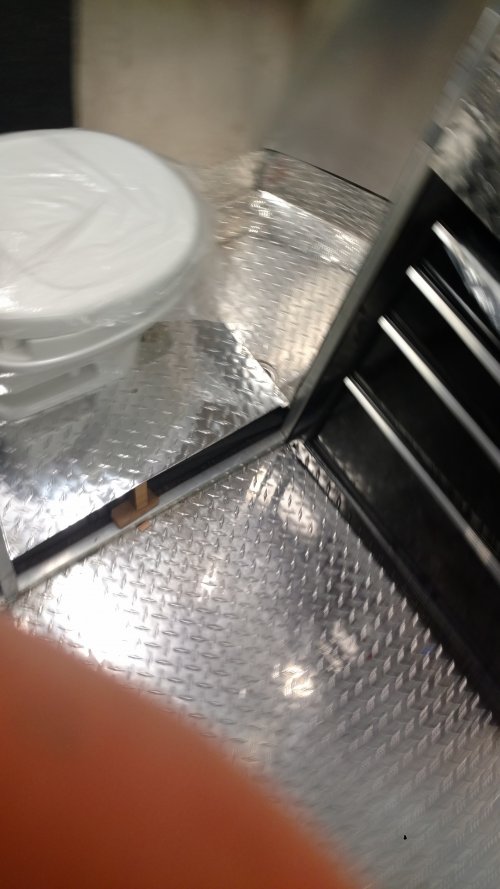
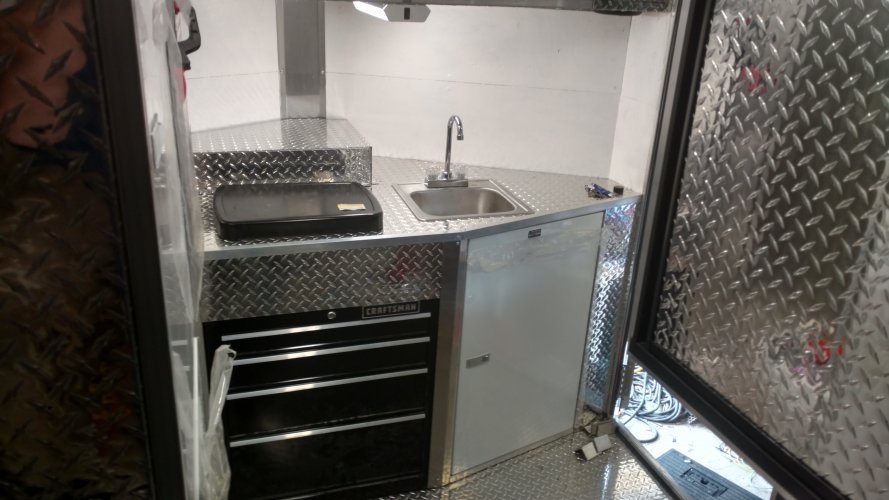
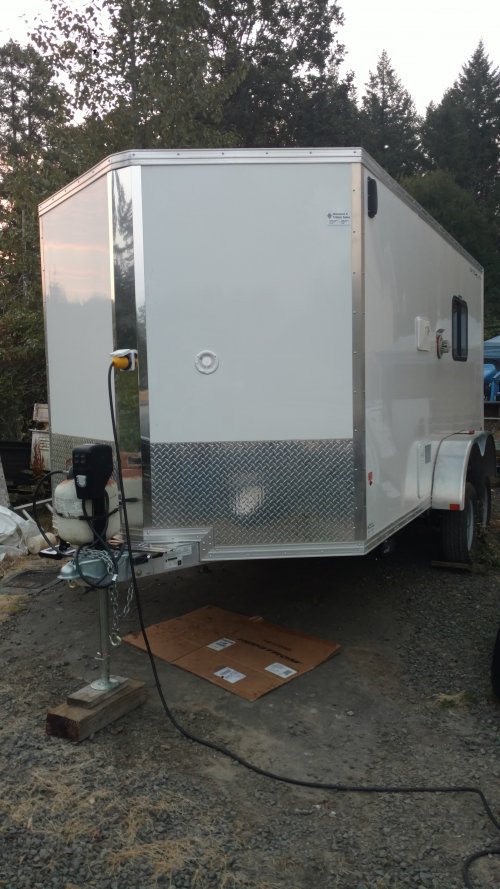
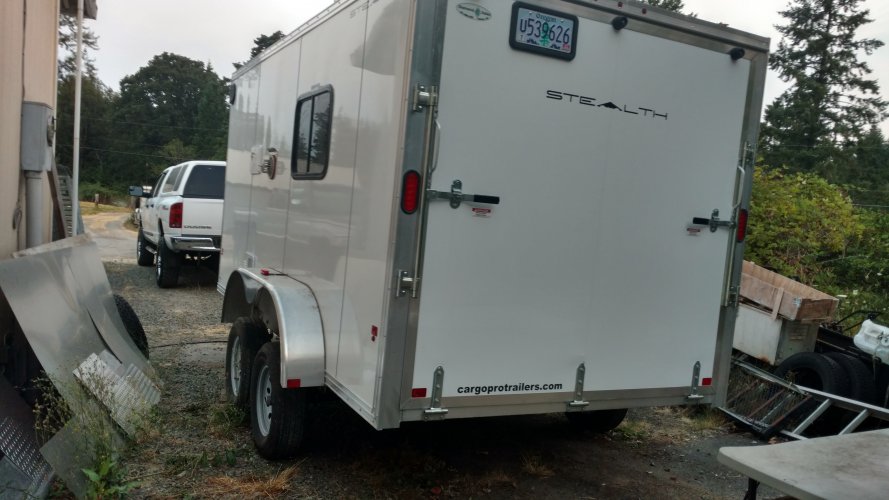
 I started with some rigid foam board on large areas and liquid nailed it directly to the outer sheathing. I then used a spray foam kit to insulate the entire inside of the trailer to not only make sure insulated but seal cracks and seams. I should also point out i removed the back door and framed it in as a solid wall since i wasn't going to use the drop down door anyways and newit would only leave area for air to seep inside. Once done with the insulation i trimmed high points off. The floor a put 1" rigid foam board and then used the snap together pergo floating floor pieces. The side walls are 1/4 birch stained with a high quality clear coat. I used white wainscoating on the ceiling. I bought replacement rv windows and a vent with 12v fan for the ceiling. These all went between the square ribbing as i did not want to deal with the structural integrity of the trailer. The bunk beds in the rear are both full size and built on an "e track" system with 2x4 brackets. The framing is 2x4's ripped in half with four of them per bed lengthwise. the two end pieces i added a piece of Poplar on end and wood glued and bolted to the 2x4 for structural support plus it adds a nice lip to the front so the memory foam mattress's down slide off in transit. on top of the framing is 1/2 inch ply. I added a Ashley vented LP heater instead of using the good ol big buddy heater as i wanted a vented system to keep moisture out plus it has a thermostat built in. Everything electrical is 12v led and runs of a renogy battery and 100w solar panel on the roof. This system for lights, vent, charging station, outside lights has worked great and i barely draw it down at night. I painted the exterior of the trailer with a Latex believe it was EDC paint. the stuff is super tough and used my wagner sprayer to apply it. The front kitchen area is not complete yet due to supply shortage. The cabinet i got for $5 off craigslist and did some 2x2 framing to the sides and floor to secure. I used a bar sink for the depth and plumbed that to a removable water jug. The water is a separate water jug with a hose up to a rechargable faucet intended for your reusable office jug type water system. One trip down and working great so far. In the future a counter top and some extra upper cabinet/storage will go in.


You need a 2nd exit that cannot be locked from the outside. It’s a death trap without a way out.Good enough for the girls I run with.
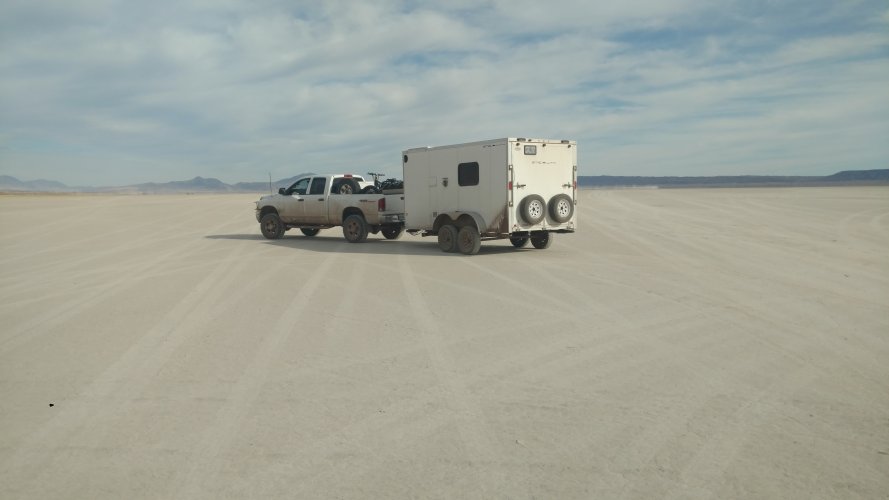
A guy could always do more, but I’m trying to keep it light weight/high speed like the Hugo boss racing yacht.
Coleman 2 burner should fit nicely on the countertop.
It’s got 2 side vents that are always open, but I’m still worried about condensation from the heater buddy.
Planning on cracking the fold down rear door with an old paint stick to get that extra circulation as needed.
Since it’s built for battle and maximum resale value I decided not to install any windows and went with some large Dougs Chrondre original prints.
Still making some tweaks but the core project is complete.
View attachment 257111
View attachment 257114View attachment 257115
I won’t be running the heater while I sleep and I’d bet $1000 I can kick the side entry door off it’s hinges.You need a 2nd exit that cannot be locked from the outside. It’s a death trap without a way out.