Pucky Freak
Well-known member
Goal was to turn the Savage Axis factory matte black stock into a useable component, mostly just to gain experience. If I completely screwed up I could just throw it away and replace with one from Boyd’s.
Axis II with Matte black stock was $303 online (30% off MSRP from Savage for select service occupations). Including transfer and tax was $348.
Gun was missing recoil lug on arrival, so I contacted the warranty department to see if they could send me a replacement. Expecting a delayed response due to COVID-19 stay at home order.
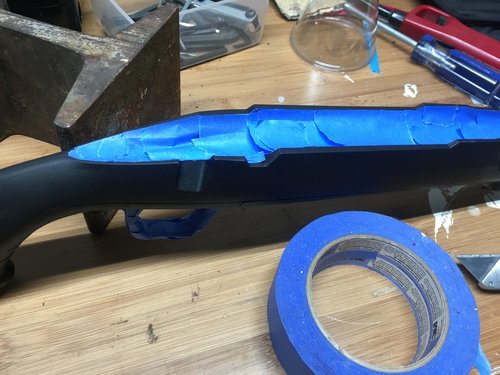
The stock is barely above toy gun-quality. Forestock bent hard to the right and contacting barrel, and shaped in a squiggle rather than a straight line. I used a wood chisel to remove material from the left inside of the forestock to achieve free float, then evened out the gouges with 60-grit sandpaper. Tested new gap with 3 sheets of thick paper to slide down the barrel with no contact. This pic is during sanding.
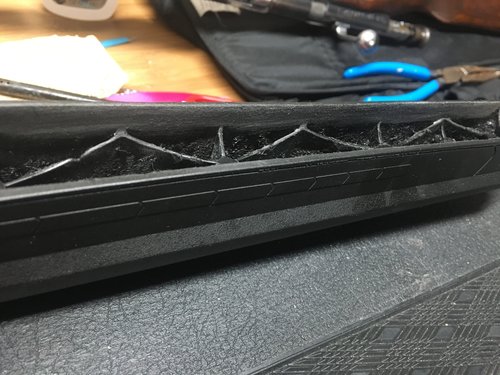
I also used a drill with a small bit to roughen all the inside surfaces of the forestock. Dozens of tiny divots along the bottom, and holes in the honeycomb dividers. Picked out debris with pinpoint tweezers the washed out thoroughly with acetone.
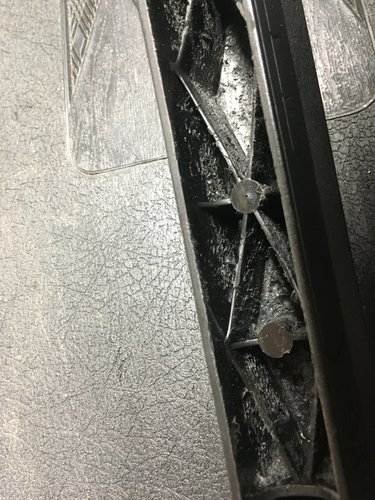
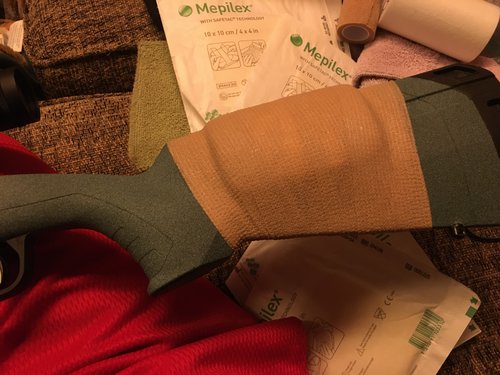
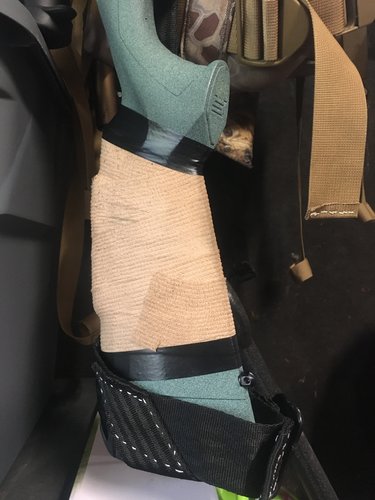
I removed the recoil pad and tightly stuffed torn up pieces of Walmart grocery sacks into the recoil pad extender and the butt stock. This added about 1 oz., removed hollow sound, and made the buttstock much more rigid. I drilled a hole in the grip cap and stuffed it full of bags too.
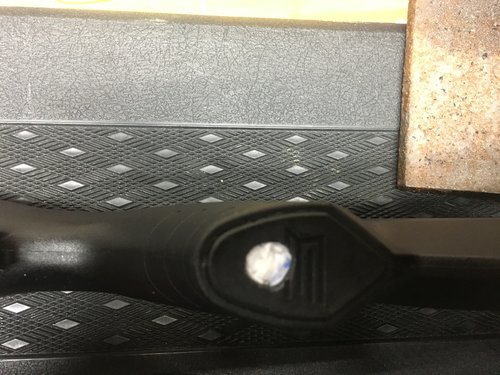
Cleaned above area with acetone, placed stock in vice, leveled the grip cap to the horizontal plane and filled the small remaining cavity with epoxy to have a flat surface where I had drilled the hole. The epoxy does not adhere to the bags, but it does to the sides of the hole I drilled. After it dried I sanded it smooth.
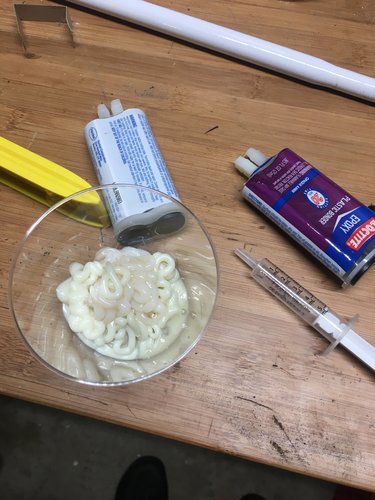
Next was to fill the forestock with plastic epoxy. I used 3 bottles at 0.85 oz. each for $22 total. I had previously filled the cavities with water using a syringe to calculate the volume of epoxy needed, but I was too conservative and should’ve bought 4 bottles. I squirted all 3 bottles into a plastic cup, stirred together, then used a children’s ibuprofen syringe to draw up epoxy and squirt into the cavities. Epoxy is caulk-like consistency and not pourable. My method would have worked better with a larger volume syringe, with a wider, longer nozzle, as I could not easily get epoxy to the bottom of the cavities, and the nozzle clogged after 10 minutes of use. The last 10 mins were spent spooning in the remaining epoxy, then using my stir stick and a toothpick to jam it in the cavities. This resulted in a lot of air pockets.
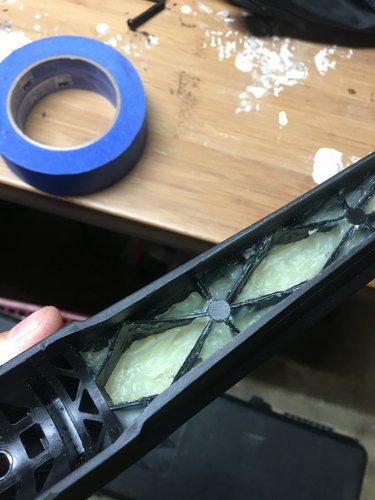
Despite the air pockets it bonded very tightly to the stock, making it about twice as stiff as the original and added a couple ounces of weight. If I had used a better syringe and an extra bottle of epoxy I’d be up to 3+ ounces, fewer air pockets, and stiffness rivaling wood (insert COVID-19 donation gag reference here). There are many other epoxies available, but I wanted the tightest bond I could get, and something that won’t crack during when the gun is fired.
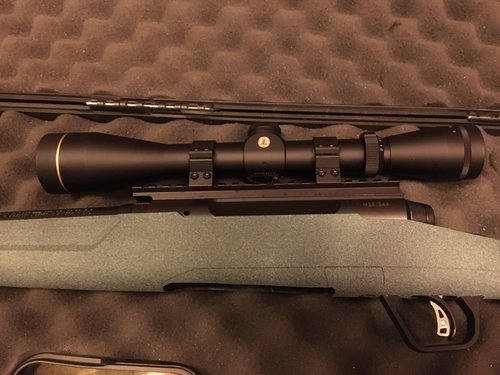
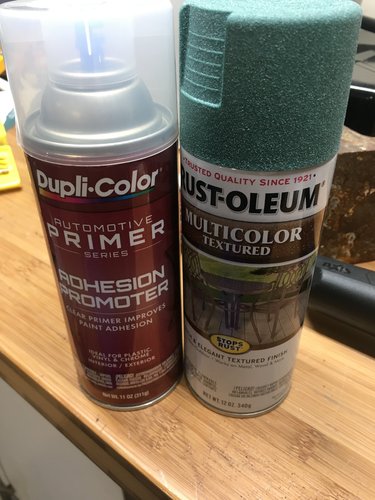
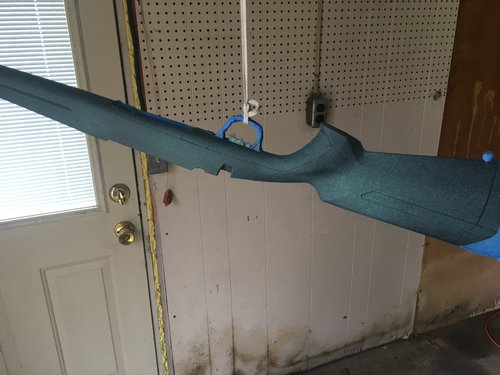
Next up was finish. Cleaned exterior of stock with acetone 20 times. Taped off surfaces with blue painter’s tape, suspended from ceiling by a string and added 3 coats of adhesion promoter $10. Did the first 3 coats of paint ($6), let dry 24 hours then 3 more coats. Yes, I’m fully aware I lack graffiti skills as the coat is uneven. It adhered extremely well to the stock, and provides bumpy surface like 40-grit sandpaper, except it’s not sharp.

Obviously still need to add recoil lug. Will put some blue threadlocker on the pillar screws. Next I will get a scope, some rings, a couple boxes of 143 ELD-X, and see if this man-bun is a shooter. Will update when that’s done.
Axis II with Matte black stock was $303 online (30% off MSRP from Savage for select service occupations). Including transfer and tax was $348.
Gun was missing recoil lug on arrival, so I contacted the warranty department to see if they could send me a replacement. Expecting a delayed response due to COVID-19 stay at home order.
The stock is barely above toy gun-quality. Forestock bent hard to the right and contacting barrel, and shaped in a squiggle rather than a straight line. I used a wood chisel to remove material from the left inside of the forestock to achieve free float, then evened out the gouges with 60-grit sandpaper. Tested new gap with 3 sheets of thick paper to slide down the barrel with no contact. This pic is during sanding.

I also used a drill with a small bit to roughen all the inside surfaces of the forestock. Dozens of tiny divots along the bottom, and holes in the honeycomb dividers. Picked out debris with pinpoint tweezers the washed out thoroughly with acetone.

I removed the recoil pad and tightly stuffed torn up pieces of Walmart grocery sacks into the recoil pad extender and the butt stock. This added about 1 oz., removed hollow sound, and made the buttstock much more rigid. I drilled a hole in the grip cap and stuffed it full of bags too.

Cleaned above area with acetone, placed stock in vice, leveled the grip cap to the horizontal plane and filled the small remaining cavity with epoxy to have a flat surface where I had drilled the hole. The epoxy does not adhere to the bags, but it does to the sides of the hole I drilled. After it dried I sanded it smooth.
Next was to fill the forestock with plastic epoxy. I used 3 bottles at 0.85 oz. each for $22 total. I had previously filled the cavities with water using a syringe to calculate the volume of epoxy needed, but I was too conservative and should’ve bought 4 bottles. I squirted all 3 bottles into a plastic cup, stirred together, then used a children’s ibuprofen syringe to draw up epoxy and squirt into the cavities. Epoxy is caulk-like consistency and not pourable. My method would have worked better with a larger volume syringe, with a wider, longer nozzle, as I could not easily get epoxy to the bottom of the cavities, and the nozzle clogged after 10 minutes of use. The last 10 mins were spent spooning in the remaining epoxy, then using my stir stick and a toothpick to jam it in the cavities. This resulted in a lot of air pockets.


Despite the air pockets it bonded very tightly to the stock, making it about twice as stiff as the original and added a couple ounces of weight. If I had used a better syringe and an extra bottle of epoxy I’d be up to 3+ ounces, fewer air pockets, and stiffness rivaling wood (insert COVID-19 donation gag reference here). There are many other epoxies available, but I wanted the tightest bond I could get, and something that won’t crack during when the gun is fired.
Next up was finish. Cleaned exterior of stock with acetone 20 times. Taped off surfaces with blue painter’s tape, suspended from ceiling by a string and added 3 coats of adhesion promoter $10. Did the first 3 coats of paint ($6), let dry 24 hours then 3 more coats. Yes, I’m fully aware I lack graffiti skills as the coat is uneven. It adhered extremely well to the stock, and provides bumpy surface like 40-grit sandpaper, except it’s not sharp.


Obviously still need to add recoil lug. Will put some blue threadlocker on the pillar screws. Next I will get a scope, some rings, a couple boxes of 143 ELD-X, and see if this man-bun is a shooter. Will update when that’s done.
Last edited:


