homemade broadheads for hunting

Stay Sharp

Well-known member
Joined
Dec 12, 2019
Messages
605
Location
Wisconsin
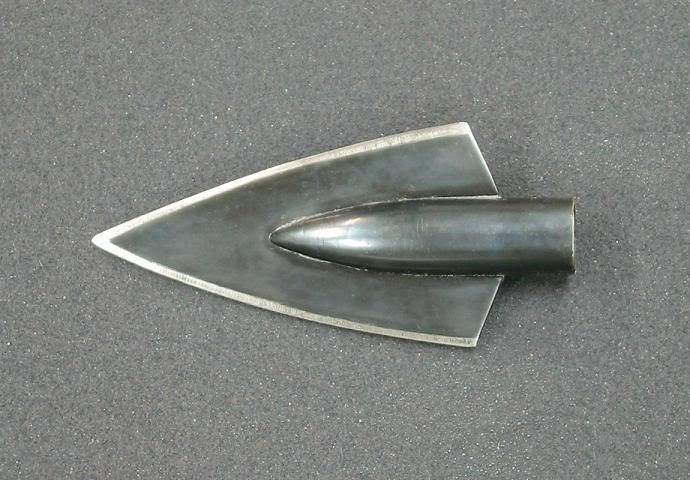
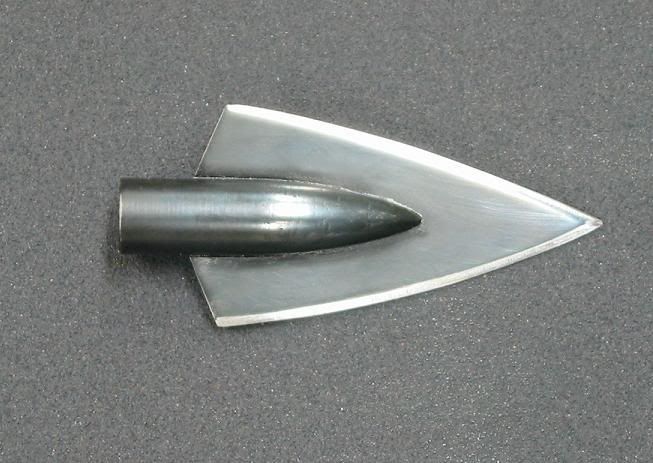
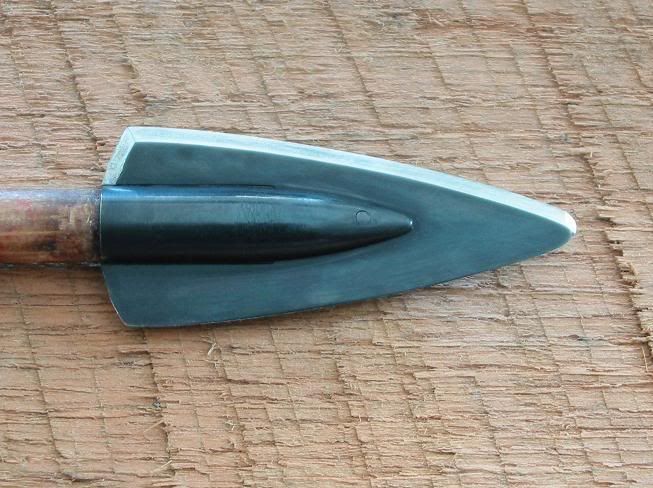
This is the process I use to make the broadheads that I hunt with.

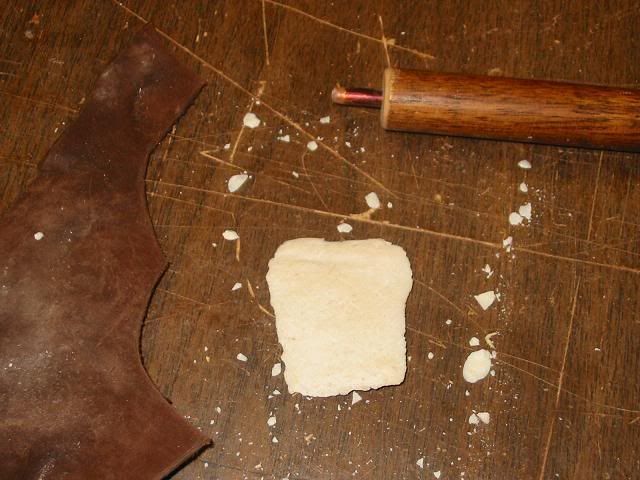
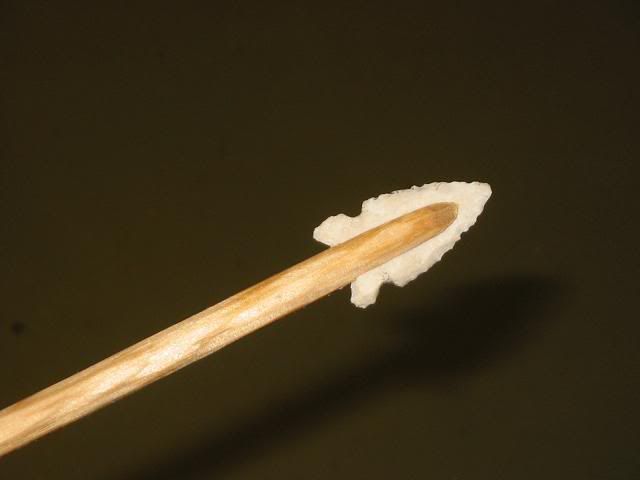
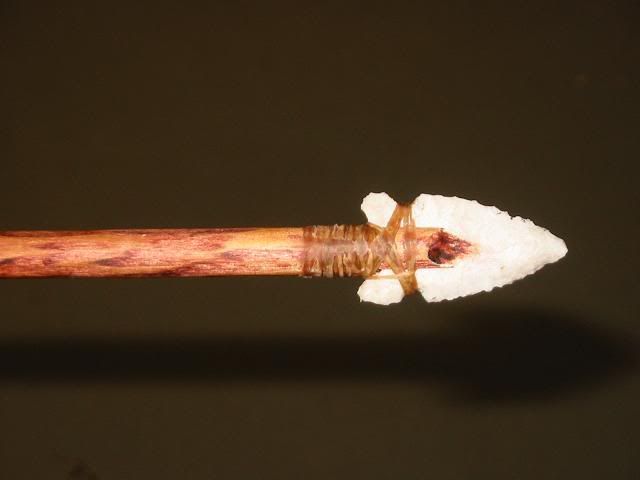
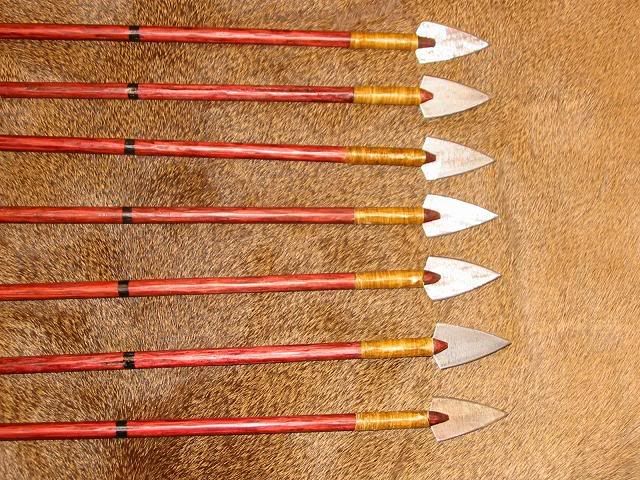
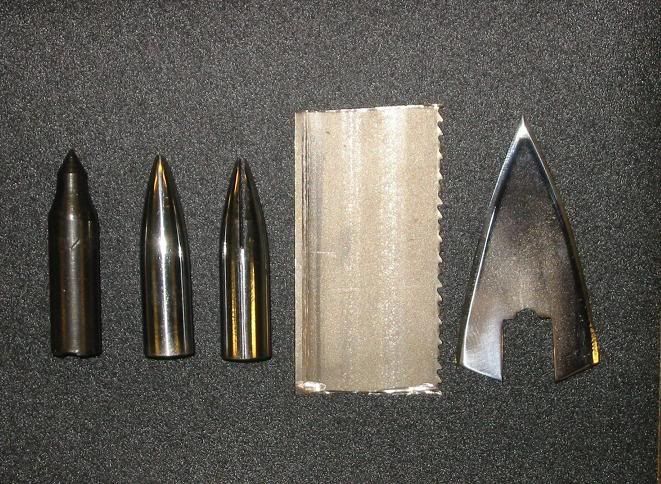
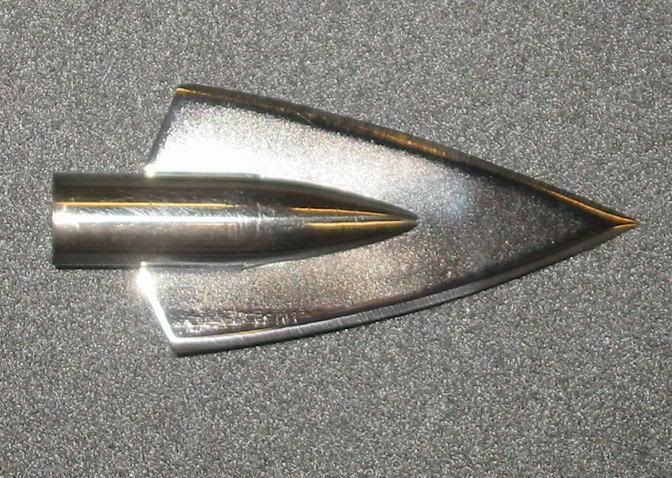
I use 125 grain field points and reshape them to remove the shoulders. this step may not be necessary buy It looks nice.

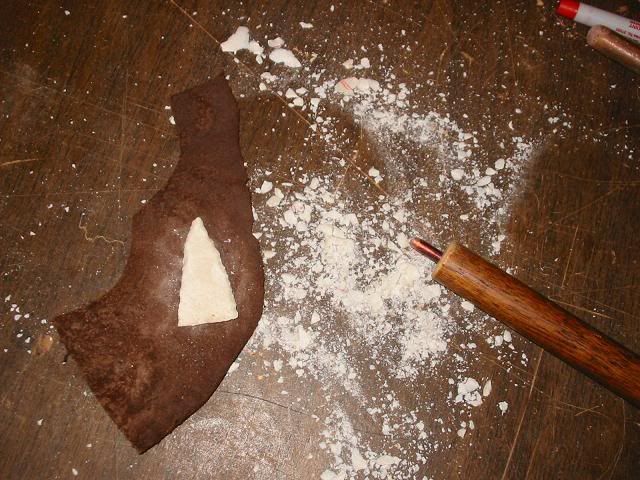
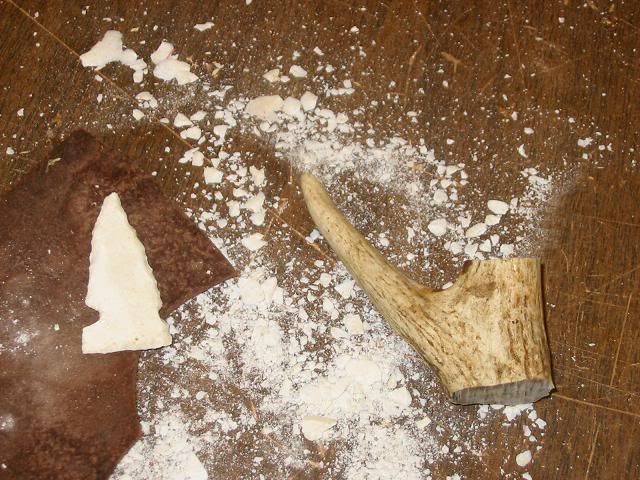
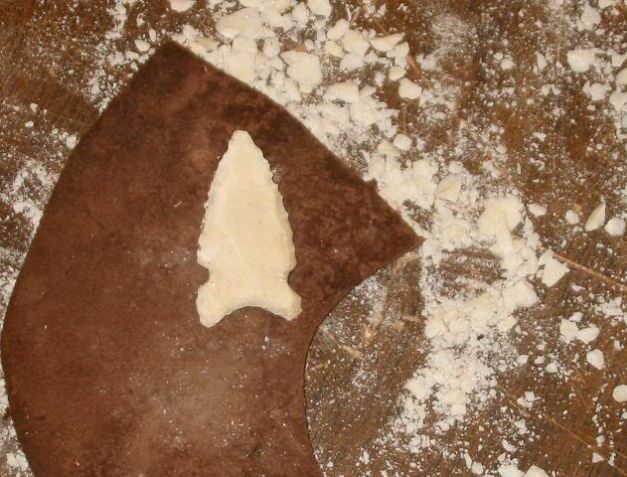
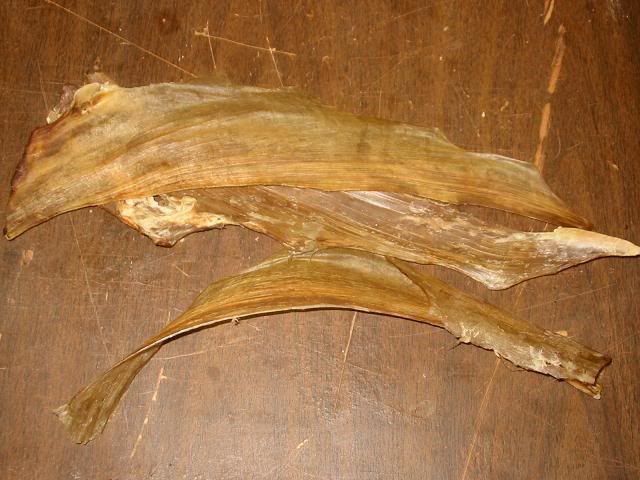
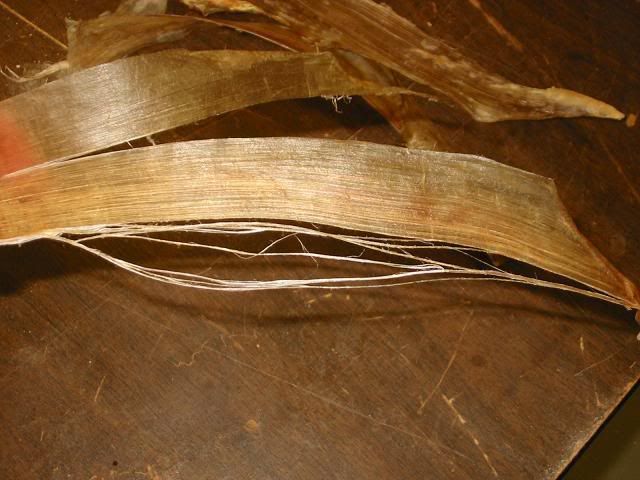
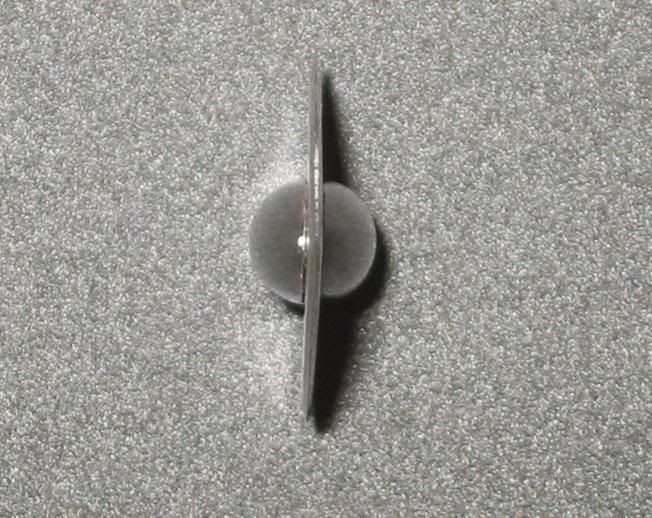
the blades are cut from a .039 thick bandsaw blade.

broadheads99.jpg


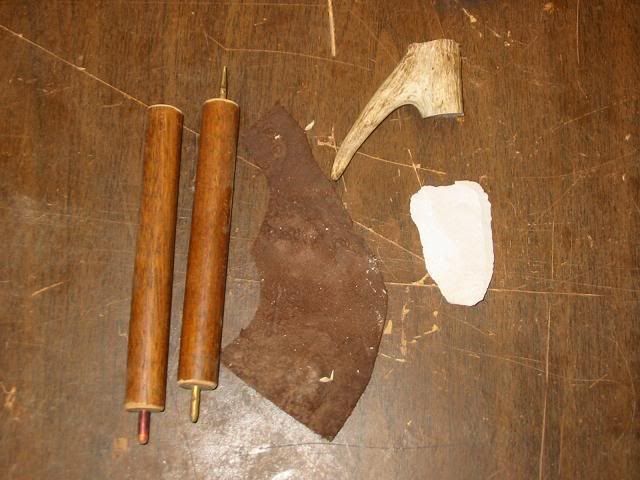
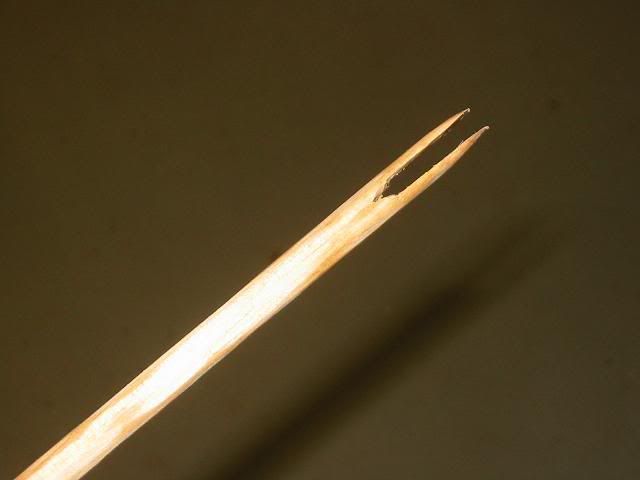
the jig for slotting the field point is made of steel and clamps the point while the spacer (piece of hacksaw blade) Leaves room for the saw to pass between the two halves to cut the slot.

broadheads94.jpg


broadheads95.jpg


broadheads96.jpg


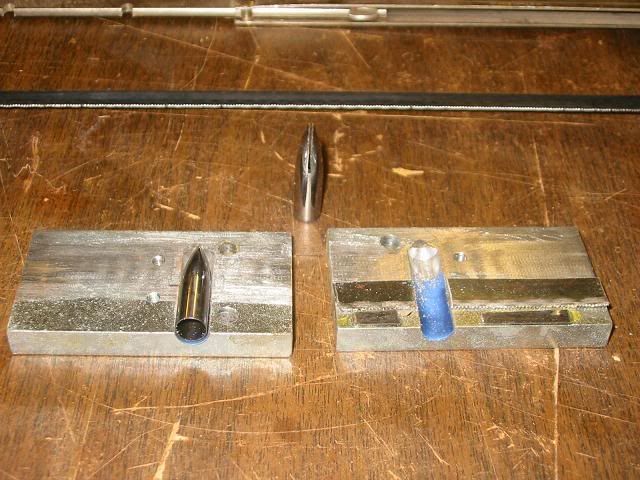
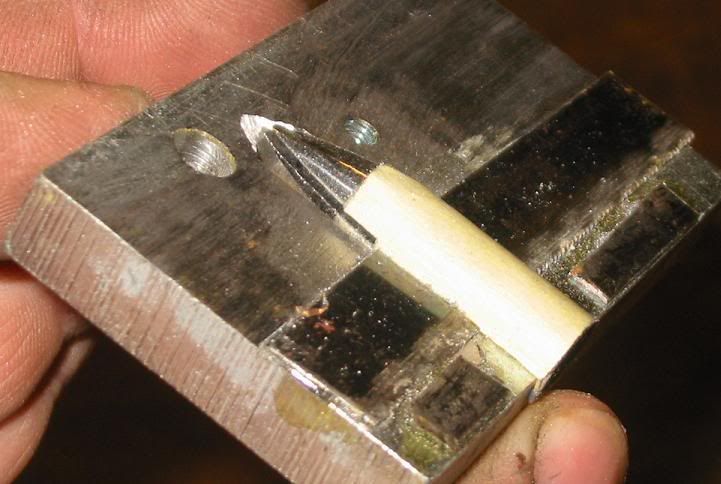
I then polish the two pieces and make sure I have a good fit up.

broadheads97.jpg


broadheads98.jpg


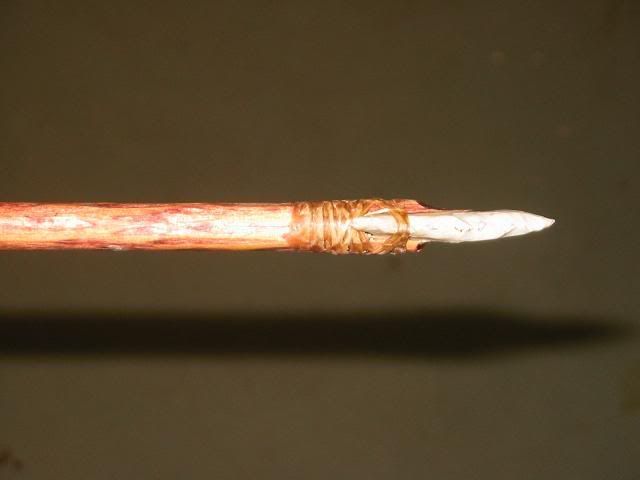
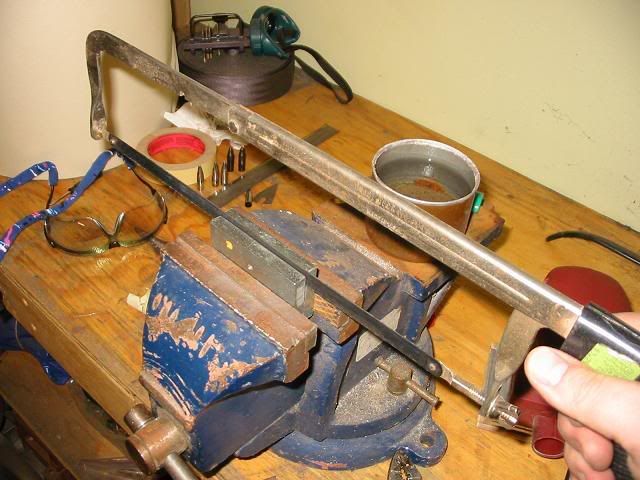
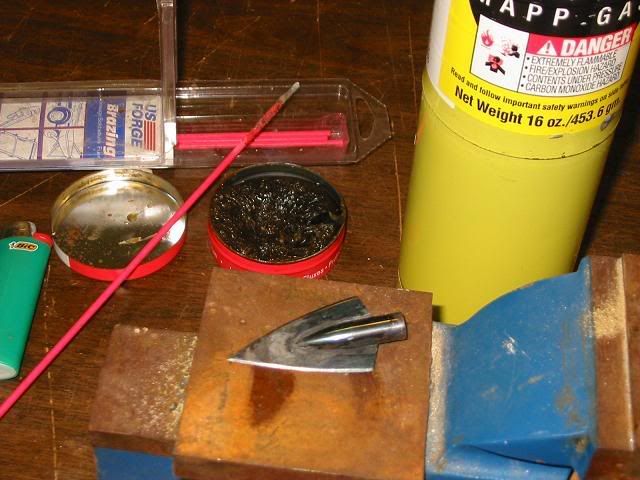
Next I braze the two parts together although I think solder or even J.B. Weld would suffice. I may try this on the next batch because brazing is messy and I have to quench afterward to make sure the heads are hard.

broadheads999.jpg


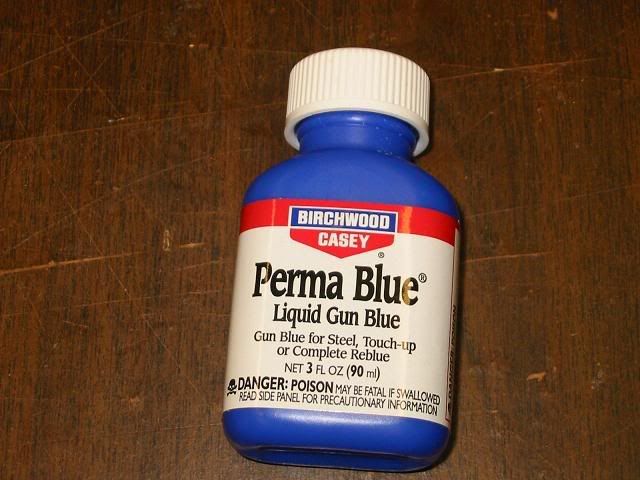
After cleaning and polishing again, I use a cold bluing to protect the heads and then a light coat of oil.
broadheads991.jpg


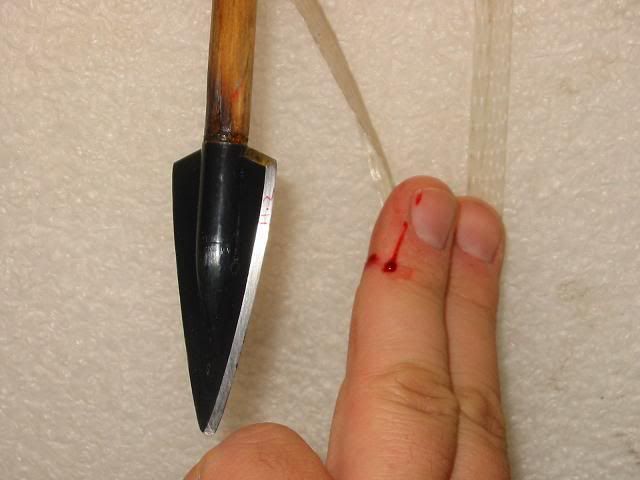
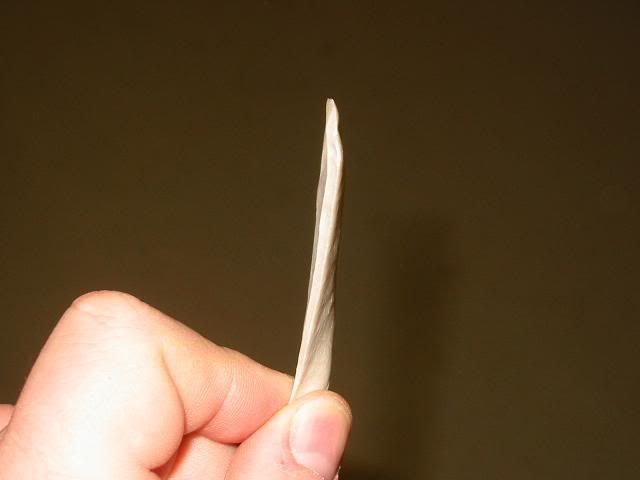
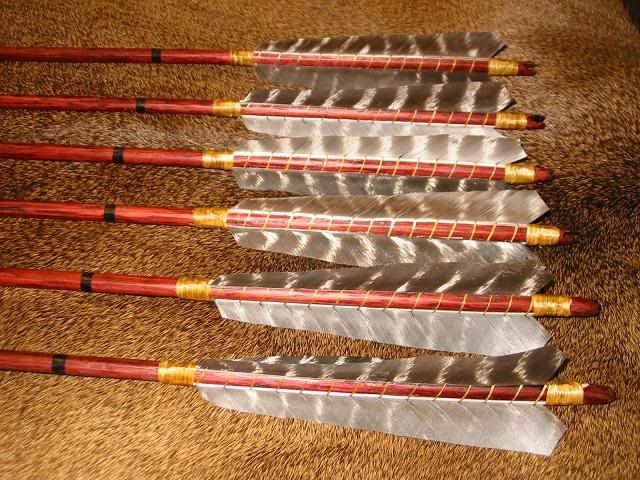
Finished weight, 165 grains. about 1 inch wide (15/16) and 1 1/4 long.

broadheads992.jpg


broadheads993.jpg


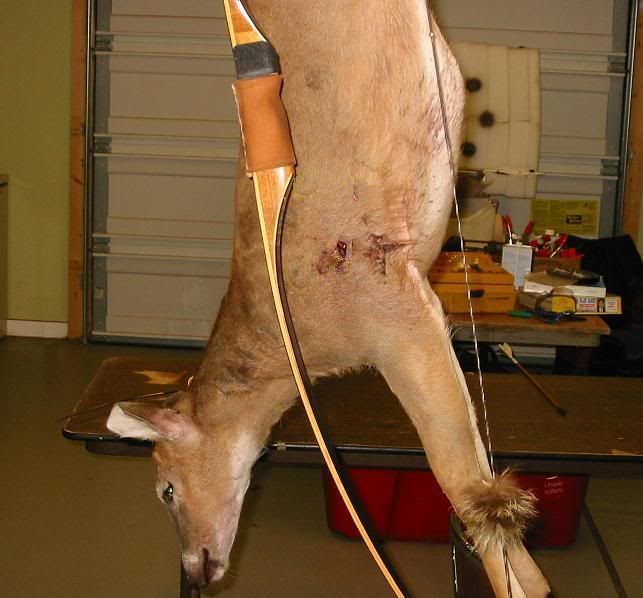
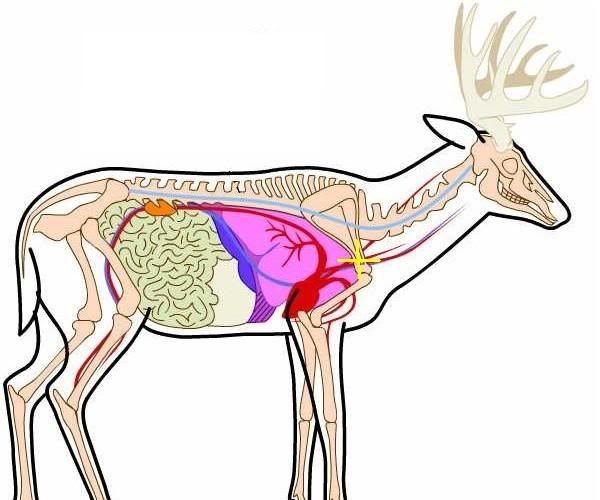
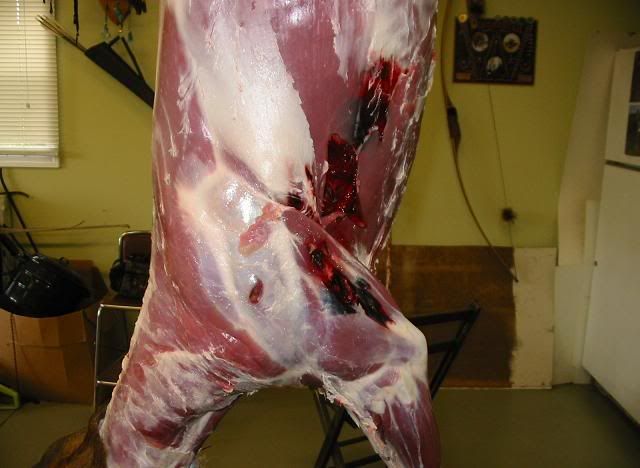
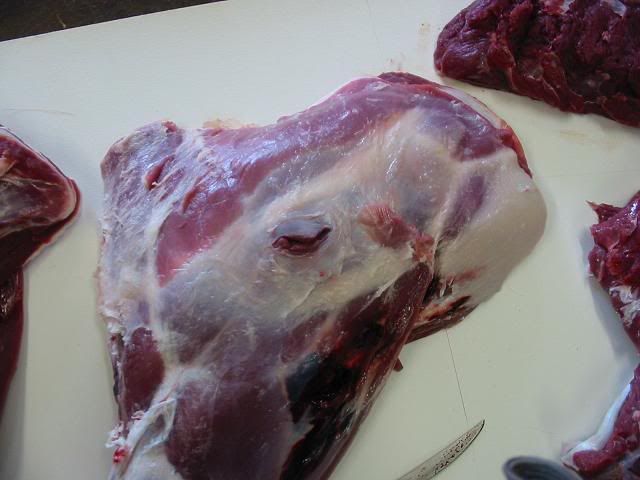
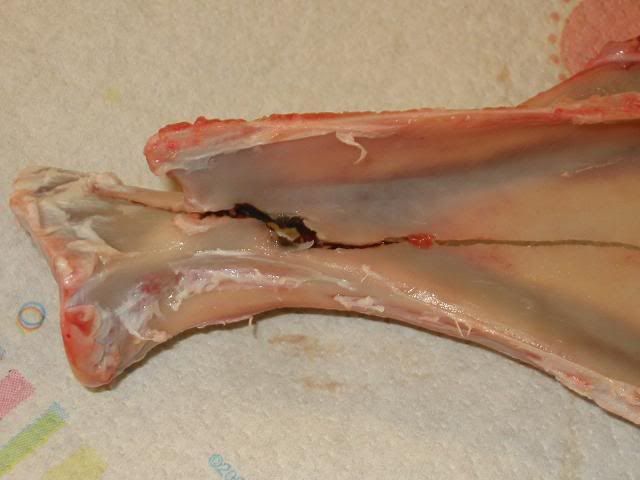
After reading Dr. Ashby's report on single bevel broadheads.(right after I finished the last batch of double bevel heads) I just had to make some single bevel heads. It just makes so much sense. I will test both to see if I get his results.

http://www.tradgang.com/ashby/single-bevel-broadheads.pdf

singlebevel1.jpg


singlebevel2.jpg


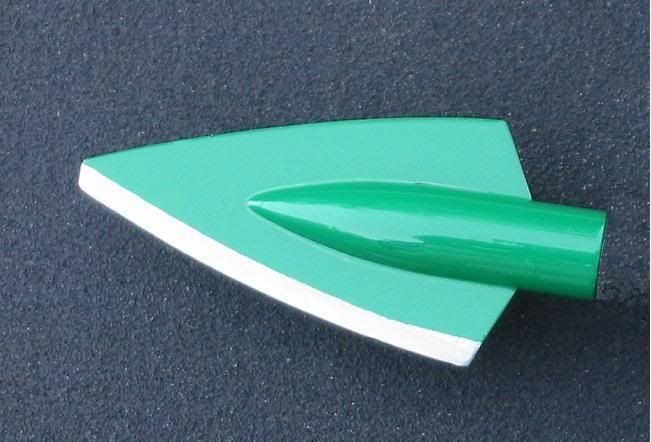
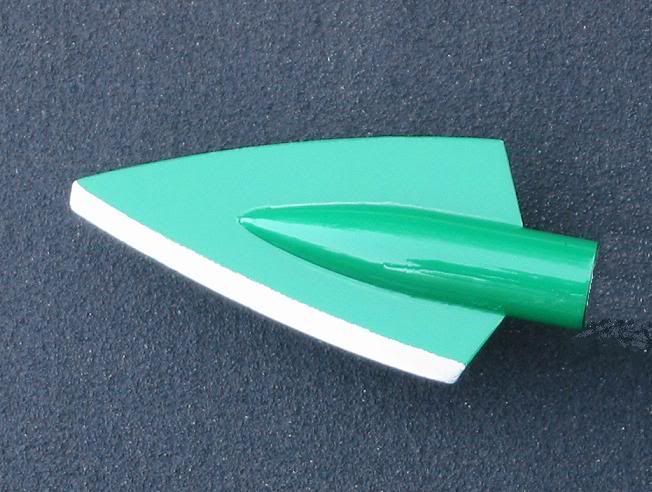
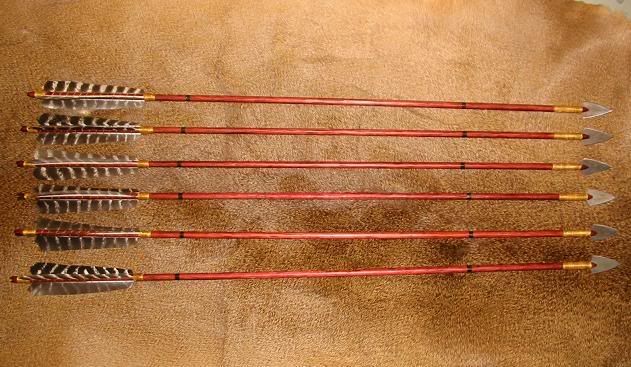
After making the first set of single bevel heads, I made a new set with a longer profile.

Then I fooled around with a longer version.

2.316.jpg
 
As luck would have it, a neighbor brought me a fresh archery kill to process for him. I asked him if it would be ok to test my heads on his deer. He didn't mind since he wanted the whole deer ground into sausage and/or burger. So here she is. All 68 pounds of her (dressed) I would have loved to be trying this on a 150 pound deer but beggars can't be choosers.

head_test1.jpg


I made three shots from 10 yards with my 45 pound longbow that shoots an arrow at a blazing 142 FPS. the first two were through the ribs and the final one hit the shoulder blade at the point where the flat and the "T" meet, right near the ball joint. This is (in my opinion) the largest and thickest bone section in the upper shoulder. I admit that hitting this far forward is not a good place to aim on a live animal but things happen beyond our control. I of course hit this spot with pin point precision on purpose.

deeranatomy.jpg


The rib shots were complete pass throughs but the shoulder shot ended up with just the fletches sticking out entrance side. I know there were no lungs in the deer but they don't offer much in the way of resistance any way. Also consider that this deer was cold and stiff as rigor mortise had set in so I consider all things equal.
head_test2.jpg


Right off the bat, I noticed the "S" shaped cuts that Dr. Ashby had spoke about. This was the case on both the entrance and exit holes.

head_test4.jpg


*** Word of caution***
When you pull the arrow back out of the deer (through a bone) and you have sharpened your broadheads on the trailing edge as well as the main edge. Make sure to keep your fingers clear even though you need to hold the deer steady while retrieving the arrow.

head_test3.jpg


After a brief bit of first aid, I began to skin the deer, I noticed that both of the rib shots had completely missed hitting ribs on both sides. My goal was to break a rib to see the results but I must have used up all my luck..... I mean skill on that shoulder shot.

head_test5.jpg


I then removed the shoulder and boned it out.

head_test6.jpg


Just as described by Dr. Ashby, the "S" shaped cut and the bone had split completely being held at the joint end by only some soft fibers.

head_test7.jpg


head_test8.jpg


As expected, the single bevel head is a real bone breaker/splitter. I know this is a very small deer but again, I was using a rather low power bow. Take from this what you will but I am even more pleased with the single bevel heads. This sort of thing is not necessary with todays super fast and powerful bows hunting whitetails but for those using traditional archery gear, or those going after large or dangerous game, we are looking for every advantage we can get
 
In this day in age, making something that you can easily buy, is pretty rare. Quite a process, and looks like it works very well.

What makes a single bevel better? I'm ignorant of this topic. Easier to sharpen? is it stronger?
 
This is a cool thread. Not that I can contribute any examples, but do any of you knap? One summer I turned my office into a gravel pit (much to the chagrin of the poor janitor), knapping arrowheads out of misc. rocks. I wasn't very good, but it sure was intriguing to think about killing a deer with my own arrowhead.
 
This is how I make stone points.

chert1.jpg


I used a nice, thin, white piece for the arrowhead.

chert2.jpg


I made some wood and cooper tools and an antler brow tine to flake away the stone. The leather is to protect my hand as I press the coper tool against the chert. The flakes are sharp.

chert3.jpg


I started by squaring off the bottom of the flake and then chipped the head to shape.

chert4.jpg


chert5.jpg


Lastly I added the grooves to each side that will be used to tie the head to the shaft. This is where I make the most mistakes and break the head.

chert6.jpg


chert7.jpg


Next, I used a knife to cut a groove in the end of a wood shaft to accept the stone head.

chert8.jpg


I will trim away the extra wood after I tie the head on.

chert9.jpg


To tie the head to the shaft, I use the sinew I save from the loins/backstraps from my deer.

chert91.jpg


It separates into nice thin threads.

chert92.jpg


I soaked the sinew threads in cold water to soften and stretch them. While waiting, I stained the wood shaft. The sinew does not really get tied onto the shaft. It is more like wrapping a wet noodle around the shaft. After I put on a few layers, I dried it with a blow dryer (just like I'm sure the early people did). This makes it shrink tight. I then rub the sinew with a block of bees wax to waterproof it so it won't get wet and loosen up.

chert93.jpg


chert94.jpg


chert95.jpg


For the fletching, I went back to the turkey feathers and tied them on.

chert96.jpg
 
This is awesome. I have thought about making my own points as well. I had thought about turning some broadhead adapters down in a lathe to remove the grooves and then tig welding the blades to them. Looks like your process works quite well
 
I actually use Bone Broadheads. Hell of a broadhead they have. Blew threw a rib bone going in an going out on my elk this year, complete pass thru.
 
I talked to the owner of the company (bone broadheads) after they took my images and tried to pass them off as their own as damage being caused by their head (a head that hadn't been manufactured yet and only existed in the CAD world. At least I got him to created my work on his web site.
 
I am very impressed by your skills. Its very impressive to take an idea and make it into a reality in the ways you have
 
Now that is very cool! Amazing work! Must be extremely satisfying to see the results of your hand crafted work!
 
Taking deer and bear with a homemade bow and homemade arrows and homemade broadheads allows a fella to maximize the level of satisfaction and reward and challenge of human powered bowhunting. You have to bring more of yourself to the task which is why I no interest in crossbows or hunting with a firearm after 45 years of bowhunting.
 
My wife and I like to play a game of who would do better during a Zombie apocalypse. Before I read this thread I thought I would do well.... I'm not so convinced now.
 
Use Promo Code Randy for 20% off OutdoorClass

Latest posts

Forum statistics

Threads
111,103
Messages
1,947,129
Members
35,028
Latest member
Sea Rover
Back
Top