


Bambistew
Well-known member
Had some fun on Saturday cleaning up the skull pile with a couple bonus skulls from last year to finish whitening up.
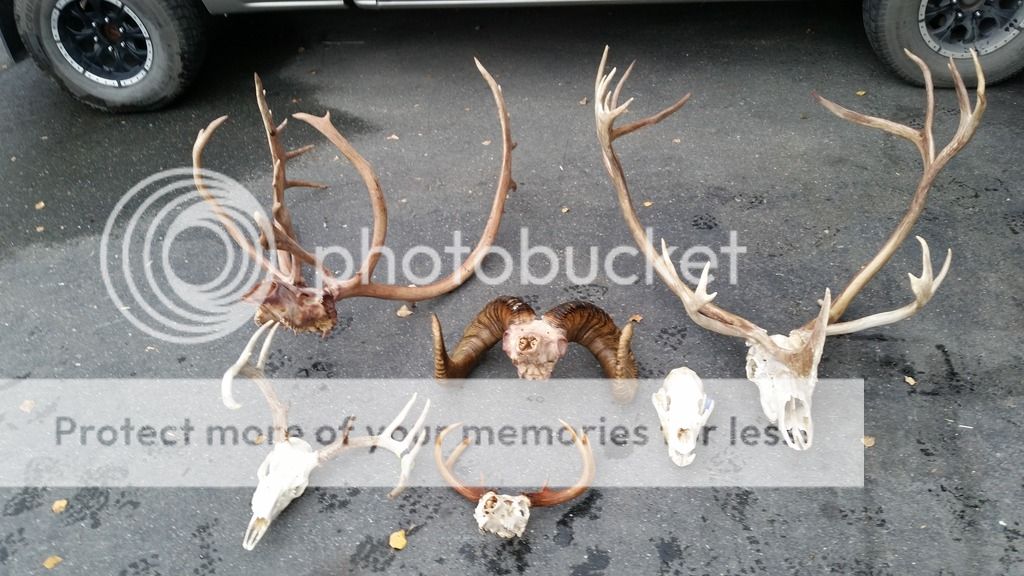
The bottom 3 skulls (whitetail, sitka, and bear) where macerated. I think this makes 5 I've done this way, and doubt I'll do any more unless they are small animals. They get "too" clean and the bones get lose, and most all the teeth fall out. A quick boil and a pressure washer is much easier. I don't really care about sinus bones either.
This is the process that works for me. I'd love to hear any critiqueing as any step that makes it easier and a better product is worth doing. I've done countless skulls, using every method. The latest is steam cleaning with a pressure washer. I'm intrigued by this, but not sure I want to spring for the steam cleaner unless I go into full business mode.
I believe cleaning a skull has been covered a few times over, but I don't recall seeing a sheep skull.The process is much the same on a sheep skull as with any skull, with only one added step. Getting the horns off, which can be a real PITA.
1. - clean as much meat off the skull as possible
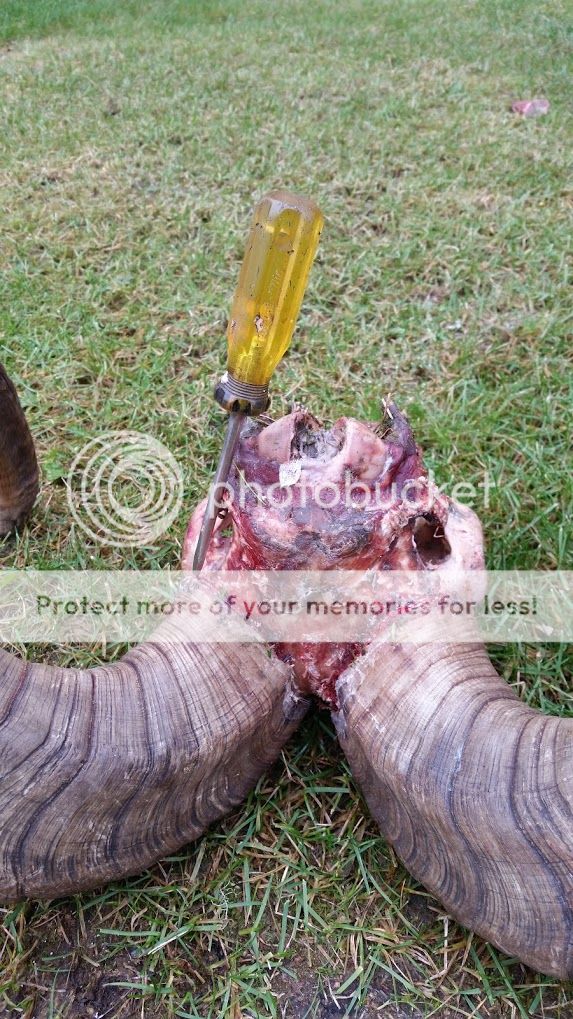
2. - remove the brain, scramble with a screwdriver, or bent wire on a drill, hose it out. The brains have a lot of oil in them and it will seep into the skull when you cook it.
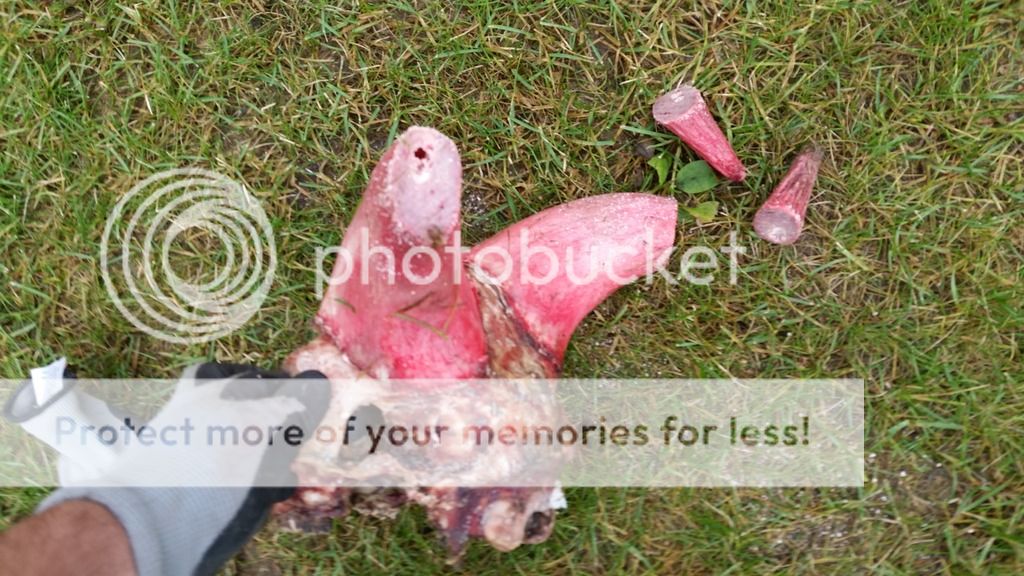
3. - I hose the skull off, and run a knife around the base of the horns, this lets a bit of moisture in, as well as promotes the release of the horn.
4. - double or triple bag bag and forget about it for 7-10 days depending on temperature.
5. - Once its fermented, pull it out and hose off the nasty, hit the brain case again. Keep your mouth closed.
6. - Work a knife and screwdriver around the bases of the horns. This is usually where they hang up. Be careful to not tear the horn, its quite pliable and thin along the back side.
7.0- Beat on it a bunch with a dead-blow hammer, or use a block of wood to cushion the blow if using a regular hammer. The horns are quite tough
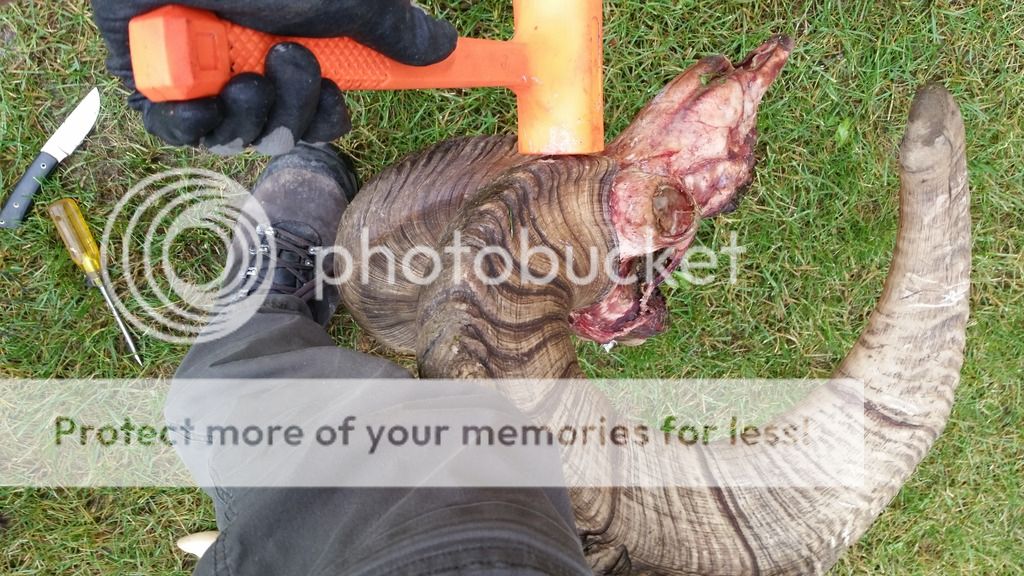
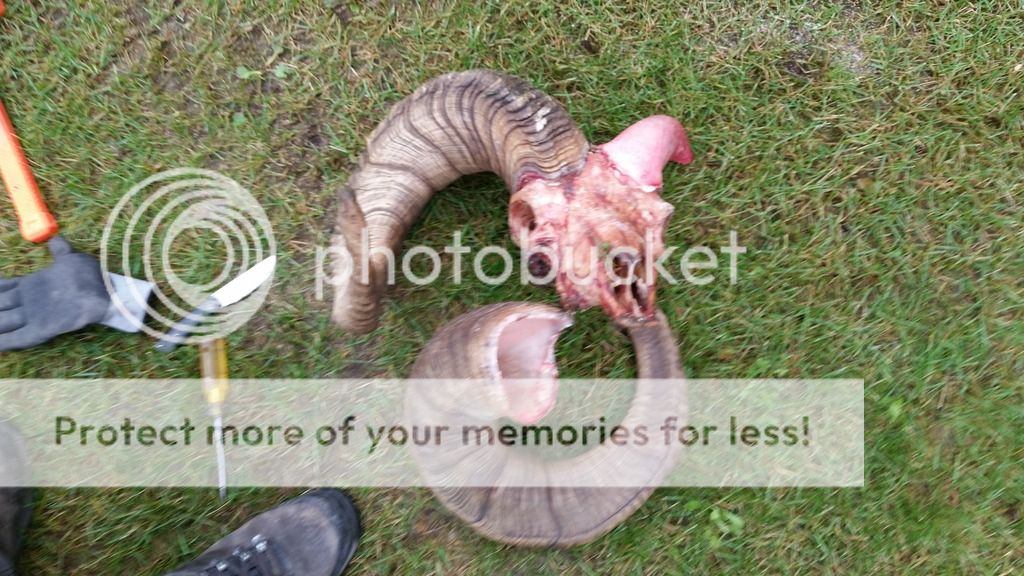
If you're lucky the horns will pop off, if not I toss it on the ground (a hard part of the lawn works well, not the rocks or driveway) aiming for the outside edge. The skull is also very tough... the nose may break so avoid direct impact. (I haven't broke one yet)
8. - Once the horns are off, I saw off the tips of the cores, they have a connection to the sinus cavity, it makes cleaning much easier and more thorough.

9. - simmer the skull for an hour or two until all the gunk loosens up. Either scrape/brush or use a pressure washer to get the gristle off, repeat as necessary. I add a cup or so (per 10 gallons of water) of liquid dishwashing detergent, some times use borax, but find the dishwashing detergent works as well or better. Oh and a healthy amount of dawn dish soap. Anything to help cut the grease... I will also skim off fat from the top, before I pull the skull out.
10. - De-grease in a solution of dawn dish soap and warm water, don't skimp on this step... a soft scrub brush helps as well. Multiple baths may be necessary.
11. - spray it off with clean water.
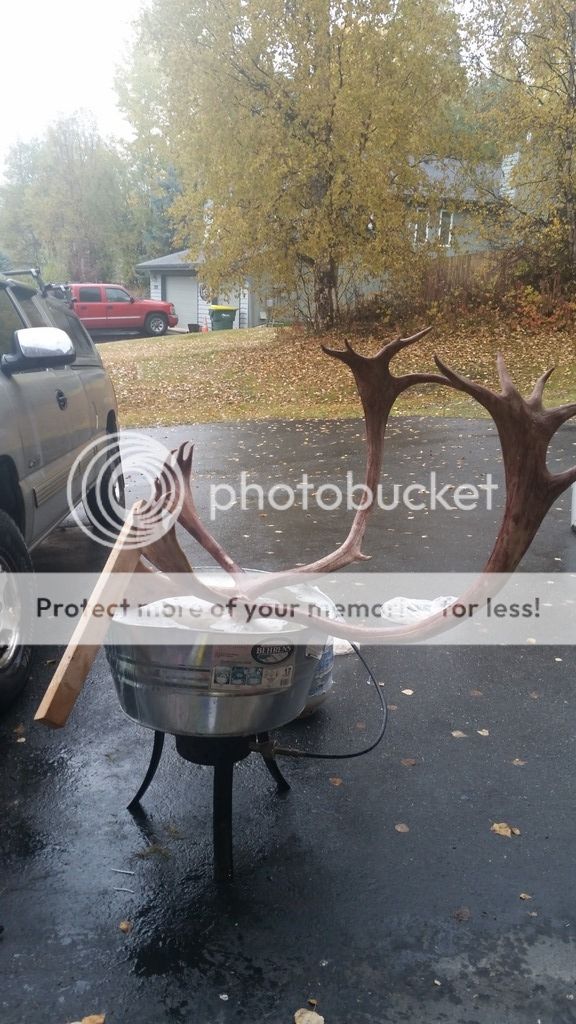
12. - paint on mixture of hydrogen peroxide (40% by volume) and cream developer (powder) paste (from the beauty supply store). Place in a plastic bag and let it sit for a few days.
13. - Hose it off and place in the sun for a couple days and it will be really white. Seal with clear acrylic if you like.
14. - clean the inside of the horns. scrape off the membrane around the inner lip, run a small wire brush across the interior surface, fill horn core with borax. These need to sit for about a week or so.
15. - discard the borax, rinse out the cores. I usually do a final rinse with a pot or two of boiling water as a final step. Let them dry completely. There should be no smell at this point. If so, repeat 14.
17. - clean up any blood or other debris on the horns, use a soft brush, and warm water. A little soap is ok, but it may take off some color.
18. - To attach the horns, I drill a bunch of shallow holes (1/4") in both the core and inside of the horns, lather up both parts with bondo and press them on. Let the bondo sit until it starts to set up and is kind of rubbery. Cut off with a knife, and shape as needed. Be careful to not get any on the skull. Masking the skull off isn't a bad idea.
19. - use hot glue or elmers to glue in any teeth that fell out.
I'll add a few more pictures later, the horn cores are drying and the skulls are soaking in peroxide.
The bottom 3 skulls (whitetail, sitka, and bear) where macerated. I think this makes 5 I've done this way, and doubt I'll do any more unless they are small animals. They get "too" clean and the bones get lose, and most all the teeth fall out. A quick boil and a pressure washer is much easier. I don't really care about sinus bones either.
This is the process that works for me. I'd love to hear any critiqueing as any step that makes it easier and a better product is worth doing. I've done countless skulls, using every method. The latest is steam cleaning with a pressure washer. I'm intrigued by this, but not sure I want to spring for the steam cleaner unless I go into full business mode.
I believe cleaning a skull has been covered a few times over, but I don't recall seeing a sheep skull.The process is much the same on a sheep skull as with any skull, with only one added step. Getting the horns off, which can be a real PITA.
1. - clean as much meat off the skull as possible
2. - remove the brain, scramble with a screwdriver, or bent wire on a drill, hose it out. The brains have a lot of oil in them and it will seep into the skull when you cook it.
3. - I hose the skull off, and run a knife around the base of the horns, this lets a bit of moisture in, as well as promotes the release of the horn.
4. - double or triple bag bag and forget about it for 7-10 days depending on temperature.
5. - Once its fermented, pull it out and hose off the nasty, hit the brain case again. Keep your mouth closed.
6. - Work a knife and screwdriver around the bases of the horns. This is usually where they hang up. Be careful to not tear the horn, its quite pliable and thin along the back side.
7.0- Beat on it a bunch with a dead-blow hammer, or use a block of wood to cushion the blow if using a regular hammer. The horns are quite tough
If you're lucky the horns will pop off, if not I toss it on the ground (a hard part of the lawn works well, not the rocks or driveway) aiming for the outside edge. The skull is also very tough... the nose may break so avoid direct impact. (I haven't broke one yet)
8. - Once the horns are off, I saw off the tips of the cores, they have a connection to the sinus cavity, it makes cleaning much easier and more thorough.
9. - simmer the skull for an hour or two until all the gunk loosens up. Either scrape/brush or use a pressure washer to get the gristle off, repeat as necessary. I add a cup or so (per 10 gallons of water) of liquid dishwashing detergent, some times use borax, but find the dishwashing detergent works as well or better. Oh and a healthy amount of dawn dish soap. Anything to help cut the grease... I will also skim off fat from the top, before I pull the skull out.
10. - De-grease in a solution of dawn dish soap and warm water, don't skimp on this step... a soft scrub brush helps as well. Multiple baths may be necessary.
11. - spray it off with clean water.
12. - paint on mixture of hydrogen peroxide (40% by volume) and cream developer (powder) paste (from the beauty supply store). Place in a plastic bag and let it sit for a few days.
13. - Hose it off and place in the sun for a couple days and it will be really white. Seal with clear acrylic if you like.
14. - clean the inside of the horns. scrape off the membrane around the inner lip, run a small wire brush across the interior surface, fill horn core with borax. These need to sit for about a week or so.
15. - discard the borax, rinse out the cores. I usually do a final rinse with a pot or two of boiling water as a final step. Let them dry completely. There should be no smell at this point. If so, repeat 14.
17. - clean up any blood or other debris on the horns, use a soft brush, and warm water. A little soap is ok, but it may take off some color.
18. - To attach the horns, I drill a bunch of shallow holes (1/4") in both the core and inside of the horns, lather up both parts with bondo and press them on. Let the bondo sit until it starts to set up and is kind of rubbery. Cut off with a knife, and shape as needed. Be careful to not get any on the skull. Masking the skull off isn't a bad idea.
19. - use hot glue or elmers to glue in any teeth that fell out.
I'll add a few more pictures later, the horn cores are drying and the skulls are soaking in peroxide.
Last edited: